






How to Place Windows 365 Cloud PC Under Review
In this post you will learn How to Place Windows 365 Cloud PC Under Review. Placing a Windows 365 Cloud PC under review is an important step in ensuring that the data on the PC is secure and can be easily accessed for digital forensics investigations.
For Windows 365 Enterprise Cloud PCs, digital forensics can be used to investigate and analyze data from cloud-based services such as Office 365, OneDrive, and SharePoint. This can include email, documents, chat conversations, and other data stored in the cloud.
When a digital forensics request is made, investigators may request a snapshot of a Cloud PC. By initiating a review of a Cloud PC, a snapshot is saved to your Azure Storage account for easy access and provision to the investigator.
By placing a Windows 365 Enterprise Cloud PC under review, organizations can rest assured that their data is secure and easily accessible in case of an investigation. To place a Cloud PC under review, you must have a Windows 365 Enterprise license, an Azure Storage account in the same tenant.

- Windows 365 App Experience | Cloud PC Application For Windows
- FIX Cloud PC Does Not Belong To The Current User Error | Windows 365
Set up Azure Storage Account
To place a Cloud PC under review, you must first have an Azure storage account in the same tenant as the Cloud PC.
It recommend that you create and maintain a dedicated storage account with dedicated access controls for auditing Cloud PCs. As part of the process of placing Cloud PCs under review, Windows 365 may be granted a contributor role for your Azure storage account.
Additionally, it’s important to consider your organization’s security and compliance requirements when setting up your Azure Storage account. For best performance, configure the storage account with the following settings;
- No region limit
- Premium Page Blob performance
- TLS 1.2 encryption
- Allow connectivity through a public endpoint
These are the basic steps to set up an Azure Storage account. The specific steps may vary depending on the specific requirements of your organization.
- Log in to the Azure portal https://portal.azure.com.
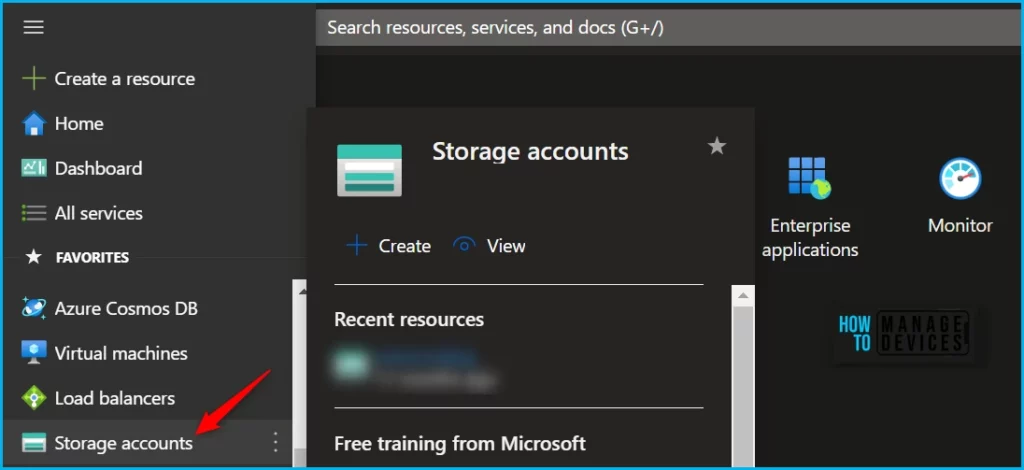
- To create a new storage account: In the Azure portal, click on the “Create a resource” button, then select “Storage” and “Storage account.”
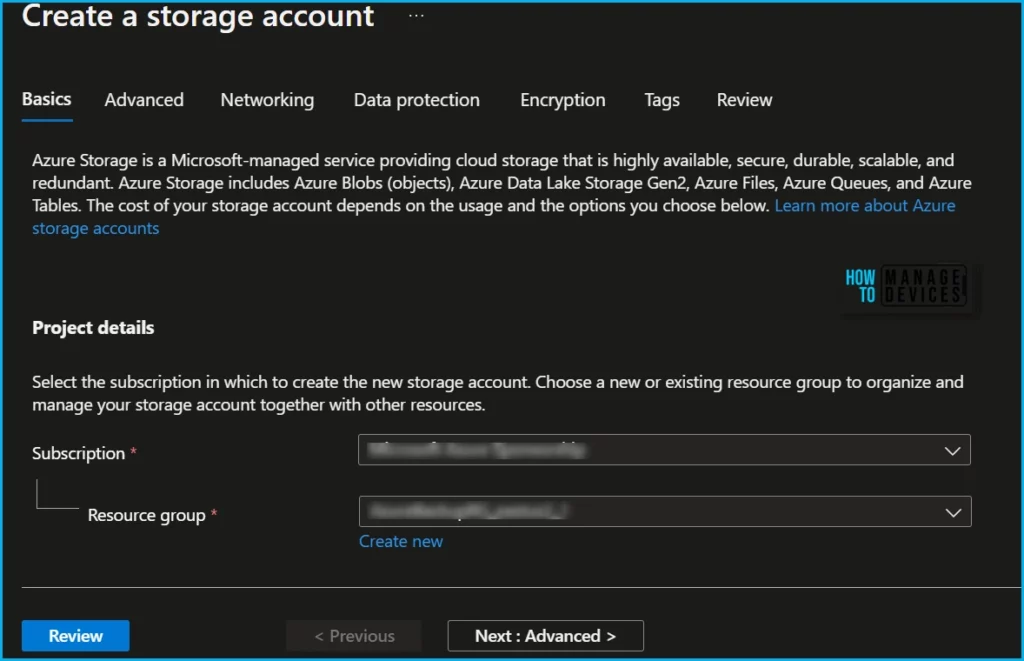
Fill in the required information, including the subscription, resource group, storage account name, and location. Click Next.
Configure the advanced settings: Depending on the storage account type, you may have the option to configure advanced settings such as network, encryption, and data replication options. Review and create: Review your settings and click “Create” to create the storage account.
Assign an Azure role for access to blob data. The minimum permission required for the Windows 365 service to place a Cloud PC under review is Storage Account Contributor.
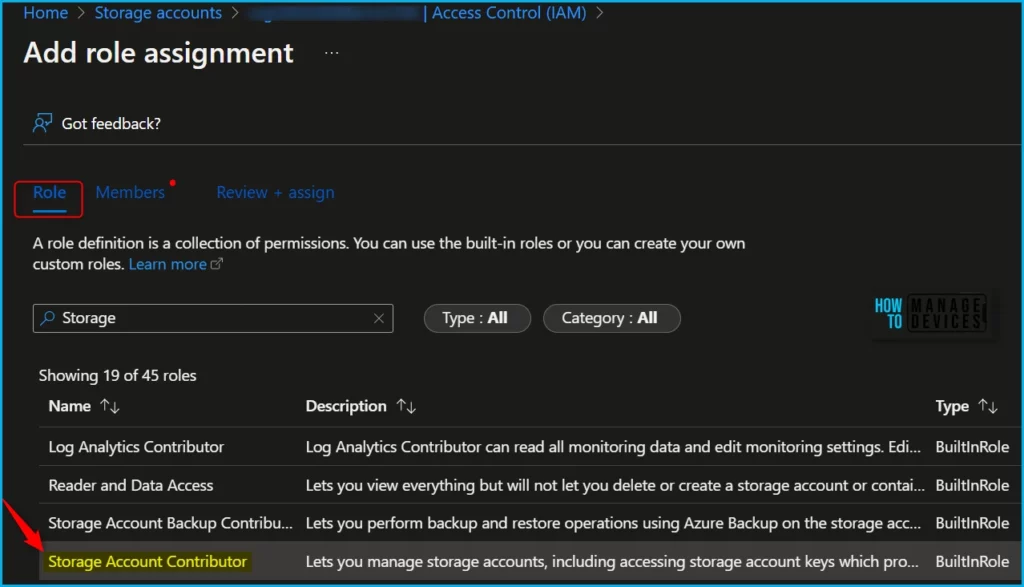
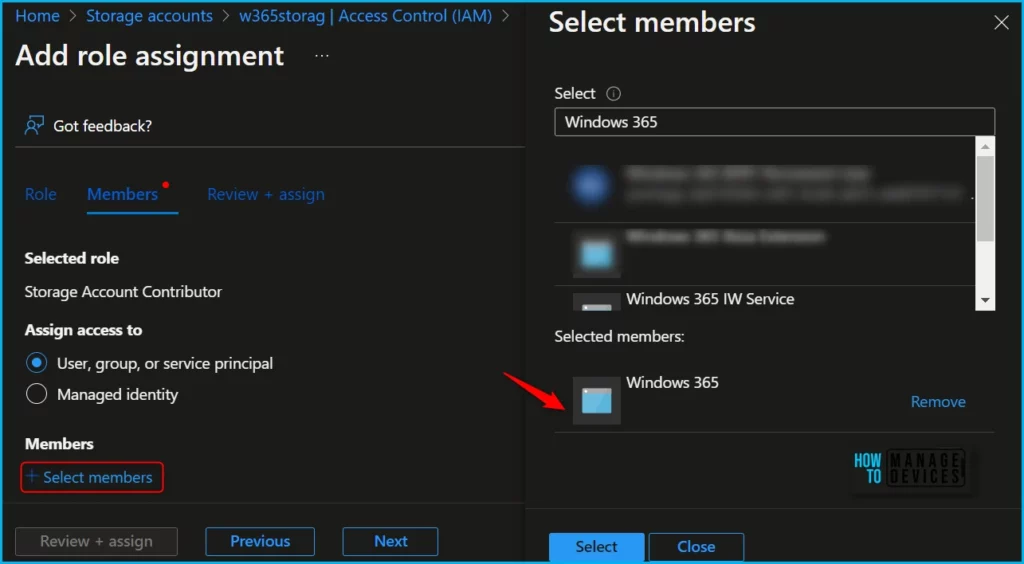
Here you need to search for Windows 365 app to grant the storage account contributer.
Place Windows Cloud PC Under Review from Intune Portal
By following the above steps for configuring an Azure storage account with the appropriate permissions, you can initiate a review of a Cloud PC.
There are multiple ways to get to Cloud PC remote actions. The following method is more helpful for Cloud PC admins. The other option is to Navigate to all devices -> search for cloud PC.
- Sign in to the Microsoft Intune admin center and Navigate to Devices -> Windows 365 node.
- Here you can click on the All Cloud PCs tab to view all the available cloud PCs. Click on the Cloud PC name that you want to initiate remote action – CPC-jites-G29KQ.
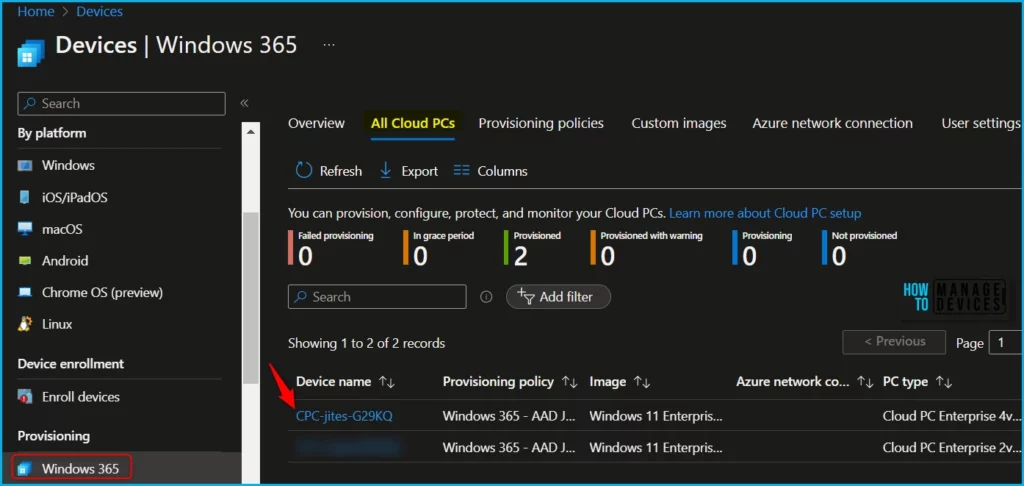
The remote management actions for Cloud PCs are very similar to remote actions available for devices in Intune. There are a few remote management actions that are only available for Windows 365 Cloud PC.
Click on the 3 dots (…) and select Place Cloud PC under review remote device action, you will be prompted with the additional steps.
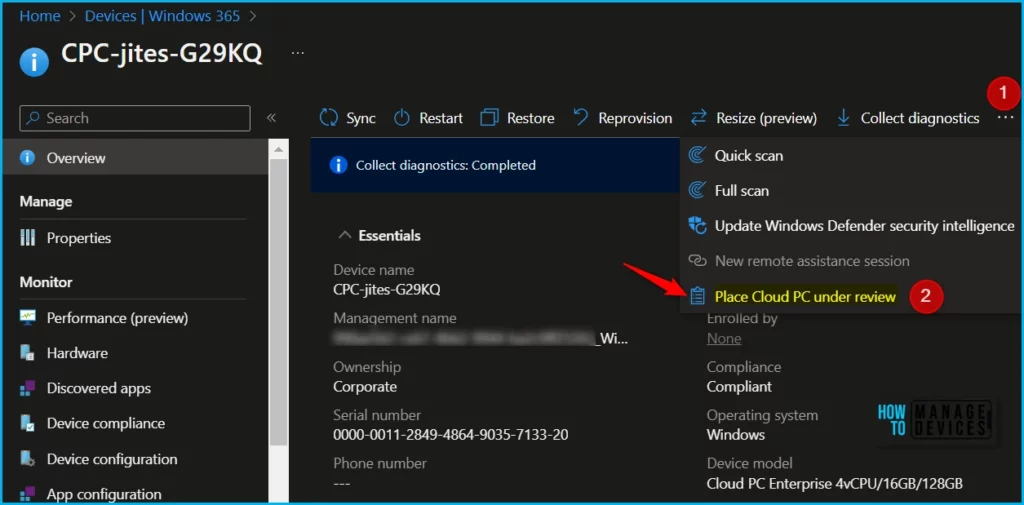
Select the Azure subscription and the Azure storage account, Next you need to select Place under review. Based on the size of the Cloud PC, it could take a few minutes for the snapshot to be saved to the storage account.
Once you click on Place under review, you will be prompted with a message.
Place under review? This process could take some time depending on the size of the restore point.
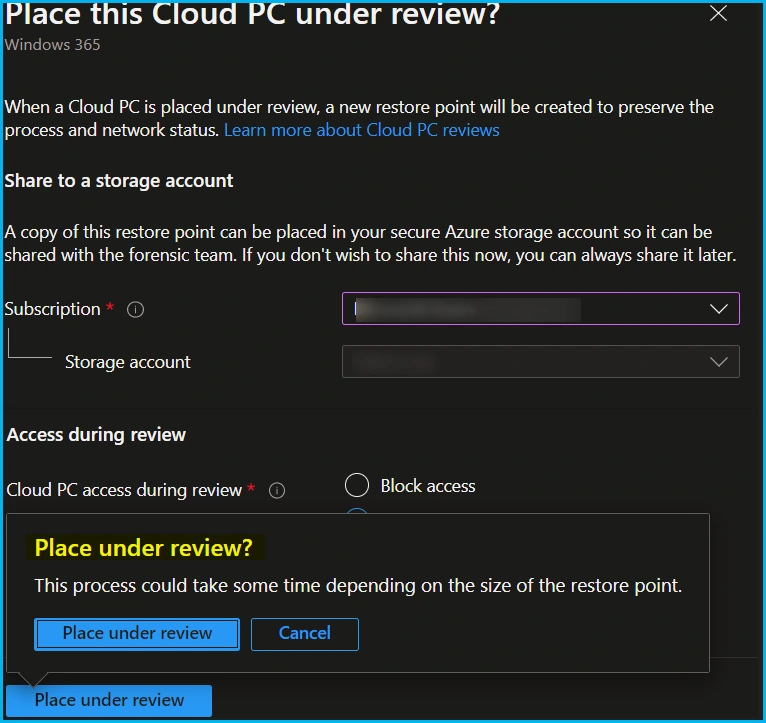
When a Cloud PC is placed under review, a new restore point will be created to preserve the process and network status.
End Users Experience
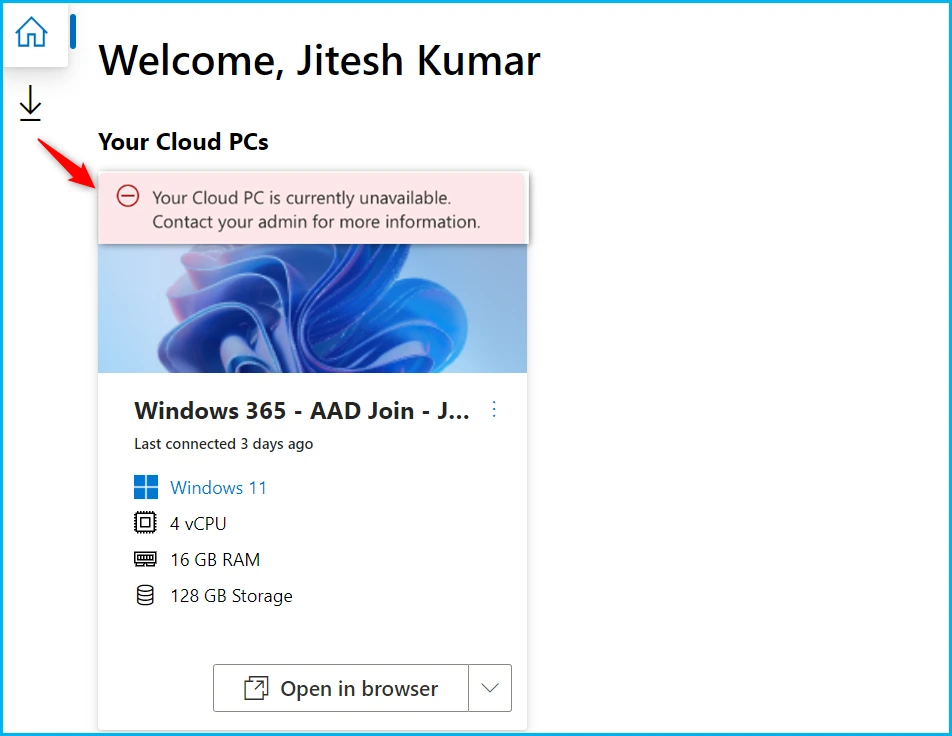
The end user can sign in to the Windows Cloud PC from anywhere. You can use the Cloud PC URL https://windows365.microsoft.com/ to launch Windows 365 service and start working on a personalized desktop in the cloud.
You will be asked to log in with your Azure AD credentials (corp ID) when you launch the URL. Enter your credentials and proceed.
Here you can see the different Cloud PCs assigned to you in the Windows 365 web client portal. As we have allowed access to Cloud PC, The end users will be able to browse their Cloud PC. If the access is blocked, you won’t be able to perform any actions.
Author
About Author – Jitesh, Microsoft MVP, has over five years of working experience in the IT Industry. He writes and shares his experiences related to Microsoft device management technologies and IT Infrastructure management. His primary focus is Windows 10/11 Deployment solution with Configuration Manager, Microsoft Deployment Toolkit (MDT), and Microsoft Intune.




Discussion