






Data Loss Prevention is Now Available on macOS Settings Catalog
Exciting News for Microsoft Intune Admins! Data Loss Prevention is Now Available on macOS Settings Catalog. Microsoft Intune introduced new features and improvements to the service release of Microsoft Intune 2405. With this update, Users can easily access Data Loss Prevention in macOS via Settings Catalog.
Microsoft is dedicated to providing useful features on Microsoft Intune. Usually, Intune’s monthly service is one of the major updates that improve existing features. Now, macOS device data security can be ensured via the Settings Catalog.
Every organization is always concerned about data privacy. Data loss and cyber crimes are increasing daily, and we can control this situation. Now, Microsoft provides a solution for Intune users. Users can create a policy to prevent data loss on macOS devices, and it is a Microsoft Defender feature.
This feature can be easily accessed through the Settings Catalog and is the best solution for preventing data loss. In this blog post, I will explain more about Data Loss Prevention, which is Now Available in the macOS Settings Catalog.

- Deploy Local Primary Account On MacOS Using ADE Method In Intune
- How To Deploy PPPC Utility On MacOS Using Intune

Data Loss Prevention is Now Available on macOS Settings Catalog
Users can quickly Enable Data Loss Prevention via the macOS Settings Catalog of Microsoft Intune Admin Center. This policy setting allows you to enable Data Loss Prevention. This policy is very effective for macOS devices in your organization.
| Steps for Enable Data Loss Prevention |
|---|
| Sign in to the Microsoft Intune admin center |
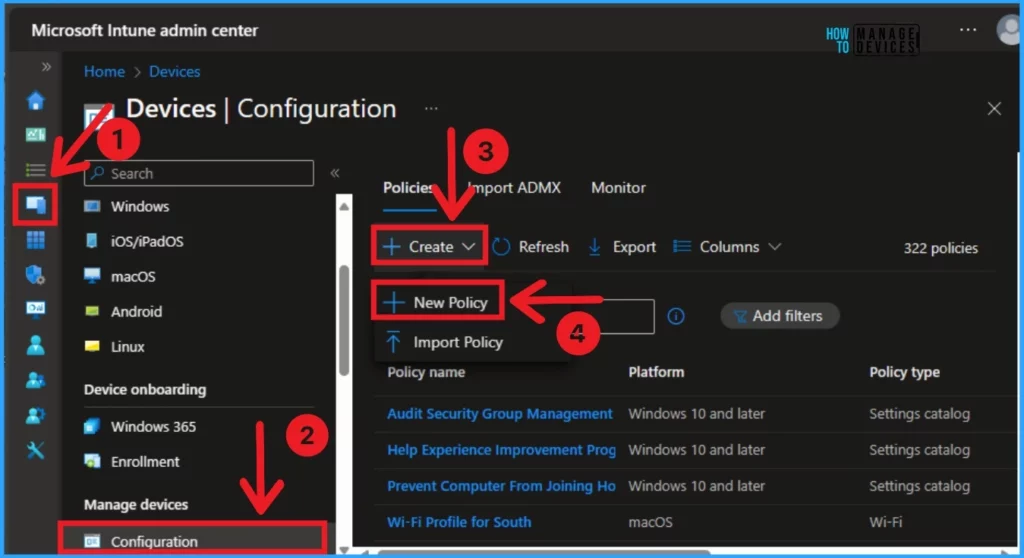
| Select Devices and click on Configuration |
| Click on +Create and select New Policy |
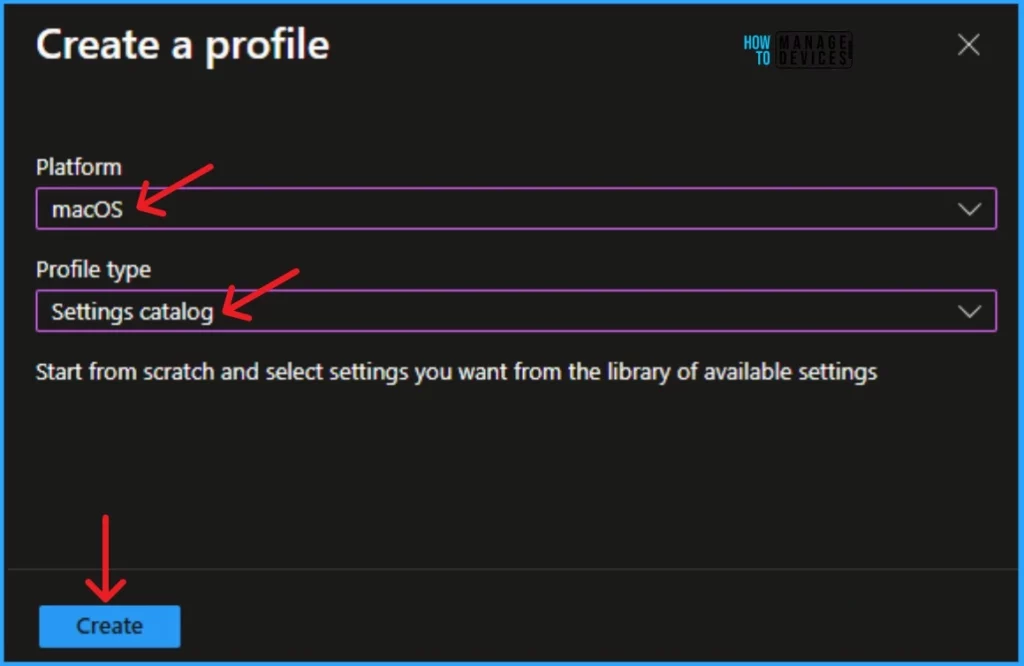
After that, a new window will appear, and you can choose the Platform and Profile Type. Select macOS as the platform and Settings catalog as the Profile type. Then click on the Create button.
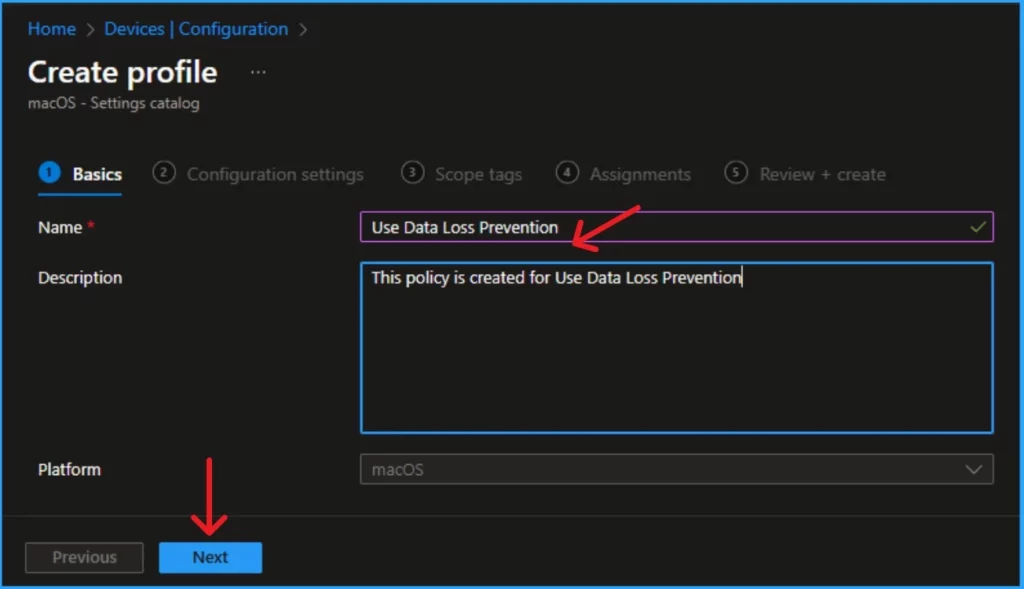
After that, you create a profile to turn on Data Loss Prevention. The first section of the profile creation process is Basic. In this section, you can provide the appropriate Name and Description. This is a required section, and users must add it to continue creating Profiles.
- The description allows users to learn about the policy at any time.
- Click on the Next button after adding the Name and Description.
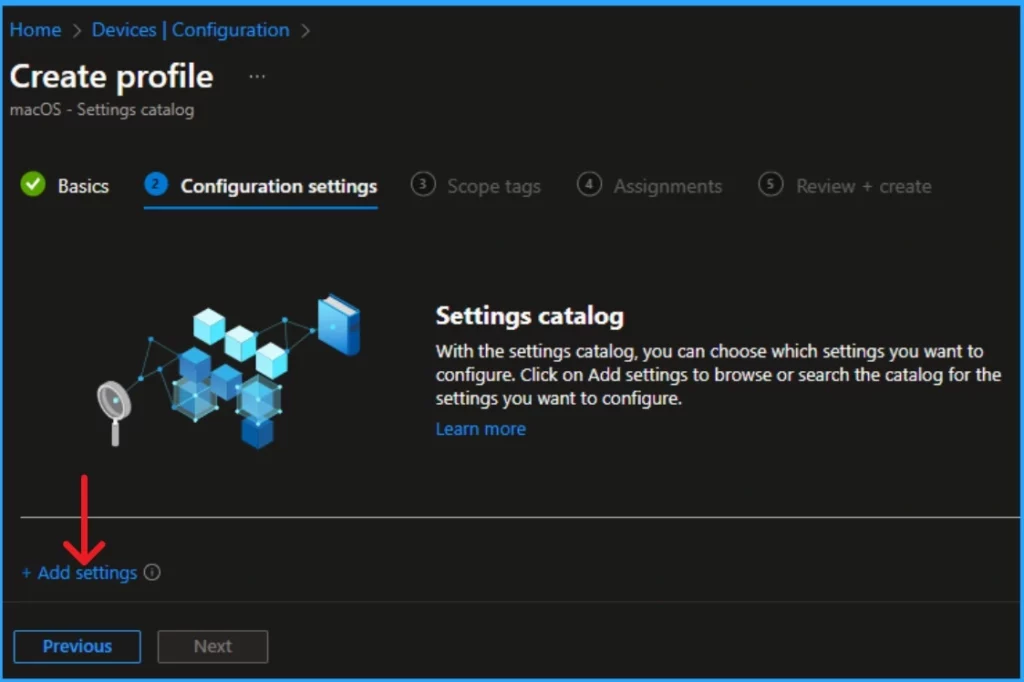
Next is the Configuration section, where you can select +Add settings to continue creating the profile. This section is used to choose the settings you want to configure.
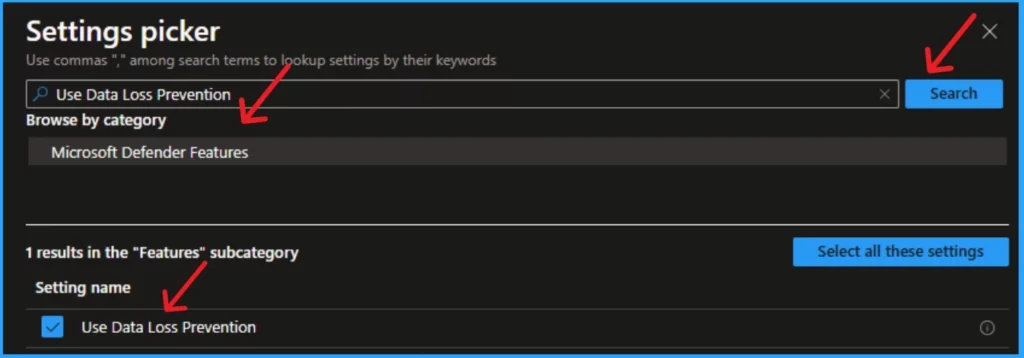
Then, the Settings Picker window will open, and you can search for the keyword of the search item. Here, the keyword is Use Data Loss Prevention. Then click on the Search button. After, you can browse by category and click on Microsoft Defender Features. Click on the checkbox near Use Data Loss Prevention.
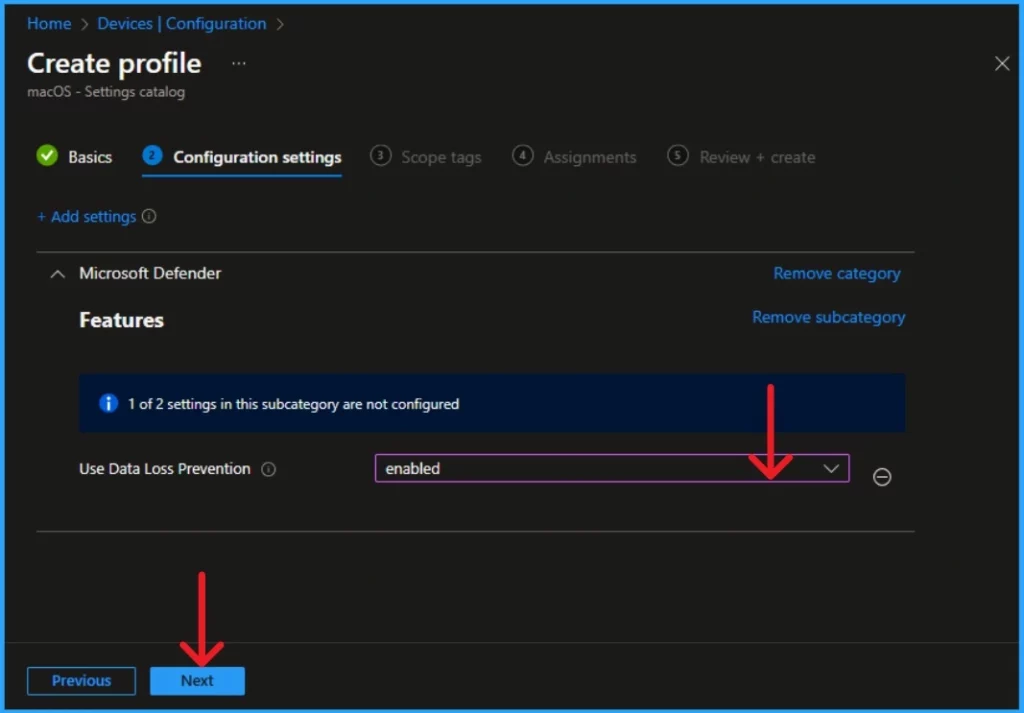
The window below shows the Configuration settings page. Here, Use Data Loss prevention is disabled. Click on the drop-down arrow to select the enabled option. Then click on the Next option.
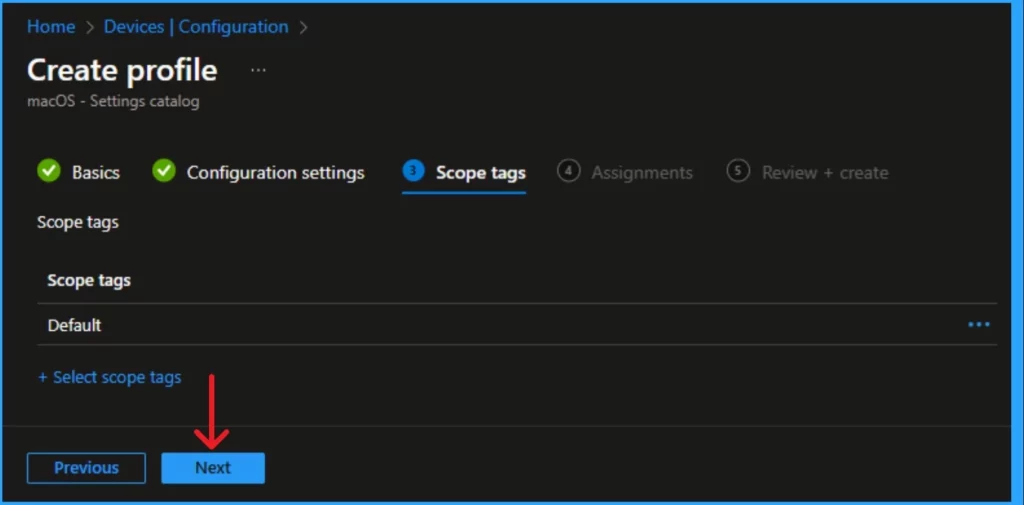
Scope Tag is the next stage of Profile Creation. You can easily skip this section or add Scope tags for your profile. However, a scope tag is not mandatory for this profile creation. If you skip this section, you can click on the Next button and continue.
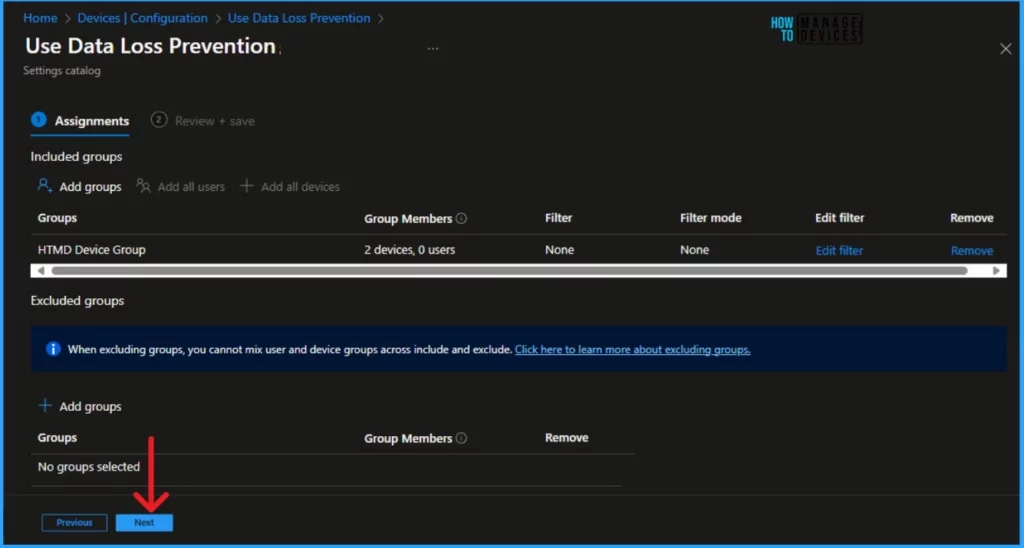
Next is the Assignment section. In this section, you can Add groups to turn off Copilot in Windows. To do this, add groups to the included groups. After that, a new window will appear, and you can select a group from here. Then click on the Select button and click on the Next button.
- New Platform SSO for macOS Devices in Microsoft Intune
- Microsoft Intune Introduces Full Control Support for MacOS Devices
The last section is Review + Create. In this window, you can see all the details of your profile. It summarises the profile and shows the previous sections of profile creation. You can quickly go to the earlier sections if any changes are necessary. After verifying all the steps, you can complete the Profile creation.
- Click on the Review + Create button from this window.
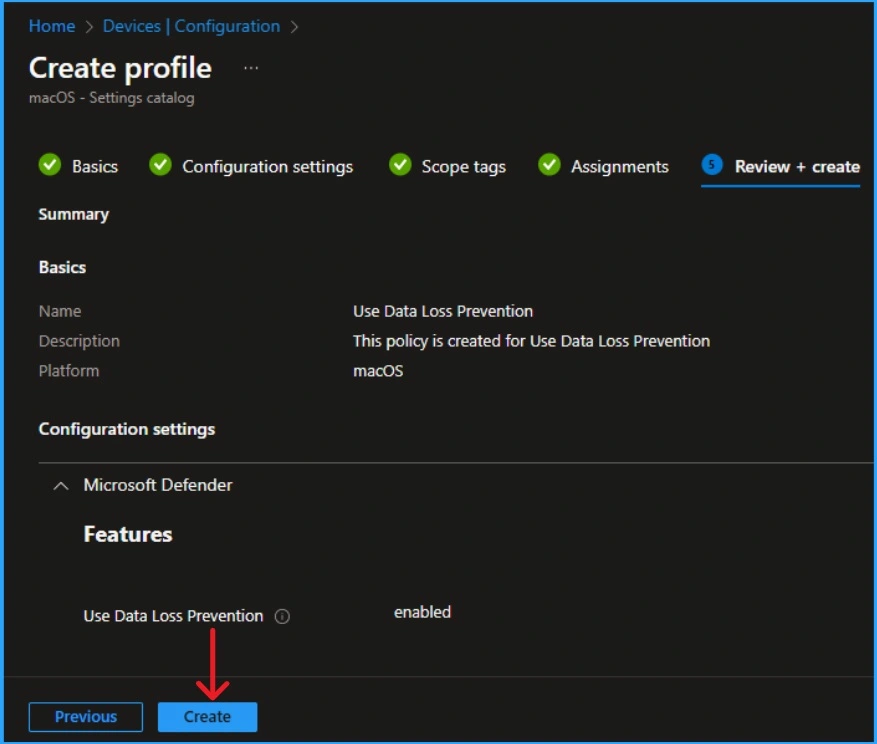
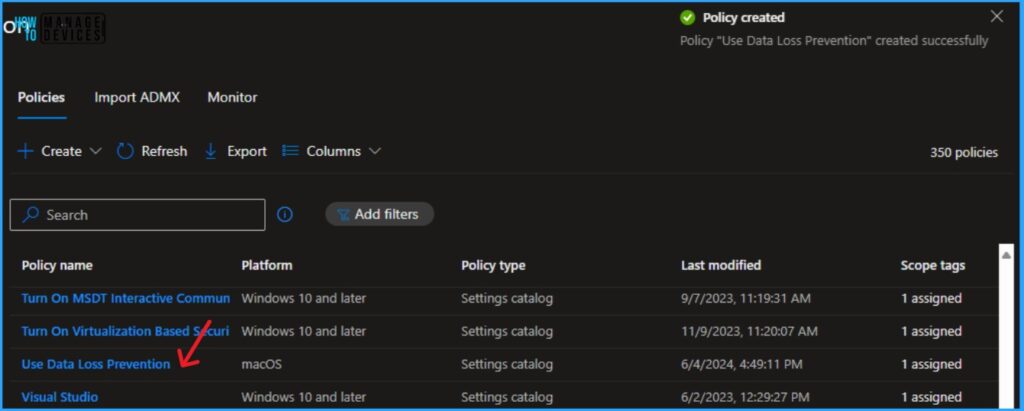
After clicking the Create button, you will get a notification on the Intune Portal as Policy “Use Data Loss Prevention“ created successfully“. You can easily check the Created policy in the Intune Portal.
- Devices > Configuration.
- In the Configuration window, you can search the Policy by its name.
- Microsoft Intune Introduces Full Control Support for MacOS Devices
- Automate Microsoft Intune Device Compliance Report using Graph API
We are on WhatsApp. To get the latest step-by-step guides and news updates, Join our Channel. Click here for HTMD WhatsApp.
Author
Gopika S Nair is a computer enthusiast. She loves writing on Windows 11 and related technologies. She is here to share quick tips and tricks with Windows 11 or Windows 10 users. She is Post Graduate Diploma Holder in Computer Science.


Discussion