






Disable Click to Do Feature on Windows Devices using Intune Policy
Key Takeaways
- Click to Do is enabled by default on supported Windows devices.
- The policy helps organisations control the availability of Click to Do on devices.
- When disabled, users cannot access Click to Do or its shortcuts.
- Click to Do only works while the feature is open and processes data locally on the device.
Hey, let’s discuss Disable Click to Do Feature on Windows Devices Using Intune Policy. Click to Do is a feature that lets users take actions on content displayed on their screen. When activated, it captures a screenshot of the current screen and analyses it locally on the device to suggest relevant actions. The feature only works while it is open and cannot take screenshots after it is closed. By default, Click to Do is enabled for all users.
Table of Contents
Disable Click to Do Feature on Windows Devices using Intune Policy
This policy setting allows administrators to control whether Click to Do is available on a device. If the policy is enabled, the Click to Do feature and its entry points are removed and unavailable to users. If the policy is disabled, users can continue accessing and using Click to Do normally on their devices.
- How to Set Maximum Storage Duration for Recall Snapshots on Windows 11 using Intune
- How to Control Search Settings on Windows Taskbar using Intune Policy
- ClickOnce App Installation Prompts and Windows 10 Update KB5028244 | Issues and Solutions
Policy Creation in Intune Portal
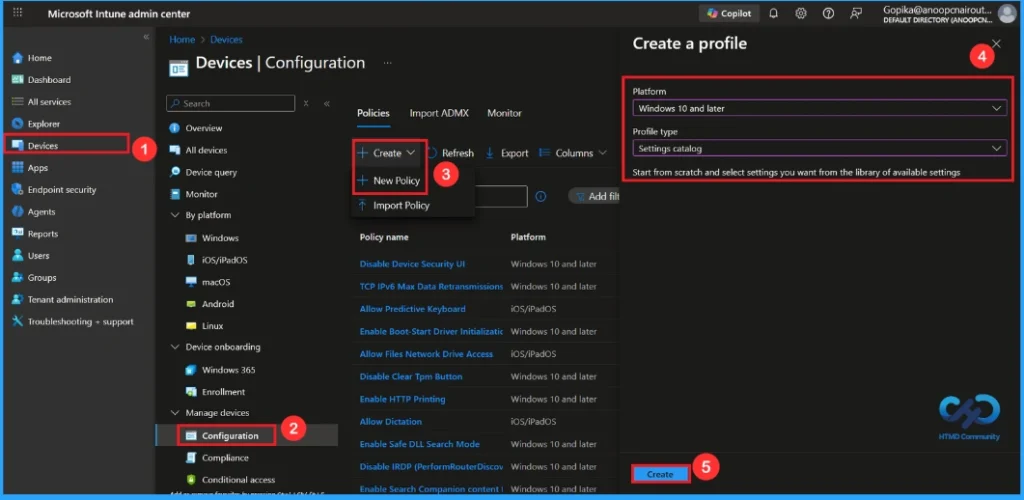
With your credentials, you can easily sign in to the Intune Portal. Then you can configure the Require Platform Security Features policy for your managed devices. For this, go to Devices > Configuration >+ Create > +New Policy. In profile creation you must select the platform and profile type. Here, the platform as Windows 10 and later and profile type as settings catalog.
Add Name and Description
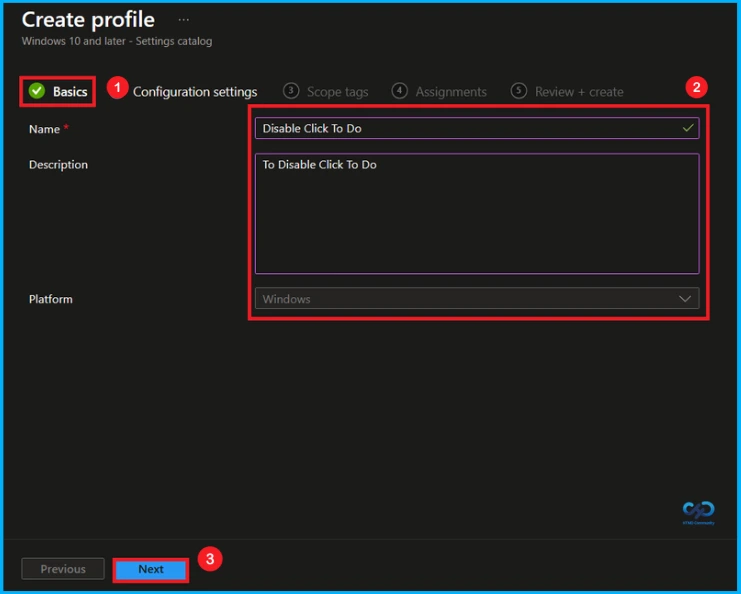
Naming the policy is the primary step that help admins to identify the policy later. This is important and necessary step that allows you to know the purpose of the policy. Here is Name is mandatory and description is optional. After adding this click on the Next button.

Configure Click to Do Policy
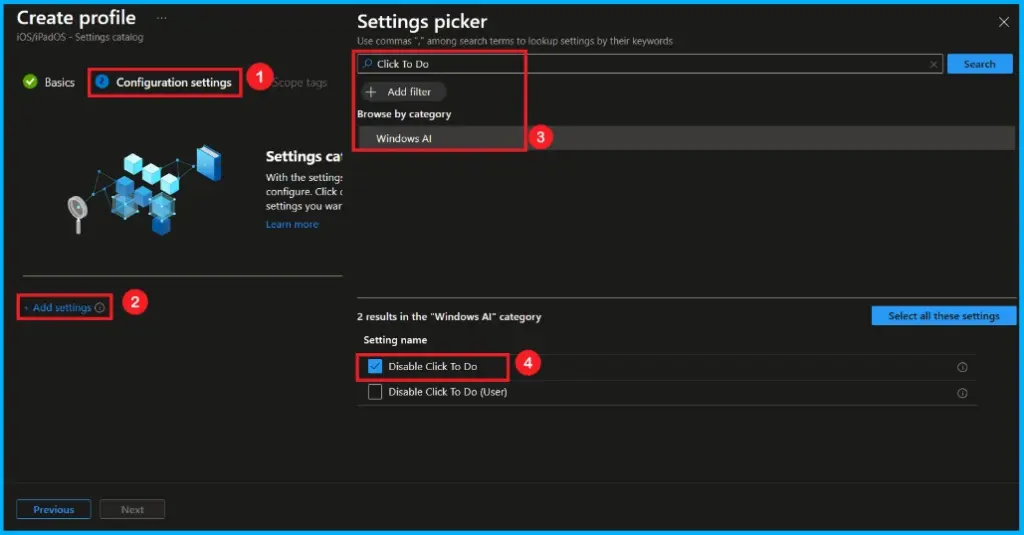
The Configuration tab is very crucial it helps you to select a specific setting. On the Configuration tab, click on the +Add settings hyperlink, and then you will get the Settings Picker. From the Settings Picker, you can choose settings quickly by browse by category or Search bar.
- Category – Windows AI
- Setting – Disable Click To Do
Enable Click to Do Policy
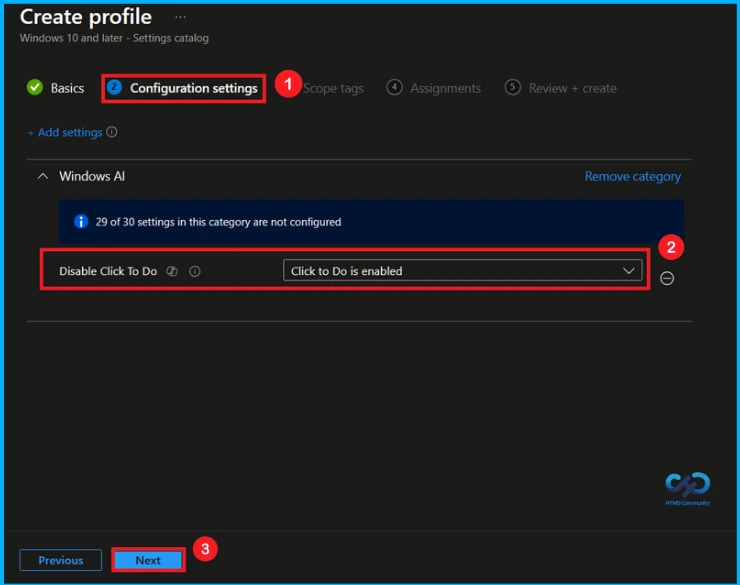
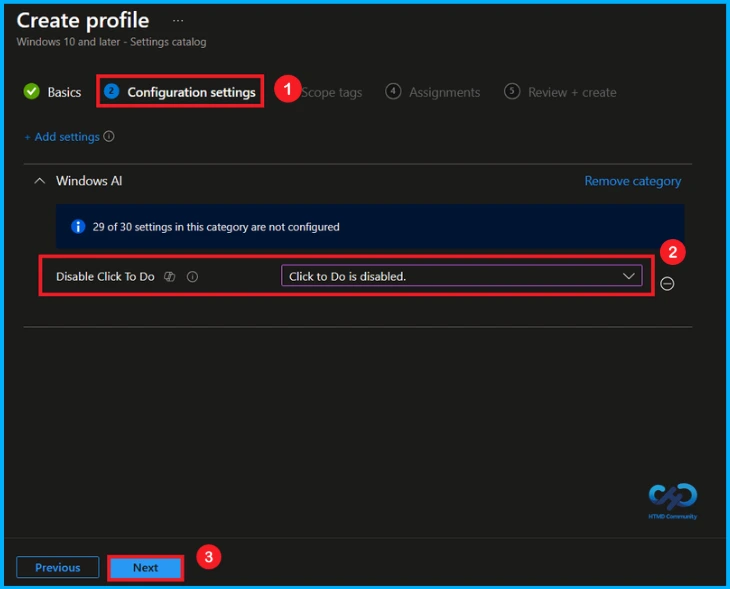
Once you have selected this policy and closed the Settings picker. You will see it on the Configuration page. Here we have only two settings: Enable or Disable. By default, it will be set to Enable. Click Next to Continue.
Disable this Policy
If we Disable or not configure this policy, you can disable the Click to Do policy by clicking the dropdown menu and select Click to Do id disabled. Then, you can click the Next button to proceed.
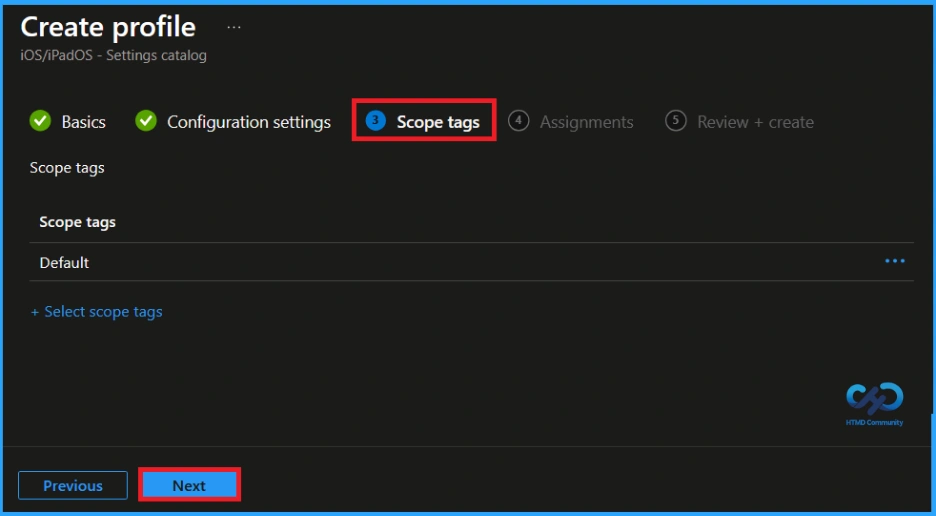
Add Scope Tags
With scope tags, you create a restriction to the visibility of the Require Platform Security Features. It helps to organise resources as well. Here, I would like to skip this section, because it is not mandatory. Click on the Next button.
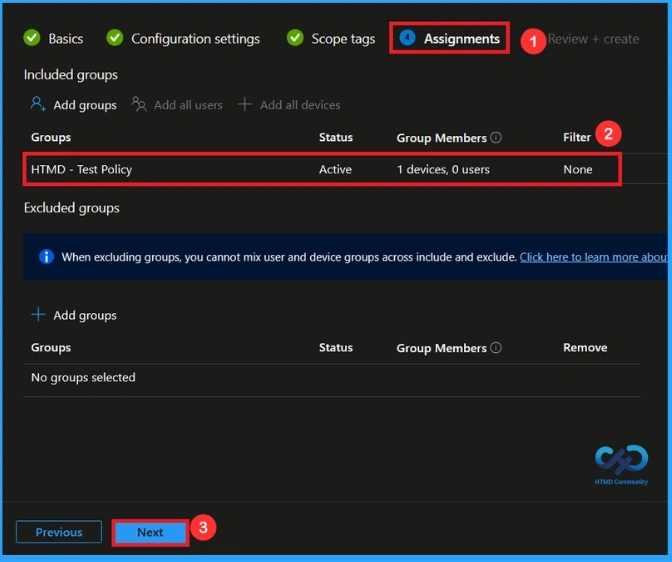
Assignments Tab for Selecting Group
To assign the policy to specific groups, you can use the Assignment Tab. Here I click, +Add groups option under Included groups. I choose a group from the list of groups and click on the Select button. Again, I click on the Select button to continue.
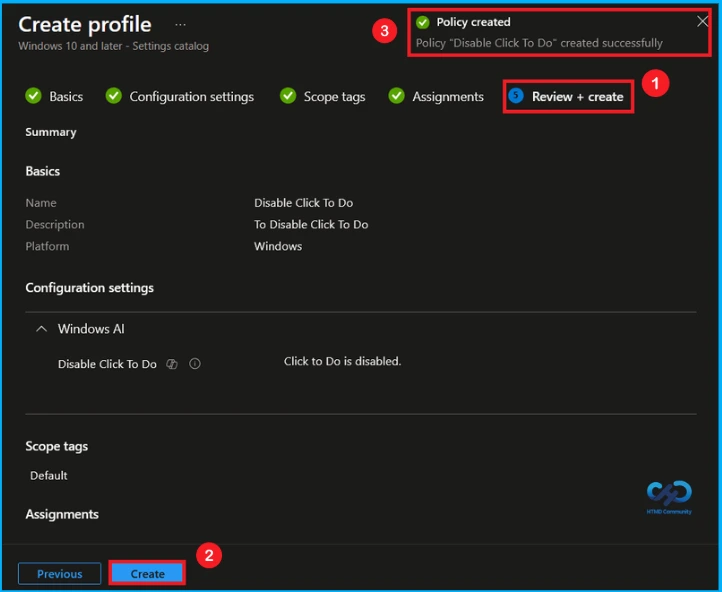
Final Step of Policy Creation
At the final Review + Create step, we see a summary of all configured settings for the new profile; after reviewing the details and making any necessary changes by clicking Previous. We click Create to finish, and a notification confirms that the “Disable Click To Do created successfully”.
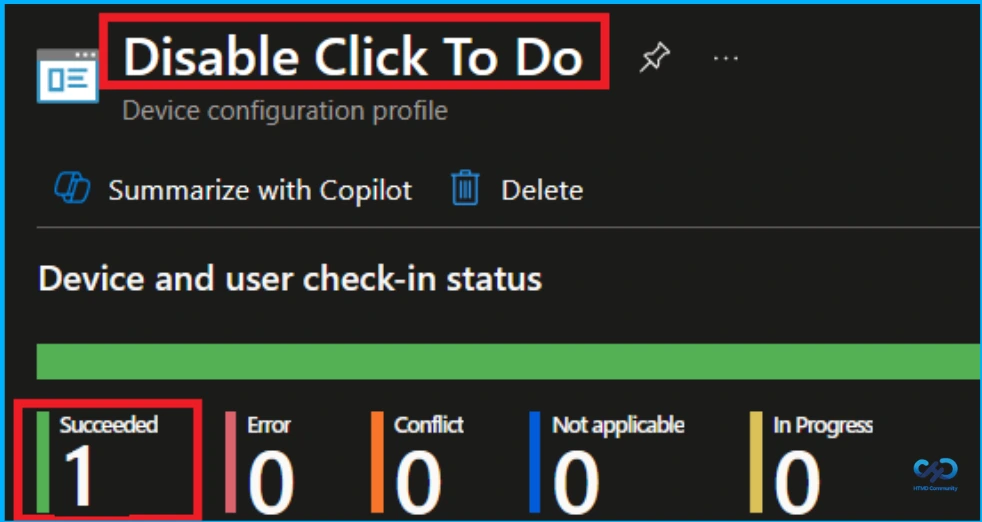
Device and User Check-in Status
The Monitoring Status page shows whether the policy has succeeded or not. To quickly configure the policy and take advantage of the policy sync the assigned device on Company Portal. Open the Intune Portal. Go to Devices > Configuration > Search for the Policy. Here, the policy shows as successful.
Event Viewer Details
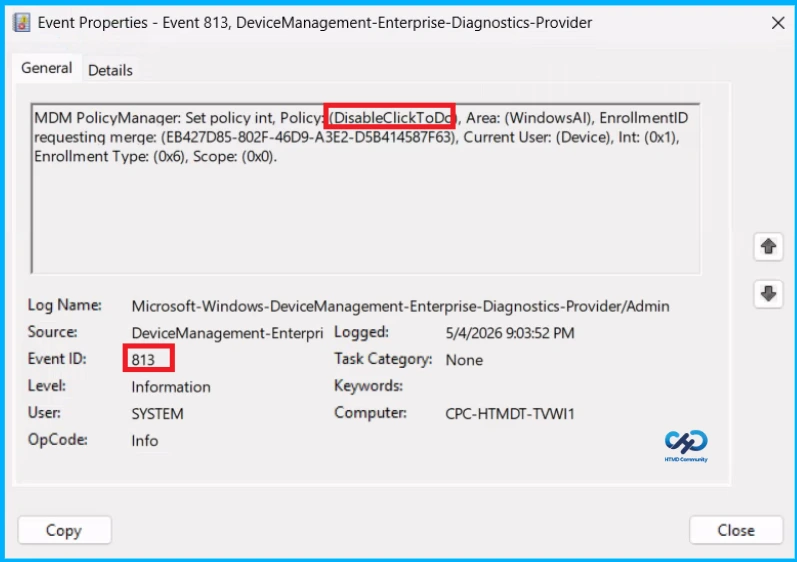
Event Viewer helps you check the client side and verify the policy status. Open the Client device and open the Event Viewer. Go to Start > Event Viewer. Navigate to Logs: In the left pane, go to Application and Services Logs > Microsoft > Windows > DeviceManagement-Enterprise-Diagnostics-Provider.
MDM PolicyManaqer: Set policy int, Policy: (DisableClickToDd, Area: (WindowsAI), EnrollmentID
requesting merge: (EB427D85-802F-46D9-A3E2-D5B414587F63), Current User: (Device), Int: (0x1),
Enrollment Type: (0x6), Scope: (0x0).
Configuration Service Provider (CSP)
The Policy Configuration Service Provider (CSP) is a feature used by organisations to manage and control settings on Windows 10 and 11 devices. It explains what each policy does, what settings or values can be used, and how it connects to older Group Policy settings (Group Policy Mapping details).
Description Framework Properties:
| Property name | Property Value |
|---|---|
| Format | int |
| Access Type | Add, Delete, Get, Replace |
| Default Value | 0 |
Allowed values:
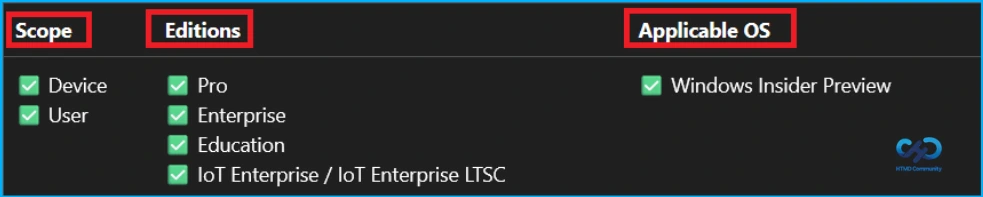
- 0(default) – Click To Do Enabled
- 1– Click To Do Disabled
Group policy mapping:
| Name | Value |
|---|---|
| Name | DisableClickToDo |
| Friendly Name | Disable Click to Do |
| Location | Computer and User Configuration |
| Path | Windows Components > Windows AI |
| Registry Key Name | SOFTWARE\Policies\Microsoft\Windows\WindowsAI |
| Registry Value Name | DisableClickToDo |
| ADMX File Name | WindowsCopilot.admx |
How Remove Assigned Group from this Policy
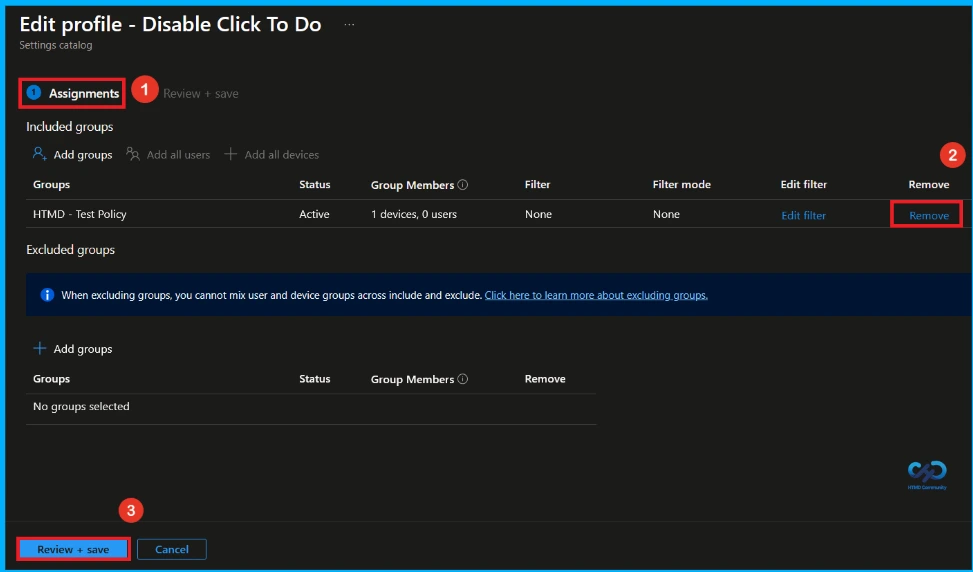
If you need to remove a group from a policy assignment for security updates. Open the policy from the configuration tab and click on the edit button. Then, click on the Remove button. Click Review + Save after making the changes.
For detailed information, you can refer to our previous post – Learn How to Delete or Remove App Assignment from Intune using by Step-by-Step Guide.
How to Delete this Policy from Intune
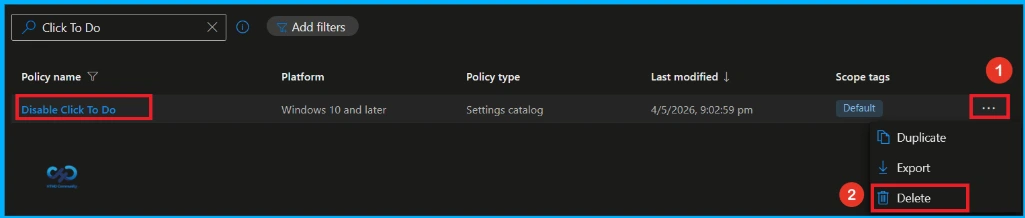
You can easily delete the Policy from the Intune Portal. From the Configuration section select the policy Click To Do. Click the 3 dots and select Delete. It will completely remove it from the client devices.
For detailed information, you can refer to our previous post – How to Delete Allow Clipboard History Policy in Intune Step by Step Guide.
Need Further Assistance or Have Technical Questions?
Join the LinkedIn Page and Telegram group to get the latest step-by-step guides and news updates. Join our Meetup Page to participate in User group meetings. Also, Join the WhatsApp Community and WhatsApp Channel to get the latest news on Microsoft Technologies. We are there on Reddit as well.
Author
Anoop C Nair has been Microsoft MVP from 2015 onwards for 10 consecutive years! He is a Workplace Solution Architect with more than 22+ years of experience in Workplace technologies. He is also a Blogger, Speaker, and Local User Group Community leader. His primary focus is on Device Management technologies like SCCM and Intune. He writes about technologies like Intune, SCCM, Windows, Cloud PC, Windows, Entra, Microsoft Security, Career, etc


Discussion