






Remove Recycle Bin Desktop Icon Using Intune
Let’s see how to remove recycle bin desktop icon using Intune, aka Endpoint Manager. Windows includes the common This PC, User’s Files, Network, Recycle Bin, and Control Panel shortcuts that you can easily access on your desktop. The Recycle Bin is one of the most recognizable programs on your Windows 10, 11 devices. It holds all your deleted files and allows you to restore them if you want to take them back.
However, some people find the Recycle Bin to be useless, and would rather it not be stuck on their desktop at all times. This Intune setting catalog policy removes the Recycle Bin icon from the desktop, from File Explorer, from programs that use the File Explorer windows, and from the standard Open dialog box.
The Intune Settings Catalog is the best place to go for all the policy settings in Intune (MEM). Microsoft recommends setting catalog profiles to create and manage security policies for all Intune managed Windows devices. In the settings catalog profile, you will also get an option Duplicate to create a copy of an existing setting catalog profile.
Remove Recycle Bin Desktop Icon Using Intune
This section will help you assign the policy to Remove Recycle Bin desktop icon using Intune setting catalog policies. You can refer to the following guide to Create Intune Settings Catalog Policy and deploy it only to a set of Intune Managed Windows 11 or Windows 10 devices using Intune Filters.

- Sign in to the Endpoint Manager Intune portal https://endpoint.microsoft.com/
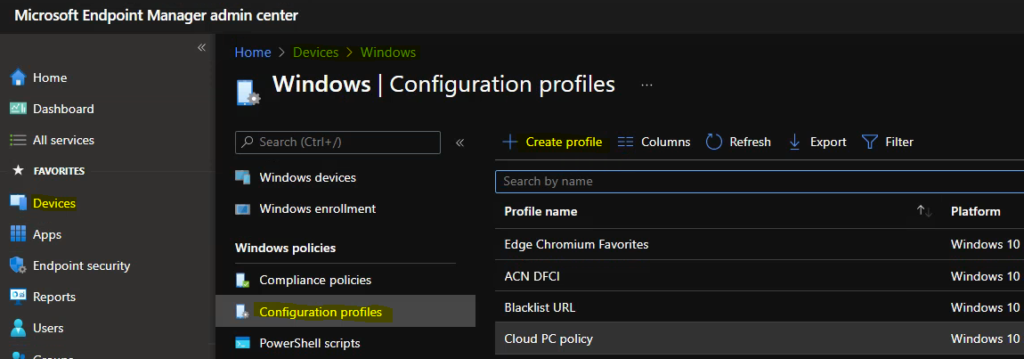
- Select Devices > Windows > Configuration profiles > Create profile
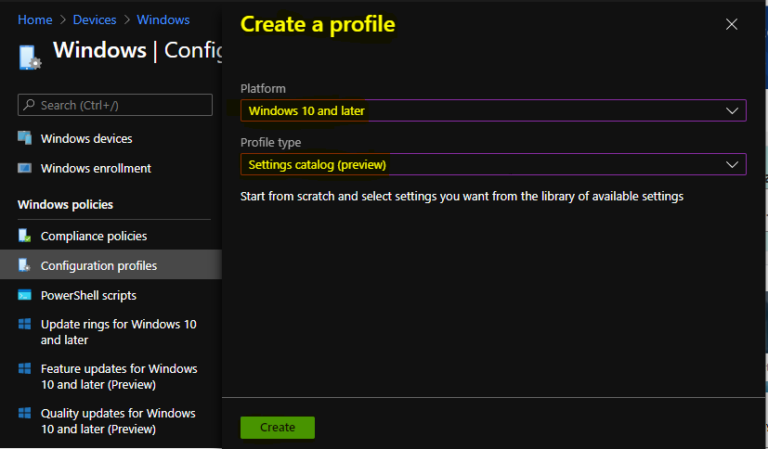
In Create Profile, Select Platform, Windows 10, and later and Profile, Select Profile Type as Settings catalog. Click on Create button.
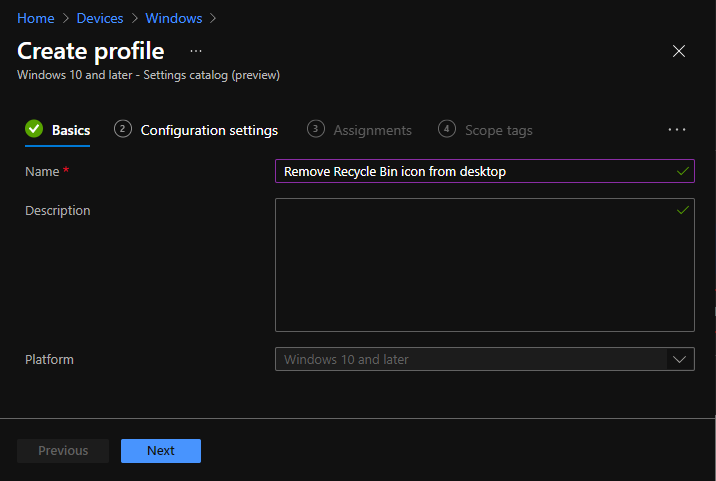
On the Basics tab, enter a descriptive name, such as Remove Recycle Bin Desktop Icon Using Intune. Optionally, enter a Description for the policy, then select Next.
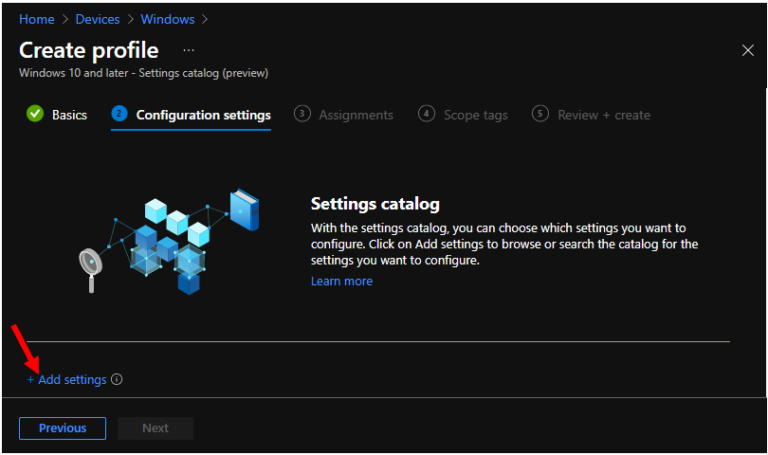
In Configuration settings, click Add settings to browse or search the catalog for the settings you want to configure.
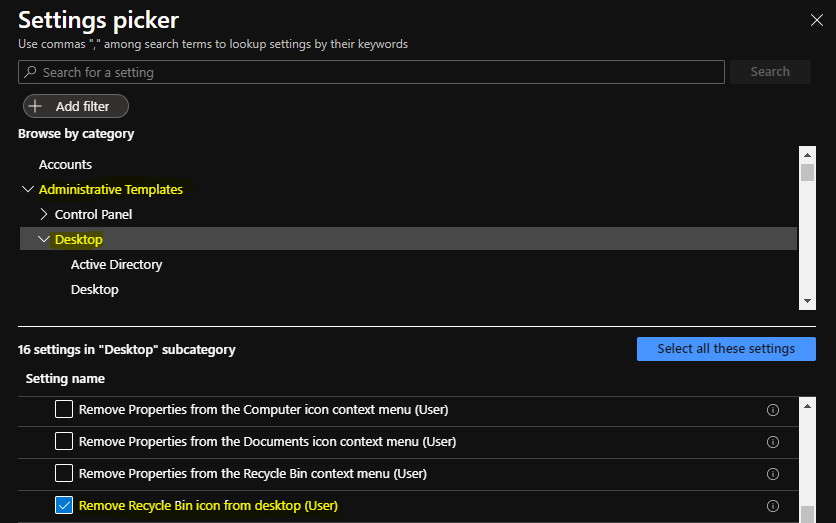
On the Settings Picker windows, Select Administrative Templates > Desktop to see all the settings in this category. Select Remove Recycle Bin icon from desktop below. After adding your settings, click the cross mark at the right-hand corner to close the settings picker.
Note – In policy, use the search box to find specific settings. You can search by category or a keyword, such as Recycle Bin Icon. It will display the related settings available.
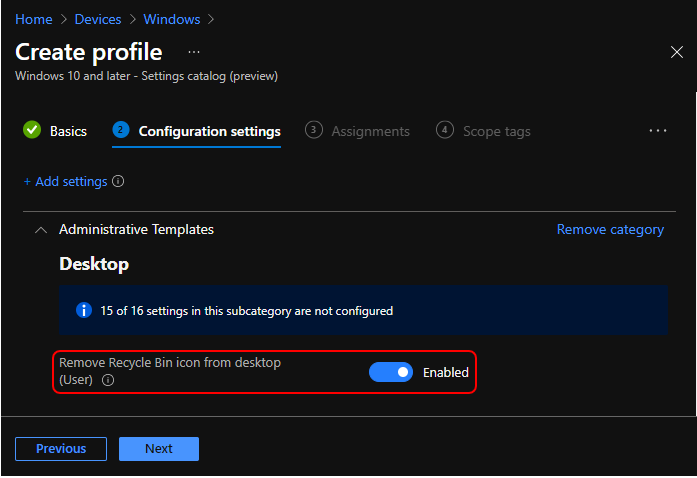
The setting is shown and configured with a default value Disabled. Set Remove Recycle Bin icon from desktop (User) to Enabled. Click Next.
Remove Recycle Bin icon from desktop (User) – Removes most occurrences of the Recycle Bin icon. This setting removes the Recycle Bin icon from the desktop, from File Explorer, from programs that use the File Explorer windows, and from the standard Open dialog box. This setting does not prevent the user from using other methods to gain access to the contents of the Recycle Bin folder. Note: To make changes to this setting effective, you must log off and then log back on.
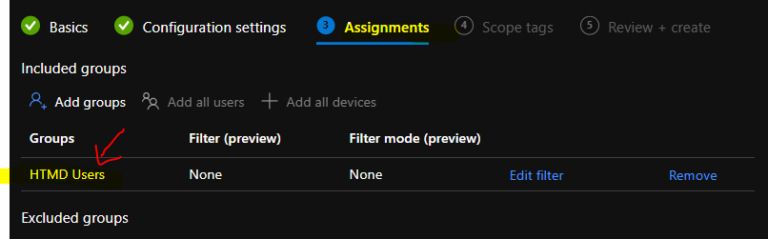
Under Assignments, In Included groups, click Add groups and then choose Select groups to include one or more groups. Click Next to continue.
In Scope tags, you can assign a tag to filter the profile to specific IT groups. Add scope tags (if required) and click Next.
In Review + create, review your settings. When you select Create, your changes are saved, and the profile is assigned.
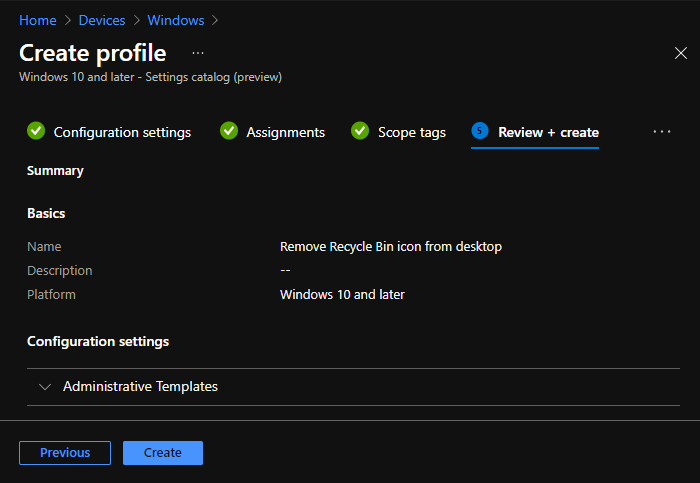
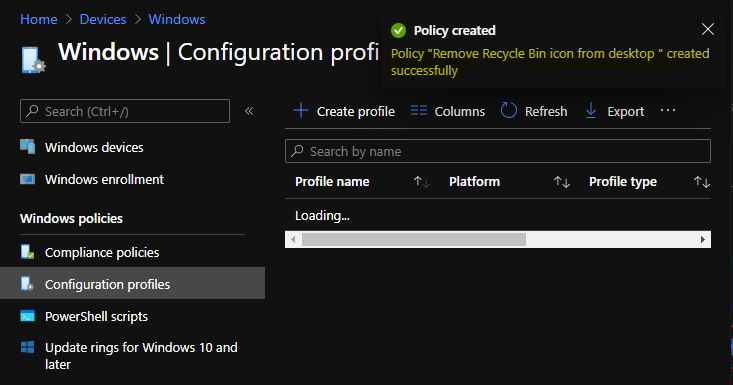
A notification will appear automatically in the top right-hand corner with a message. Here you can see, Policy “ Remove Recycle Bin Desktop Icon” created successfully. The policy is also shown in the Configuration profiles list.
Your groups will receive your profile settings when the devices check-in with the Intune service. Once the policy applies to the devices, you must log off and then log back on to make changes to this setting effective.
You can check Intune settings catalog profile report from Intune Portal, which provides an overall view of device configuration policies deployment status.
Author
About Author -> Jitesh has over 5 years of working experience in the IT Industry. He writes and shares his experiences related to Microsoft device management technologies and IT Infrastructure management. His primary focus area is Windows 10, Windows 11 Deployment solution with Configuration Manager, Microsoft Deployment Toolkit (MDT), and Microsoft Intune.


Discussion