






Add Remove Apps to Graphics Settings List | Graphics Performance Preferences for Apps in Windows 11
Let’s learn how to modify Graphics Performance Preferences for apps in Windows 11. In the settings app, the graphics page lets you adjust settings related to GPU Preference, Auto HDR, Optimizations for Windows games, and more to maximise your PC’s graphics experience.
Aligning with the new Windows 11 User Interface (UI) design, Microsoft redesigned the graphics settings page to help users quickly access the settings they want. These UI changes are now available to Windows Insiders in Build 25281 or above.
This allows users to specify which GPU is preferred to use by default for specific Microsoft Store and Desktop apps. Preferences may improve app performance or save battery life. These choices may not take effect until the app is relaunched.
From Windows 11 build 25336, if you have more than one discrete graphics adapter with no integrated graphics, you can choose which of the discrete graphics adapters is considered high-performance. If any app option shows that it does not follow your preferences, look for a setting within the app to choose the preference.

Table of Contents

How to Modify Graphics Performance Preferences for Apps
In Windows 11, you can modify the graphics performance preferences. The methods for modifying the settings using the Windows settings app are listed below.
- Add Apps to Graphics Settings List
- Remove Apps from Graphics Settings List
- Modify Graphics Performance Preferences for Apps
- Windows 11 Version Numbers Build Numbers Major Minor Build Rev
- Updated Windows 11 End-of-Life Dates HTMD Blog (anoopcnair.com)
- Windows 11 New File Explorer Experience New Features Design Details
Add Apps to Graphics Settings List
To add apps to the graphics settings list, you can use the Windows settings to make any modifications. To do so, click the Windows button, select Settings, or press Win Key + I to open settings directly.
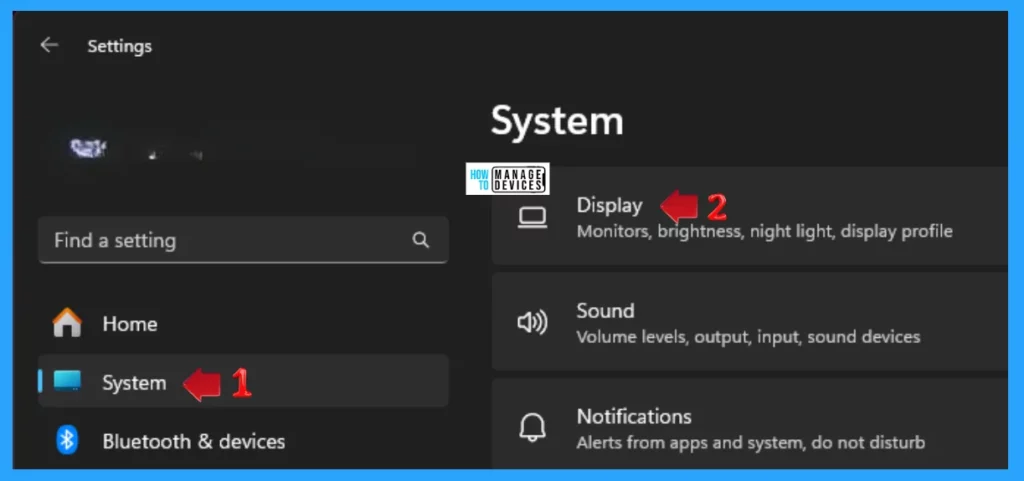
Then, under settings, click the System option on the left panel. Scroll down to find the Display (used to monitor, brightness, night light and display profile for your device) in the right panel, then click on it.
NOTE! You can also access the Display setting from the Home section under Window Settings.
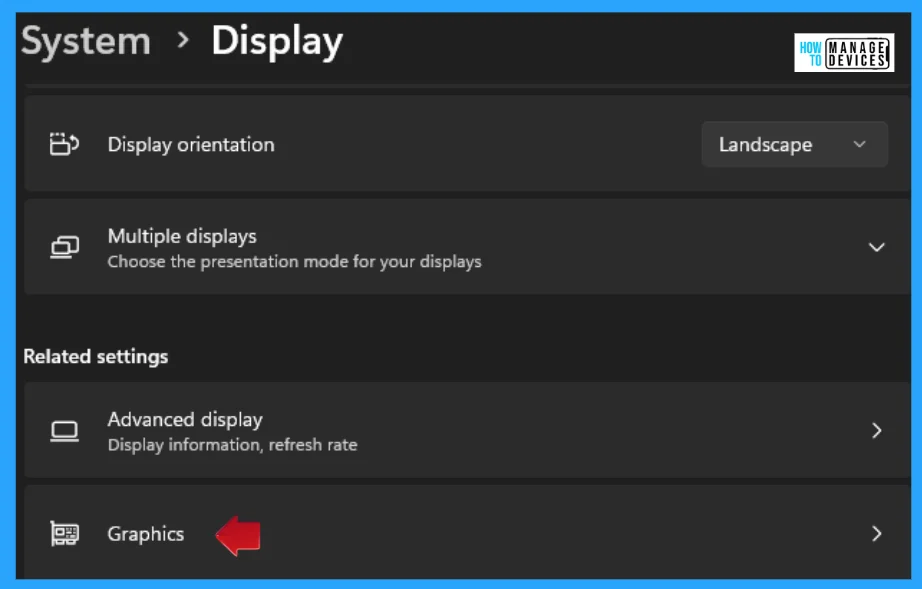
Now that the Display section opens, please scroll down to find the Graphics option under Related Settings, as shown in the figure below, and click on it to enter the Graphics section.
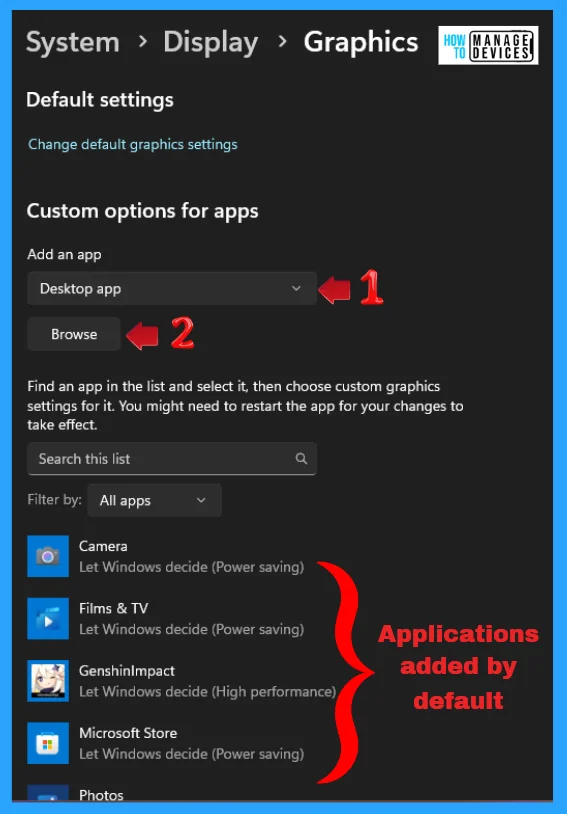
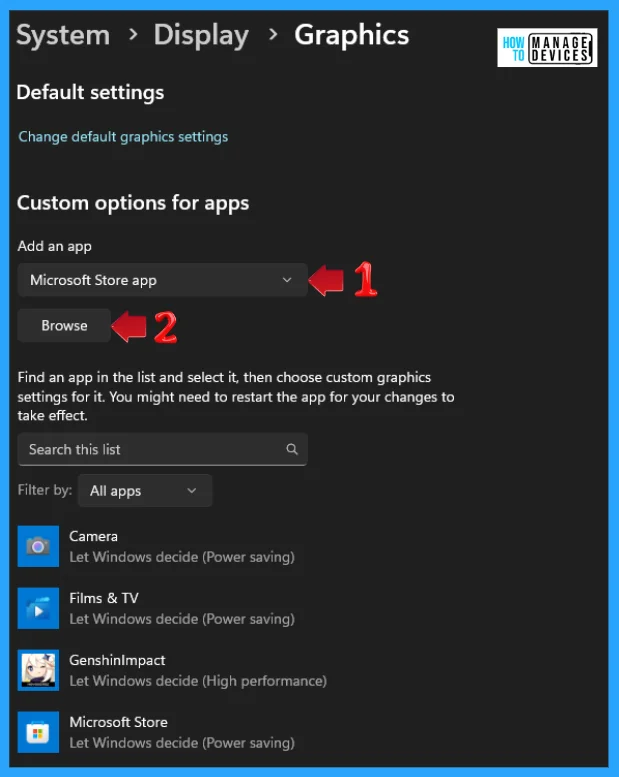
The applications added by default are presented in the lower section of the graphics section. But under Custom Options for Apps, you can see a system dialogue called Add an App. Choose the Desktop app, as shown below, and click on the Browse button to select it from the desktop.
There is a search bar to find an app in the list. Select an app in the list, then choose custom graphic settings. Your changes might need to take effect after restarting the app.
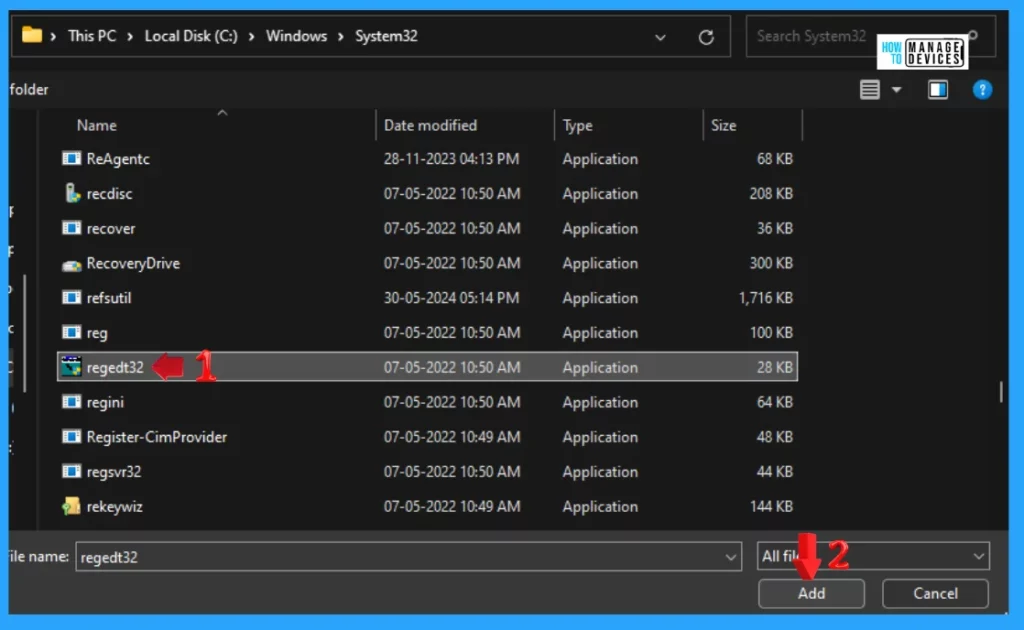
Now select an app from C:>Windows>System32 to add to the graphics setting list; after choosing the app from the destination, click on the Add button to add the item to the setting list.
You can also choose the Microsoft Store app under the Add an App section. Then click the Browse button to find the applications to be added to the graphics settings list.
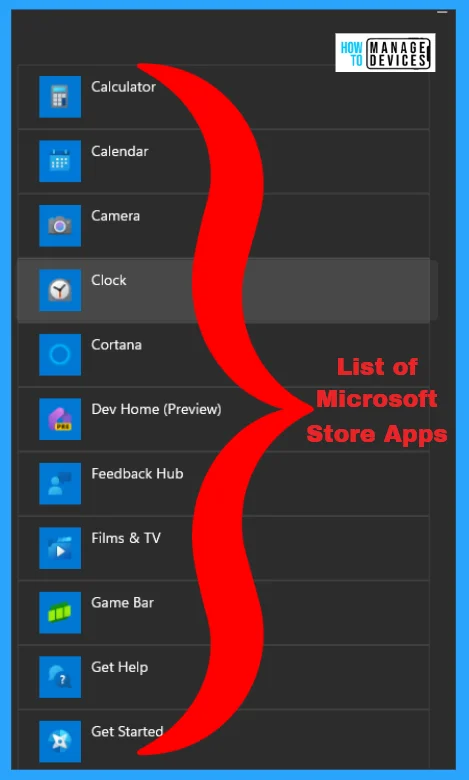
When the browse button is clicked, the following list will appear: choose the required Microsoft Store app from the list in the image below, then click on the selected app to add it to the graphics setting list.
Remove Apps from Graphics Settings List
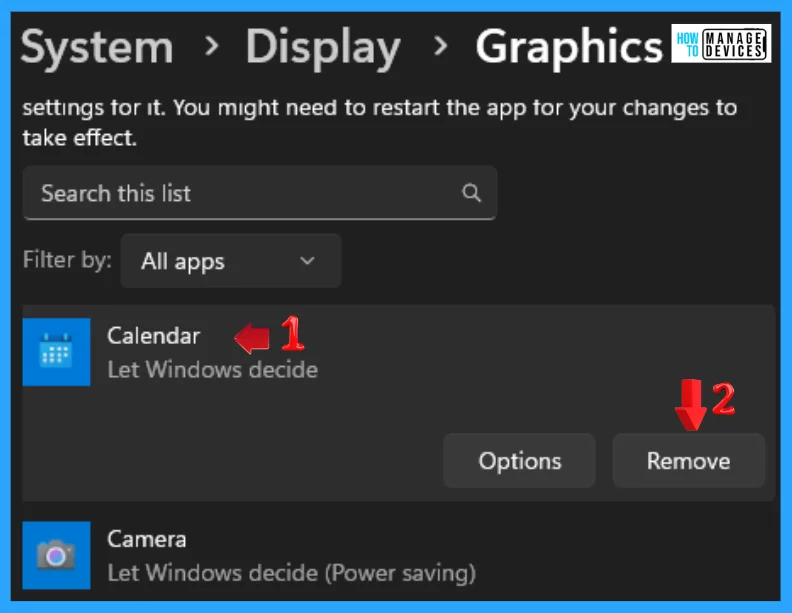
You can also use the same procedure to remove apps from the graphics setting list. Follow the process shown in Figures 2 & 3 above. Scroll down to the added item list when you reach the Graphics section. When you get the list, click on it and choose Remove to eliminate the app.
Modify Graphics Performance Preferences for Apps
You can also use the same procedure to remove apps from the graphics setting list. Follow the process shown in Figures 2 and 3 above. When you reach the Graphics section, scroll down to the added item list. When you get the list, click on it and choose the Options button to modify graphics settings.
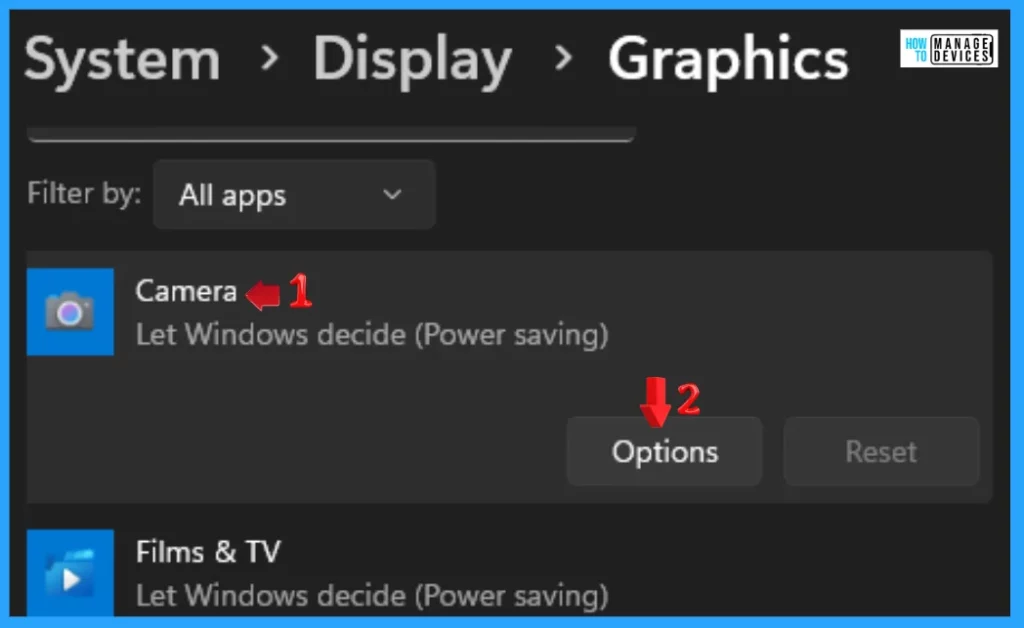
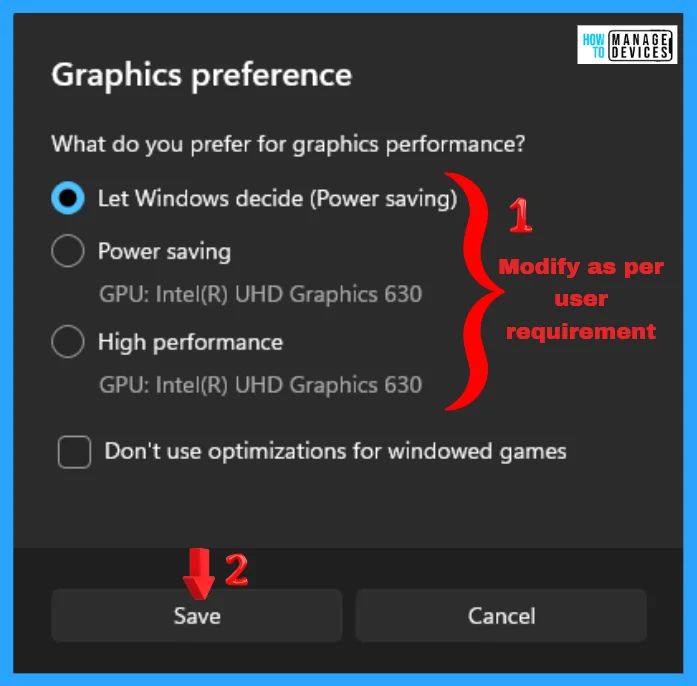
Now, the Graphics Preference window opens, which contains the preferred settings. The graphics preference pop-up asks what you like for graphics performance—the preferences are in the table below.
| Graphics Preference | Description |
|---|---|
| Let Windows decide (Power saving) | Automatically selects the Integrated GPU when running 2D apps and the Discrete GPU when running 3D apps. This is the default setting. |
| Power Saving | A request to run the application on the most power saving GPU available. Selects the integrated GPU, which provides lower performance but consumes less power. |
| High Performance | A request to run the application on the most high-performance GPU available. Selects the discrete GPU, which provides better performance but consumes more power. |
I hope the information on the How to Modify Graphics Performance Preferences for Apps in Windows 11 is helpful. Please follow us on the HTMD Community and visit our website, HTMD Forum, if you like our content. Suggest improvements, if any, and we would love to know which topic you want us to explore next.
We are on WhatsApp. To get the latest step-by-step guides and news updates, Join our Channel. Click here – HTMD WhatsApp.
Author
Alok graduated with a Master of Computer Applications (MCA) degree. He loves writing on Windows 11 and related technologies. He likes to share his knowledge, quick tips, and tricks with Windows 11 or Windows 10 with the community.


Discussion