






How to Change Add Remove Windows 11 PC from Workgroup using PowerShell Settings App
Let’s learn how to Change Add Remove Windows 11 PC from Workgroup using PowerShell Settings App. When a user connects to a network, Windows automatically creates a new workgroup and assigns it the default name WORKGROUP. So, a user can join any existing workgroup on a network or create a new one.
Workgroups provide a base for file and printer sharing but do not set up sharing for you. A workgroup is a group of PCs connected to a local area network on the same subnet that share resources, like files, printers, etc.
All devices in the same workgroup can access the resources shared by others and share their resources. All devices are peers; no device has control over another device. Each device has its user account. To log on to any device in the workgroup, you must have an account on the device.
A workgroup is not protected by a password. All devices in the same workgroup must have different computer names. If your PC was a domain member before joining the workgroup, it will be removed.


Table of Contents
Are there any Registry Editor, Group Policy and Intune Policy Settings that allow you to change WorkGroup in Windows 11?
Change Add Remove Windows 11 PC from Workgroup
You can change, add, or remove the Workgroup in Windows 11. The methods for changing the settings are using the Windows Setting application, commands in the command prompt, and PowerShell to change the Workgroup.
- Enhanced Device Info And Account Management On Windows 11 Settings
- PowerShell Script to Create a Local Admin Account using Intune
- Step-by-Step Guide Creating a Windows Server 2025 in Microsoft Azure from Scratch
Windows Settings
You can modify the workgroup settings using Windows settings. To do so, click the Windows button, select Settings, or press Win Key + I to open settings directly.
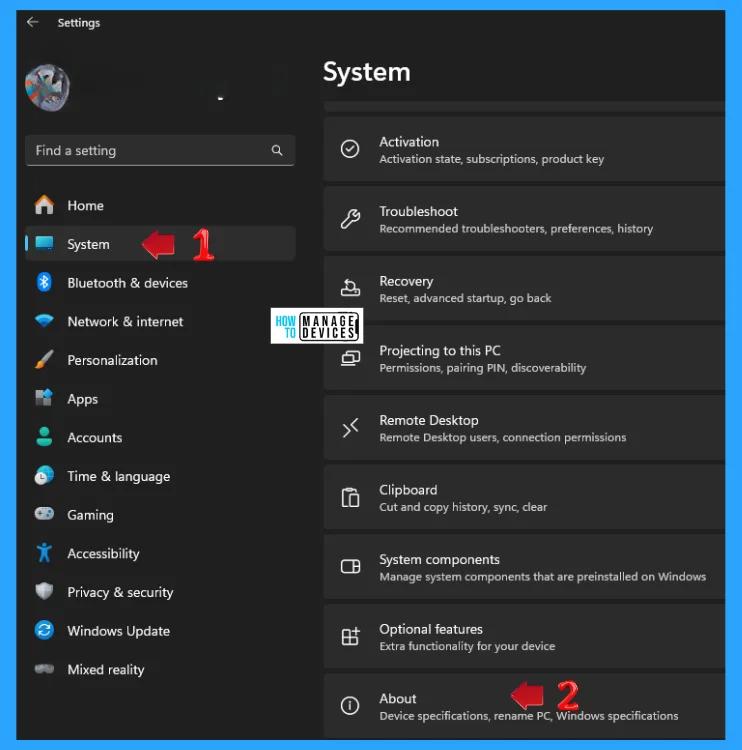
Then, under settings, click the System option on the left panel. Find the About (used for device specification, rename PC, Windows Specification) option in the right panel, then click on it to open.
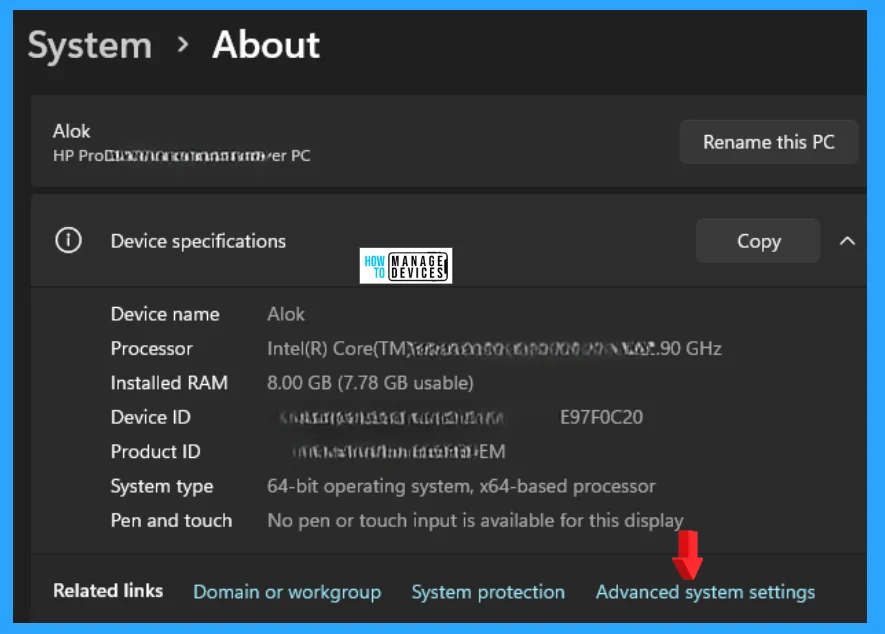
When the About window appears, you can see all the information about your device presented here. Scroll below and click on the Advanced System Setting link under the Related Links option.
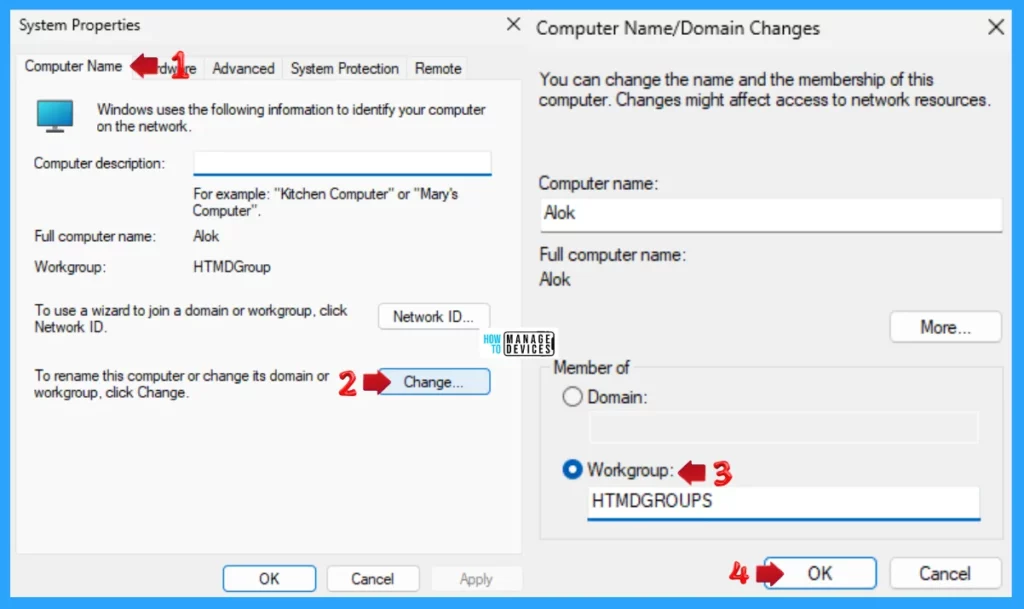
When you click Advanced System Settings, the System Properties window pops up. Under the Computer Name tab, click the Change button, as shown below. This button allows you to rename this computer or change its domain or workgroup.
Then, the Computer Name/Domain Changes window appears. You can change this computer’s name and membership. Changes might affect access to network resources. Under Member of, click the Workgroup options, type your Group Name, and click OK.
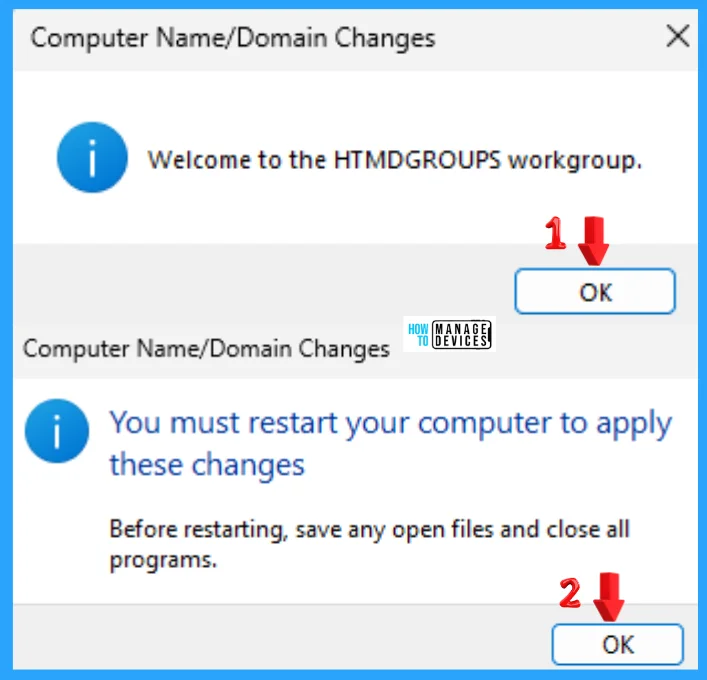
When clicked OK, it says Welcome to the “GivernGroupName” workgroup. Click OK. The following pop-up says you must restart your computer to apply these changes and again press OK.
NOTE! Before restarting, save any open files and close all programs.
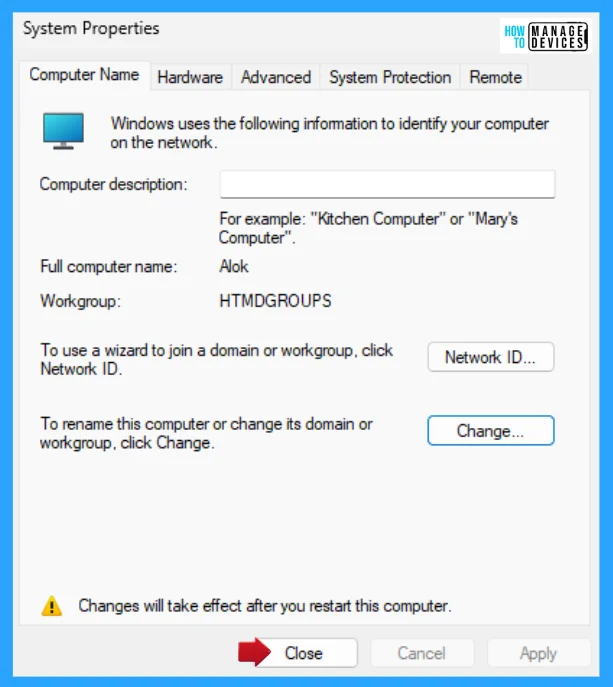
Again, it will return to the System Properties windows. Here, you can simply click on Close to exit this window. It also shows a caution: “Changes will take effect after you restart this computer.”
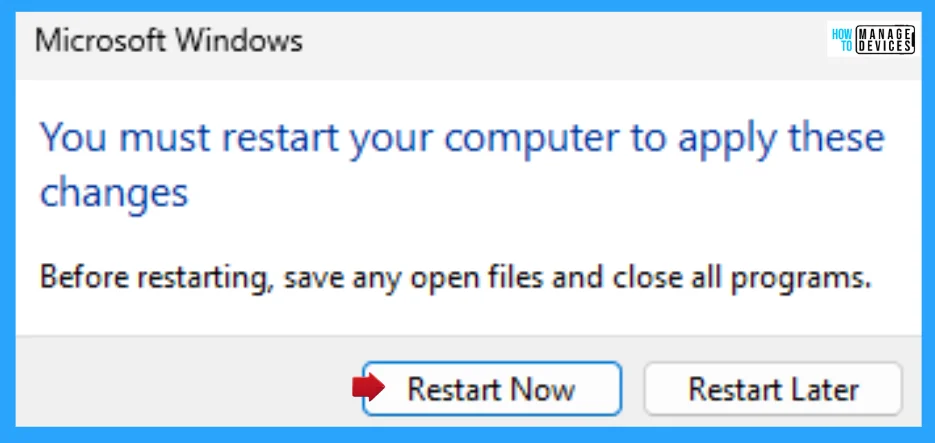
After closing the system properties window, the Microsoft Windows pop-up appears. It says you must restart your computer to apply these changes. Before restarting, save any open files and close all programs. Now, it is upon the user to choose Restart Now or Restart Later.
Command Prompt
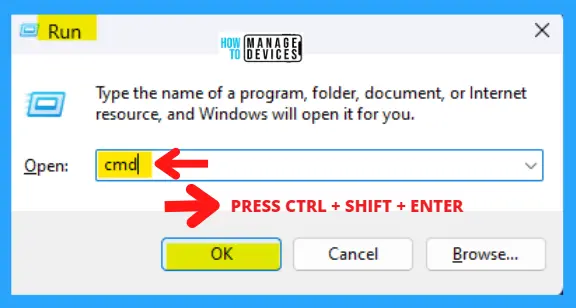
Users can use the Command Prompt in Admin mode to change Workgroup in Windows 11. To open the Elevated Command Prompt, press Win Key + R simultaneously to open the run dialogue box, and follow the below steps. The Run window said to type the name of a program, folder, document, or internet resource, and Windows will open it for you.
- Press Win Key + R
- Type cmd for the command prompt
- Press Ctrl + Shift + Enter
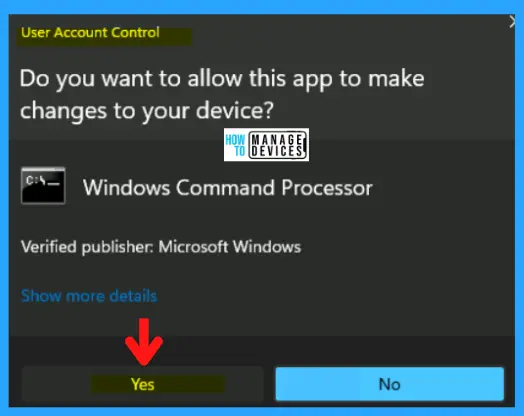
The next window appears as User Account Control, which asks you, “Do you want to allow this app to make changes to your device?”, for Windows Command Processor, press YES to continue. This window is an administrative approval to perform some tasks.
The Elevated Command Prompt window opens, and you can run some administrative commands. This window is represented as “Administrator: C:\WINDOWS\system32\cmd.exe“. Now type the following command (copy and paste) and press Enter to run the command successfully. This command Enables the built-in Administration account.
NOTE! Substitute Workgrup-Name with an actual group name that was given by the user.
wmic computersystem where name="%computername%" call joindomainorworkgroup name="Workgroup-Name"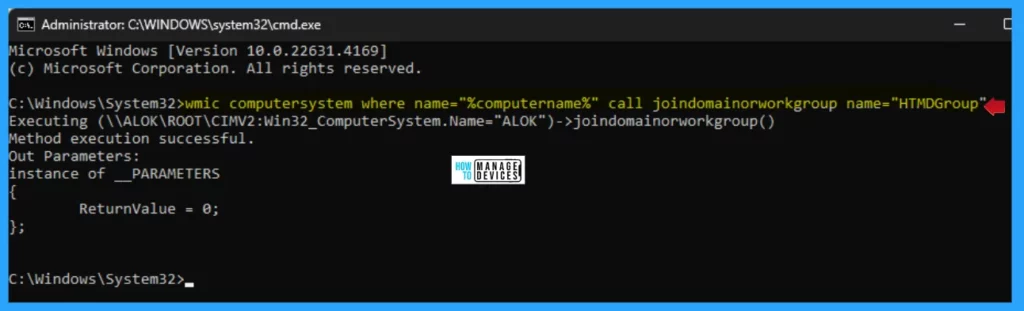
PowerShell
You can also change Workgroup using PowerShell (Admin). Launch the search box by clicking the Search icon on the taskbar or pressing the Windows key + S hotkey. Now, type Windows PowerShell. When the PowerShell app appears, click on it and select Run as Administrator. It will then ask permission to run; click on Yes to continue.
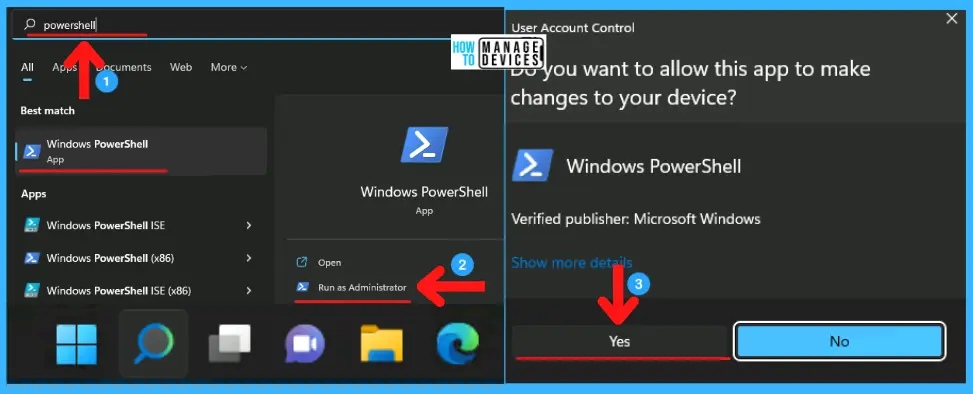
The Elevated PowerShell window opens, and you can run some administrative commands. This window is represented as “Administrator: Windows PowerShell“. Now type the following command (copy and paste) and press Enter to run the command successfully. This command Enables the built-in Administration account.
NOTE! Substitute Workgrup-Name with an actual group name that was given by the user.
Add-Computer -WorkGroupName "Workgroup-Name"
I hope How to Change Add Remove Windows 11 PC from Workgroup using PowerShell Settings App is helpful. Please follow us on the HTMD Community and visit our website, HTMD Forum, if you like our content. Suggest improvements, if any, and we would love to know which topic you want us to explore next.
Join the LinkedIn Page and Telegram group to get the latest step-by-step guides and news updates. Join our Meetup Page to participate in User group meetings. Also, Join the WhatsApp Community to get the latest news on Microsoft Technologies. We are there on Reddit as well.
Author
Alok graduated with a Master of Computer Applications (MCA) degree. He loves writing on Windows 11 and related technologies. He likes to share his knowledge, quick tips, and tricks with Windows 11 or Windows 10 with the community.



Discussion