






Enable or Disable TLS13 for EAP Client Authentication using Intune Settings Catalog Policy
Hey there, let’s discuss enable or Disable TLS13 for EAP Client Authentication using the Intune Settings Catalog Policy. As we know, the Setting Catalog is one of the best features in Intune. It lists all the settings we can configure in one place. This feature simplifies creating a policy and seeing all the available settings.
The TLS (Transport Layer Security) protocol provides secure communication over a computer network. It is the successor to the Secure Sockets Layer (SSL) protocol and ensures the data’s confidentiality, integrity, and authenticity.
TLS 1.3 is the newest version of the TLS protocol, significantly advancing encryption speed and security beyond what TLS 1.2 offered. Once a new version of a protocol is released, browsers and operating systems are responsible for providing support for it. We are deploying this policy using the Settings Catalog.
TLS 1.3 eliminates obsolete cryptographic algorithms, enhances security over older versions, and it aims to encrypt as much of the handshake as possible. In this post we will discuss the best way to deploy the allow TLS 1.3 Policy in Intune through setting catalog.

Table of Contents
What are the Features of TLS 1.3?
The connection is faster and more receptive and quicker TLS handshake in version 1.3. The user experience and website performance are better. And its round-trip time (RTT) is zero.
Windows CSP Details
CSP details plays an important role before creating a policy. In client operating system, a CSP is the interface between configuration settings specified in a provisioning document and configuration settings that are on the device. The below screenshot will help us to understand the CSP details of the policy.
./Device/Vendor/MSFT/Policy/Config/Eap/AllowTLS1_3
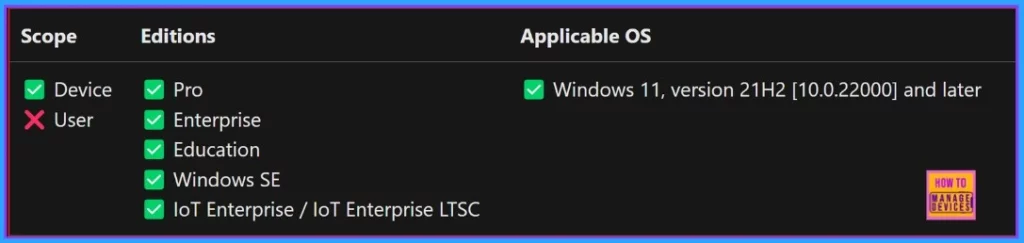
- Total Number of Setting Catalog Policies for Windows Apple and Linux
- How to Allow Adding Non Microsoft Accounts Manually Using Intune Setting Catalog
- Deploy using Intune to Turn Off Notifications Network Usage Policy
Creating a Profile
For deploying the intune policy, we need to create a profile first. Then log into the Microsoft Intune admin center with our credentials. Then, we need to navigate the Devices section, click Configurations, and create a new policy.
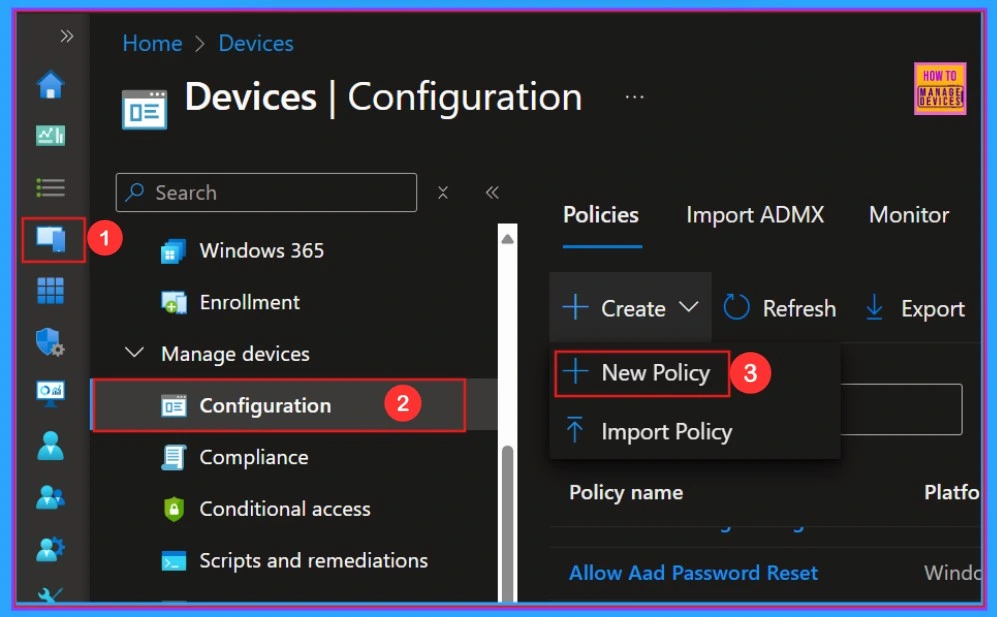
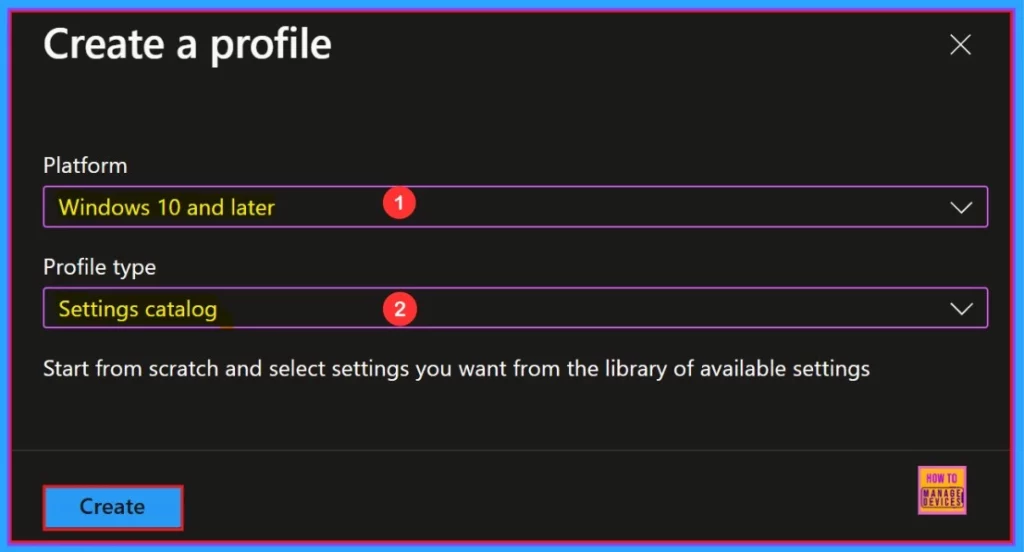
When we click the New Policy option, the Create Profile window will open. Here, we need to select the platform. Here we can choose “Windows 10 and Later.” Next, we must select the profile type; I selected “Settings Catalog” from the list. Finally, I clicked on the “Create” option.
Basics
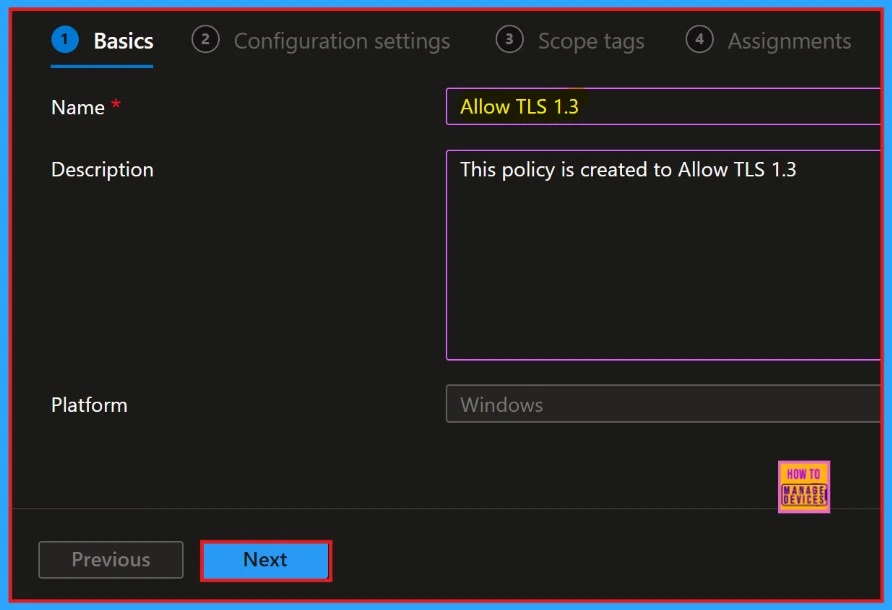
The prior section of the profile creation process is Basic. In this section, we can provide the proper Name and Description of policy we want to deploy. This is a required section, and users must add it to continue creating Profiles.
| Name | Description |
|---|---|
| Allow TLS 1.3 | This Policy is created to Allow TLS 1.3 |
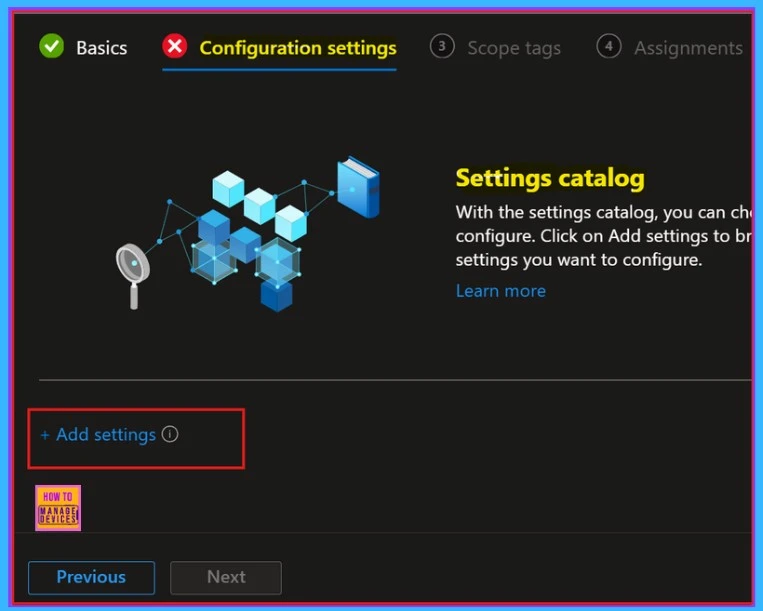
Next, we move to the Configuration settings section to select +Add settings and continue creating the profile. This section allows us to choose the settings you wish to configure. This section is required and must be completed.
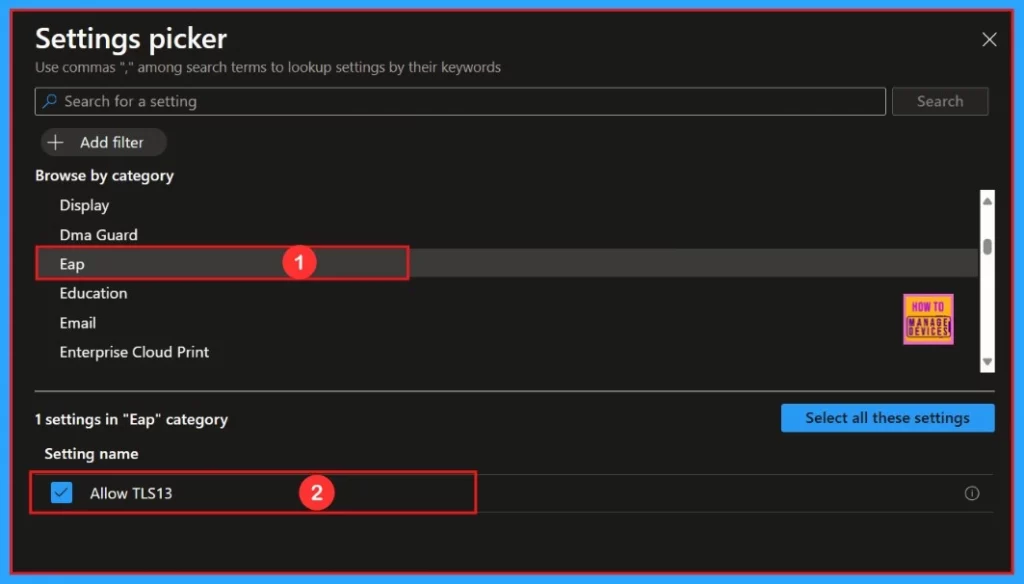
The Settings Picker window will open, allowing us to search for our desired policy. In this case, the keyword is “Allow TLS13 In.” Click the Search button to proceed. Afterwards, we can browse by category and select “Eap” In that category, we can find “Allow TLS13.”
Configuration Settings
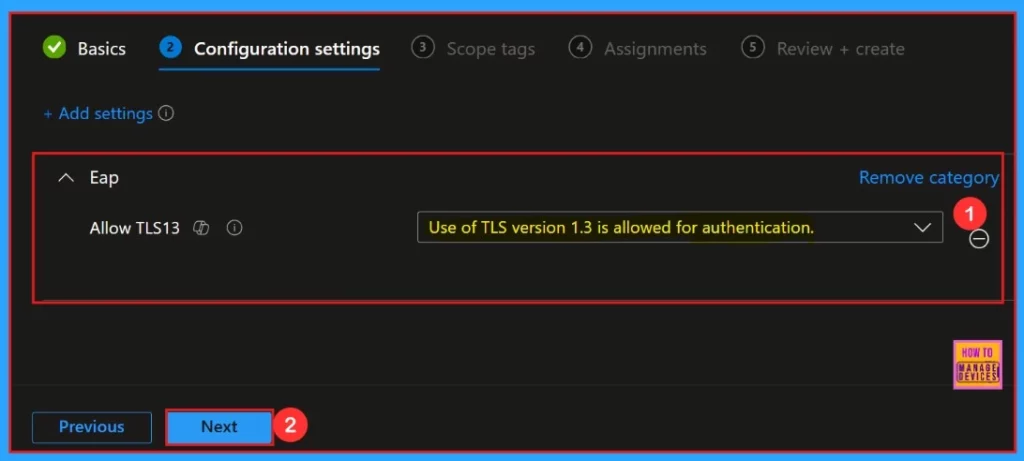
After selecting the settings, we can close the settings picker window. Then we will be in the configuration settings. Here, we can see that the use of TLS version 1.3 is allowed for authentication. We need to click the next button to continue.
Scope Tags
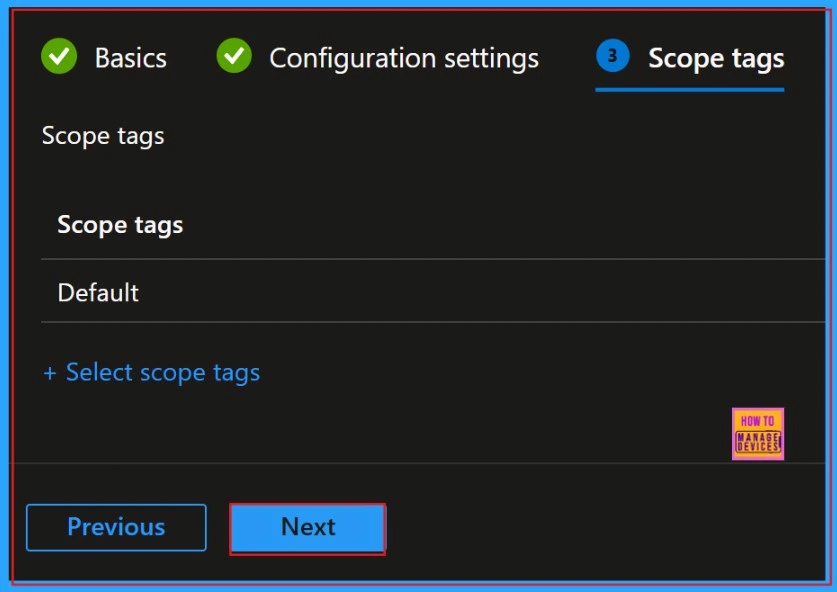
The Scope Tag section is the next step in creating your profile. We can skip this section, or we can add Scope Tags to your profile if we wish. Please note that adding Scope Tags is optional. If we decide to skip this section, simply click the “Next” button to continue.
- Enable Disable a LAN Connection through Setting Catalog via Intune
- Set Minimum Encryption Key Size for Bluetooth in Intune via Setting Catalog
- How to Establish the Allow Warning for Other Disk Encryption through Intune Setting Catalog
Assignment
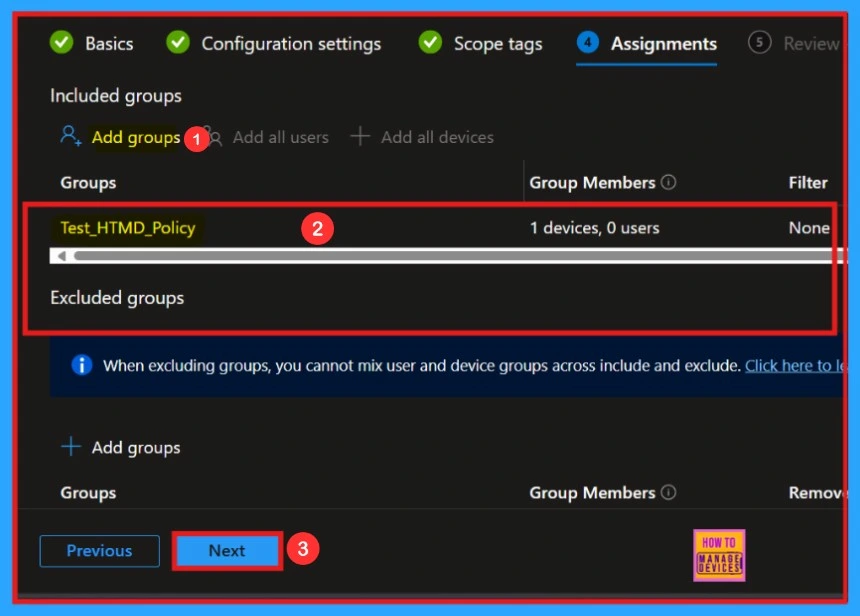
Next is the Assignments section. In this section, we can add groups to Allow TLS 1.3. Click the Add Group option under the Include Groups section to do this. After that, a new window will appear, and you can select a group from here. Then click on the Select button and click on the Next button.
- Click Next to continue.
Review + Create
The “Review + Create” is the final step in the policy creation process. In this stage, we will see a summary of the policy we are deploying, including the policy name, descriptions, platform, and other details. All the policy settings we entered will be displayed for our review.
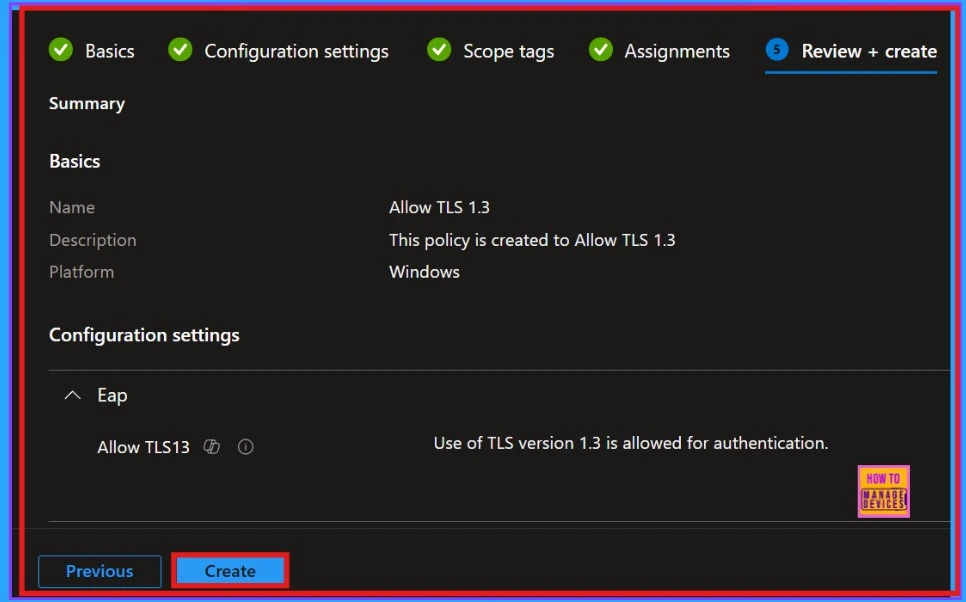
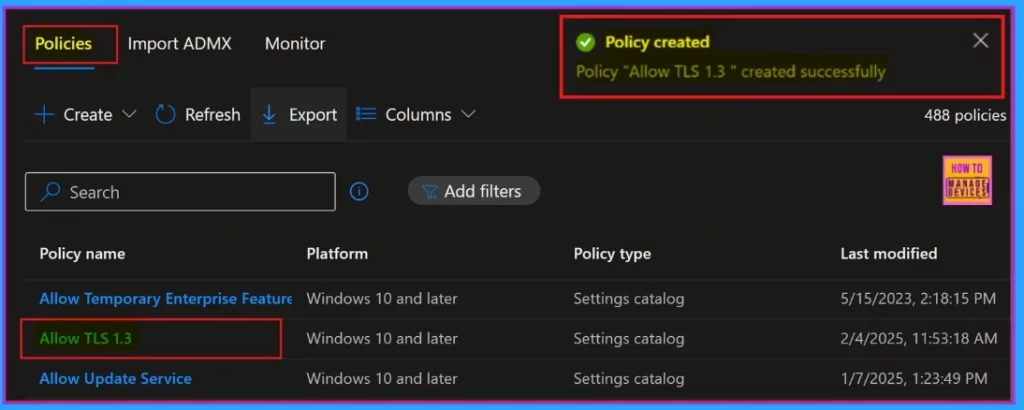
After clicking the Create button, we will be notified on the Intune Portal that the Policy “Allow TLS 1.3″ has been “created successfully“. We can quickly check the Created policy in the Intune Portal.
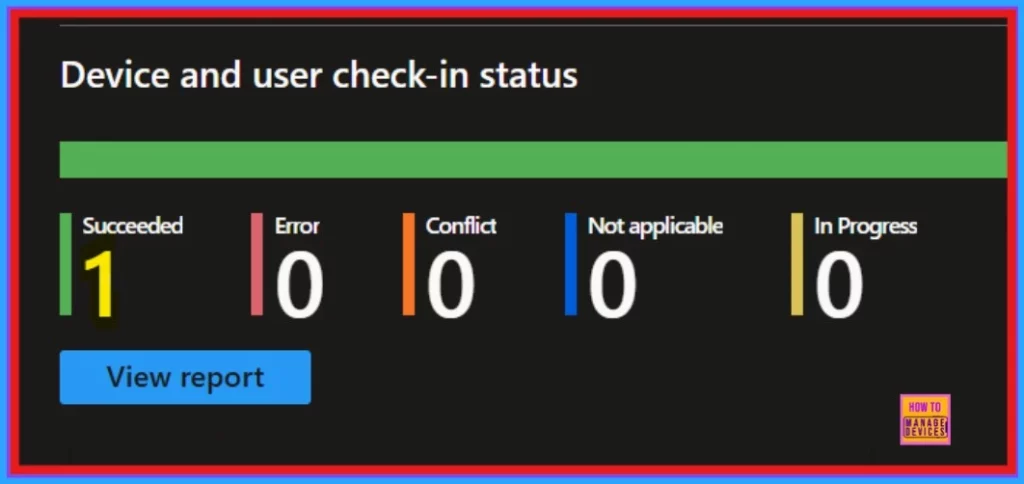
Device and User Check-in Status
When clicking on the Policy, another window will appear, and we can see an elaborate view of the policy details. Monitoring status is very important because it will show the deployment status whether the policy was created successfully or not.
- Checking Monitoring status Device > Configuration > Search the policy name
Client Side Verification
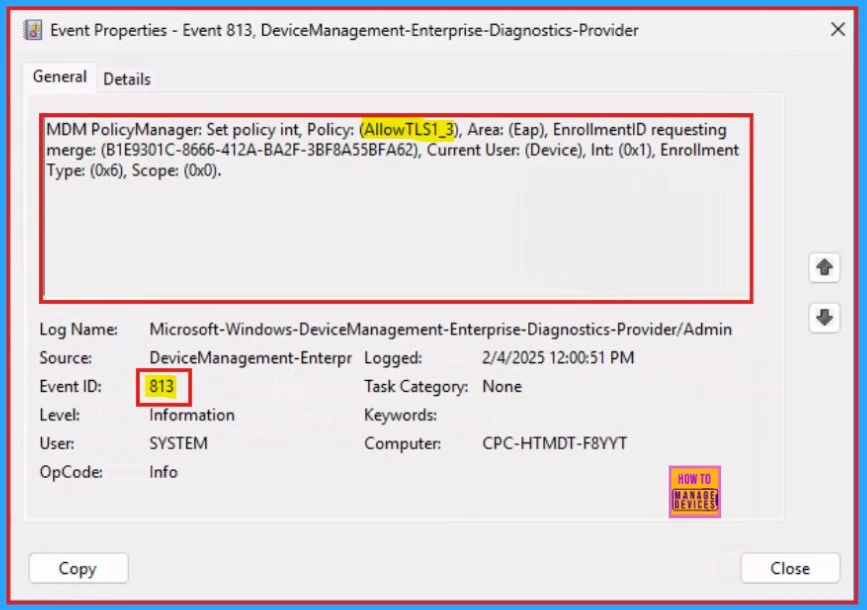
The Intune event ID 813 assure that a string policy is applied on the Windows 11 or 10 devices. We can also see the exact value of the policy being applied on those devices.
To check the Client Side Verification, you can use the Event Viewer. Go to Applications and Services Logs > Microsoft > Windows > Devicemanagement-Enterprise-Diagnostics-Provider > Admin to open it.
MDM PolicyManager: Set policy int, Policy: (AllowTLS1_3), Area: (Eap), EnrollmentID requesting
merge: (B1E9301C-8666-412A-BA2F-3BF8A55BFA62), Current User: (Device), Int: (0x1), Enrollment
Type: (0x6), Scope: (0x0).
Need Further Assistance or Have Technical Questions?
Join the LinkedIn Page and Telegram group to get the latest step-by-step guides and news updates. Join our Meetup Page to participate in User group meetings. Also, Join the WhatsApp Community to get the latest news on Microsoft Technologies. We are there on Reddit as well.
Author
Anoop C Nair has been Microsoft MVP for 10 consecutive years from 2015 onwards. He is a Workplace Solution Architect with more than 22+ years of experience in Workplace technologies. He is a Blogger, Speaker, and Local User Group Community leader. His primary focus is on Device Management technologies like SCCM and Intune. He writes about technologies like Intune, SCCM, Windows, Cloud PC, Windows, Entra, Microsoft Security, Career, etc.


Discussion