





Step-by-Step Guide to Aggressive Windows Security Scans for Zero Blind Spots using Intune
Key Takeaways:
- Days Until Aggressive Catchup Quick Scan Policy
- Handles Regular scanning of devices
- Benefical for Organizations
Let’s discuss Step-by-Step Guide to Aggressive Windows Security Scans for Zero Blind Spots using Intune. This policy says that how Microsoft Defender Antivirus handles devices that have been offline or have missed their regular scanning schedule for an extended period.
Table of Contents
Table of Contents
Step-by-Step Guide to Aggressive Windows Security Scans for Zero Blind Spots using Intune
Days Until Aggressive Catchup Quick Scan defines the threshold (in days) after the last successful scan (of any type) before Defender triggers an Aggressive Quick Scan. Organizations can enable this policy for several reasons.
- Understanding Windows Deployment Services Hardening Phase 2 And Its Impact On Hands-Free Deployment
- Enable Disable Prevent Adding New Printers Policy using Intune
- How to Fix Printer Connection Printing Problems in Windows 11
- How to Prevent Mapping of Client Printers in Remote Desktop Services Sessions using Intune
Example Scenario
Imagine, A sales representative returns from a 15-day international trip where they rarely opened their laptop. With the policy set to 7 days, Defender sees the last scan was 15 days ago. It immediately triggers an Aggressive Quick Scan. Even if the rep starts an intense Zoom call, the scan completes, ensuring any files downloaded or moved while offline are safe.
How to Configure Policy from Intune Portal
Through Microsoft Intune, you can easily configure Days Until Aggressive Catchup Quick Scan Policy. For this sign in with your credentials. Go to Devices > Configuration >+ Create > +New Policy.

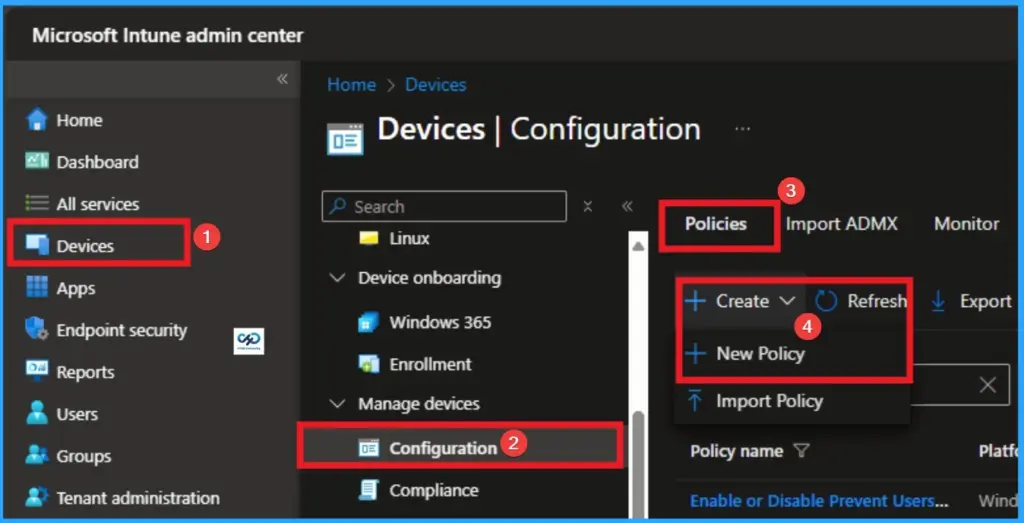
Creating Profile
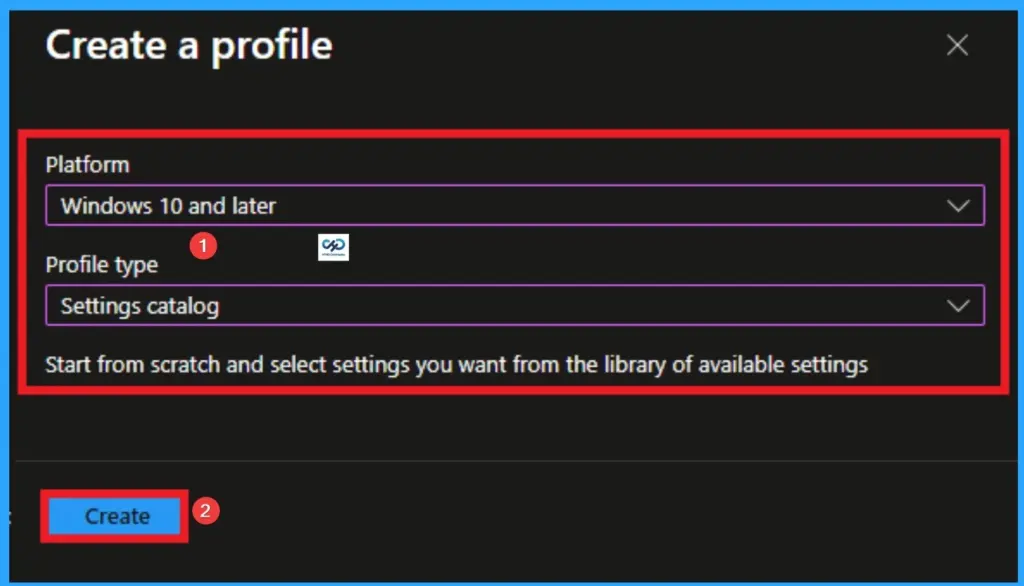
Profile creation is the necessary step that helps you to assign the policy to appropriate platform and Profile. Here I would like to configure the policy to Windows 10 and later platform and settings catalog profile. Then click on the Create button.
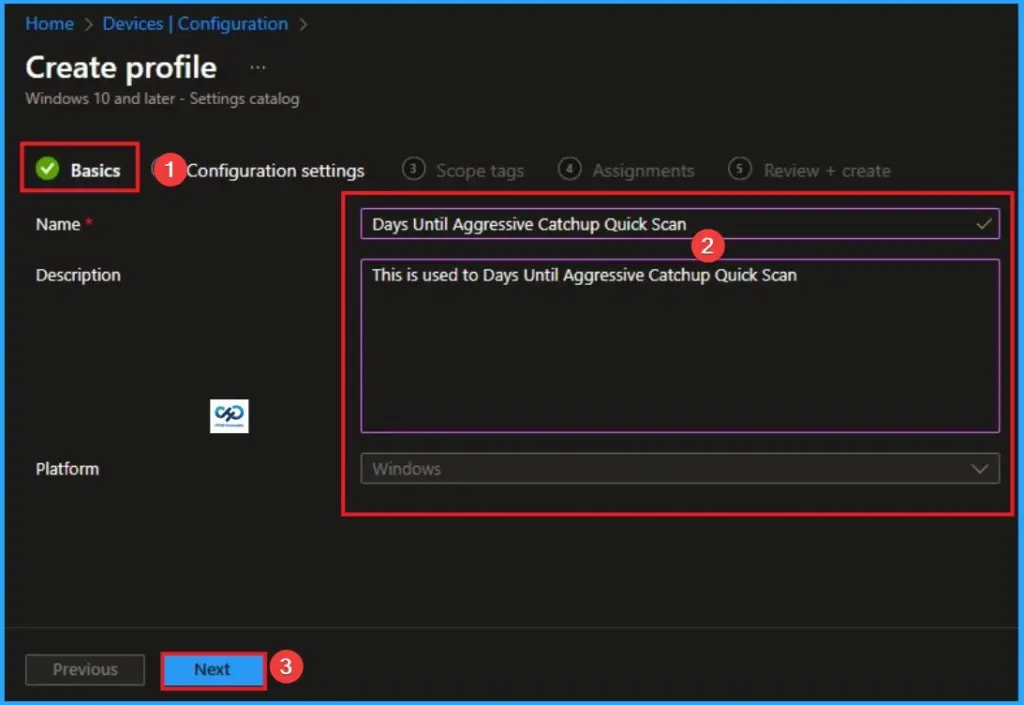
Basic Tab for Name and Description
After that, you will get Basic Tab for adding Name and Description for the policy. The Name is very mandatory field which cannot be skip. The Description is optional and you can skip. Click on the Next button after adding Name.
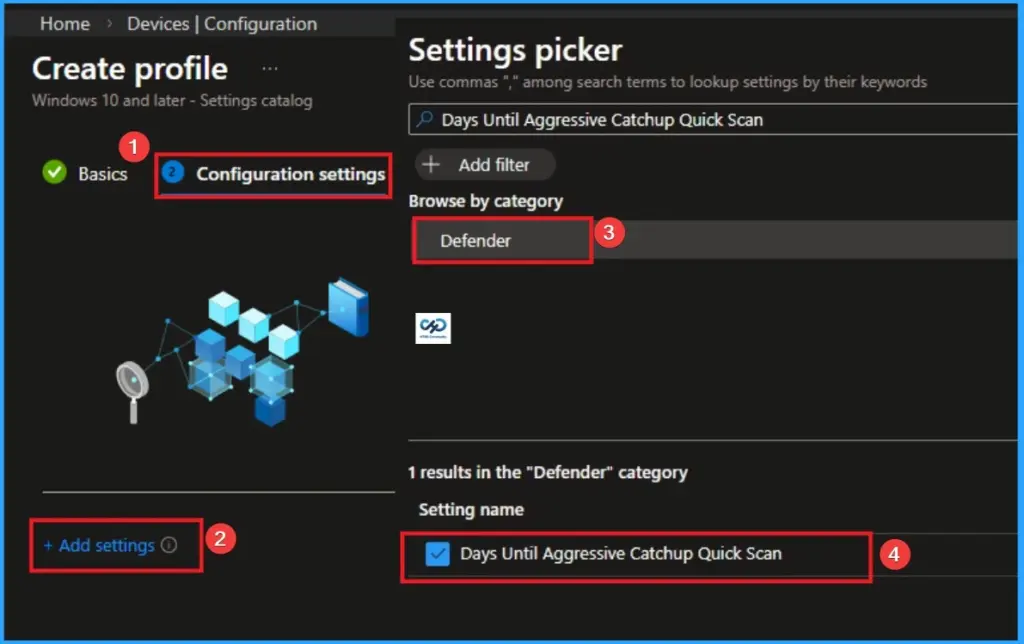
Configure Days Until Aggressive Catchup Quick Scan
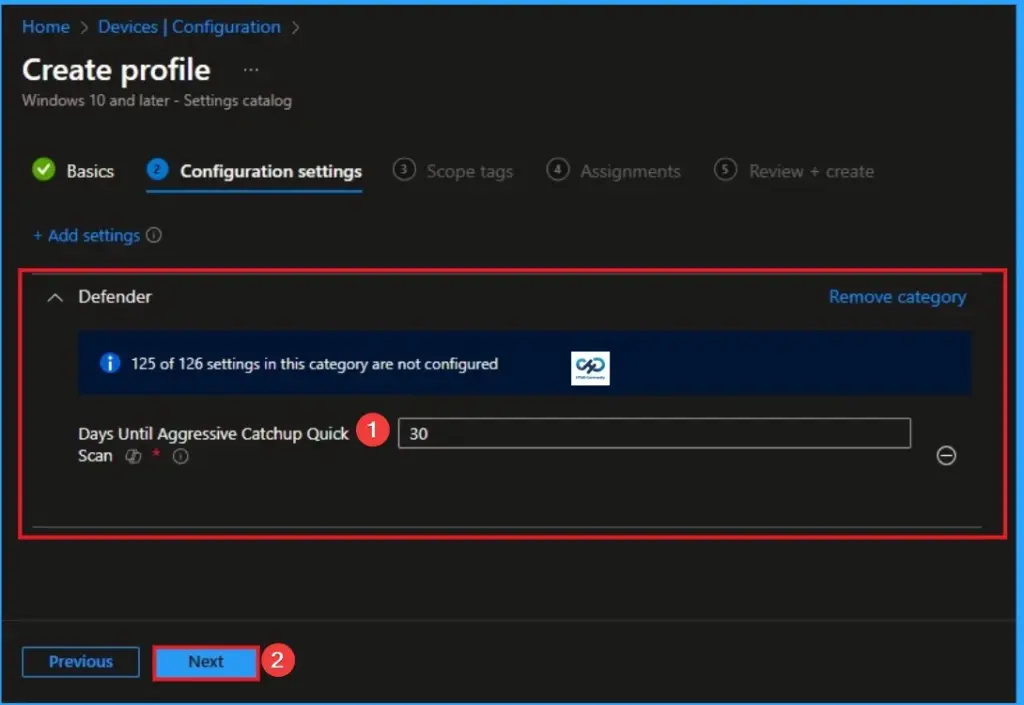
On the Configuration Settings Tab, you can easilyConfigure Days Until Aggressive Catchup Quick Scan. To access this settings, click on the +Add settings hyperlink. From the Settings Picker choose Defender > Days Until Aggressive Catchup Quick Scan.
Default Value
By default, these scans will run every 30 days when enabled. These scans are only enabled if catchup scans (quick and full) are disabled, and Microsoft Defender Antivirus is not in Passive mode.
Select Value
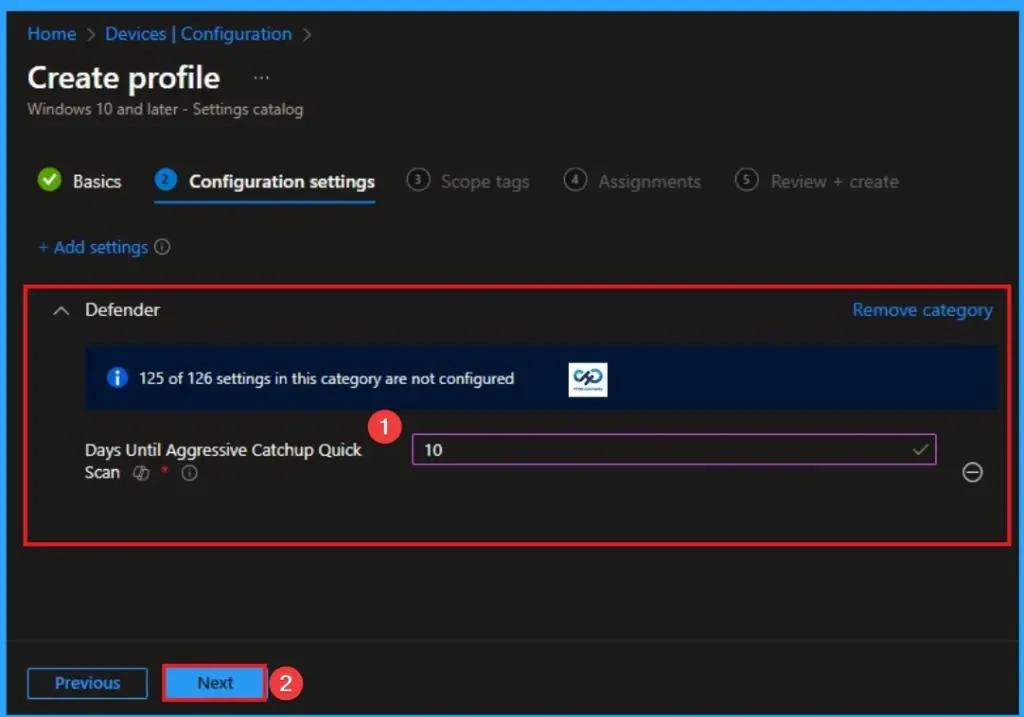
Here i choose value 10 to scans will run every 10 days. Then clcik on the Next button to continue. Look at the below screenshot.
Scope Tags
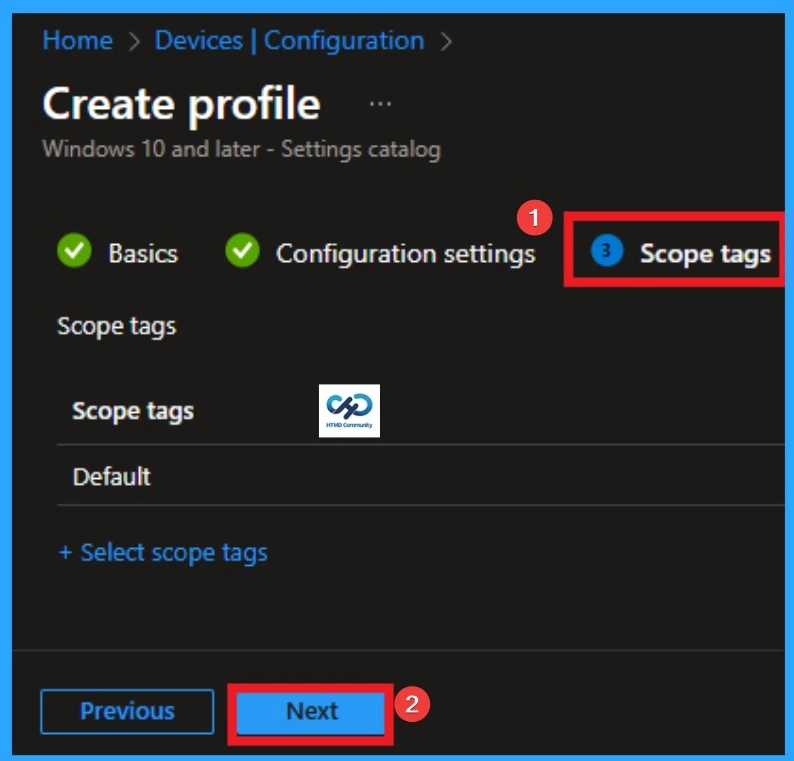
With scope tags, you create a restriction to the visibility of the Days Until Aggressive Catchup Quick Scan. It helps to organise resources as well. Here, I would like to skip this section, because it is not mandatory. Click on the Next button
Assignments Tab
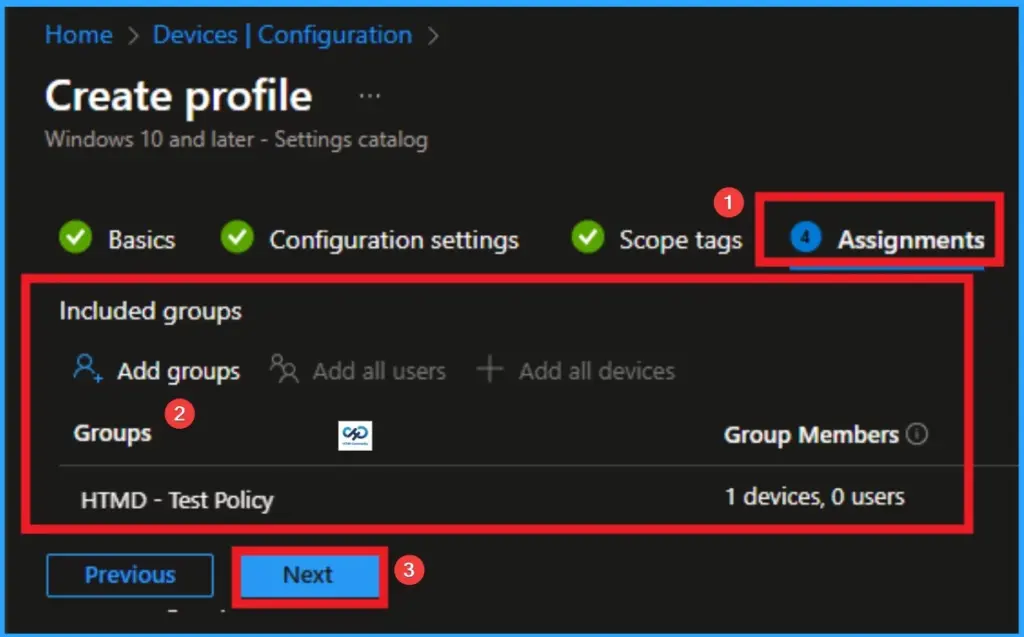
The assignments tab is the crucial step that determines which groups can be selected to assign the policy. Click on the +Add groups option under included groups. Select the group from the list of groups on your tenant.
Click on the Select button. And you can see the selected group on the Assignments tab. Click on the Next button in the window below.
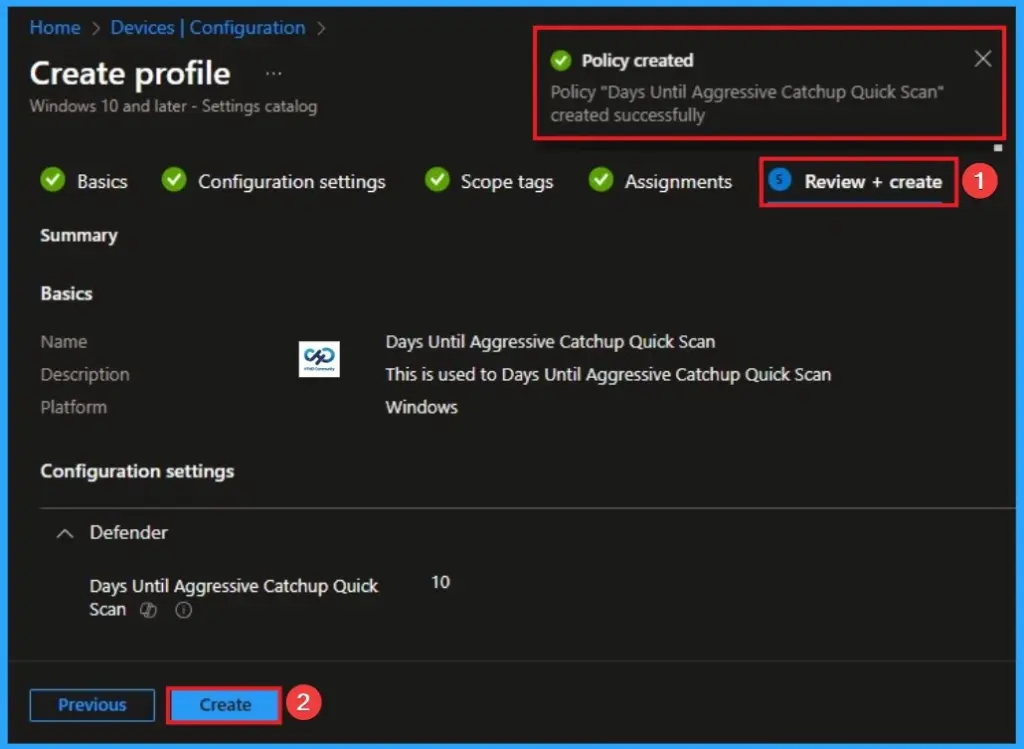
Review + Create
The Review + Create tab is the last step of policy creation. On this tab, you can verify every detail of the policy which are added in the previous steps (basic configuration settings, scope tag assignments s etc). If you want to make any changes, click on the previous button; otherwise, you can click on the Create button.
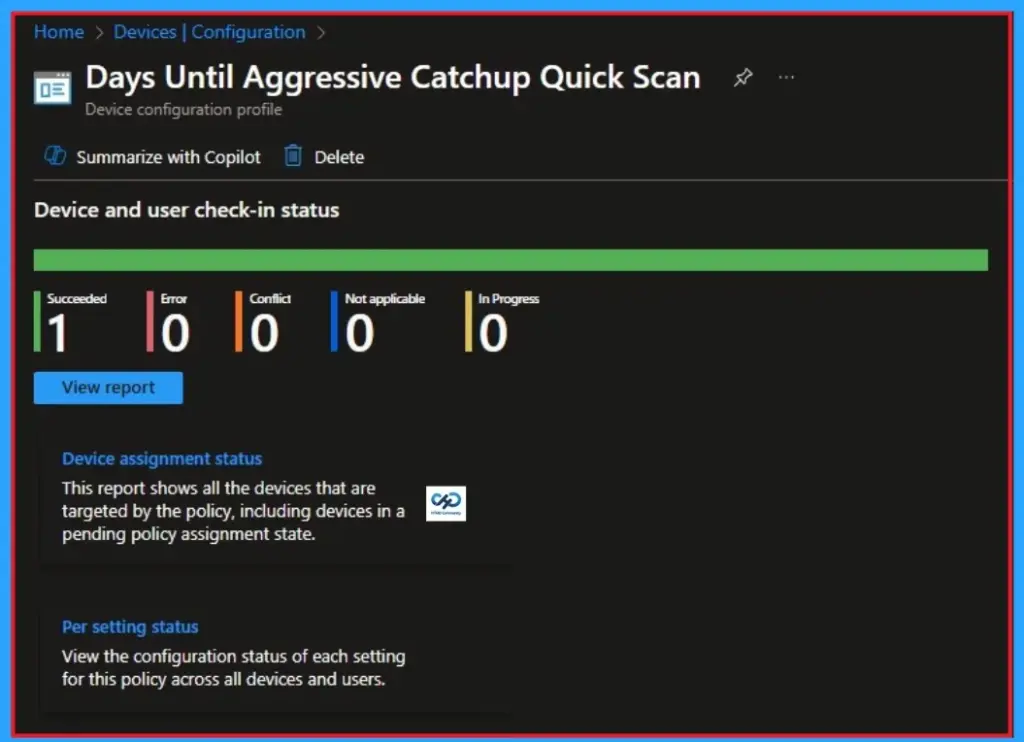
Monitoring Status
When the Policy is created successfully, you can sync the device on the Company portal for faster deployment. After syncing is completed, you can check the status on the Intune Portal. Go to Devices > Configuration and search for the policy.
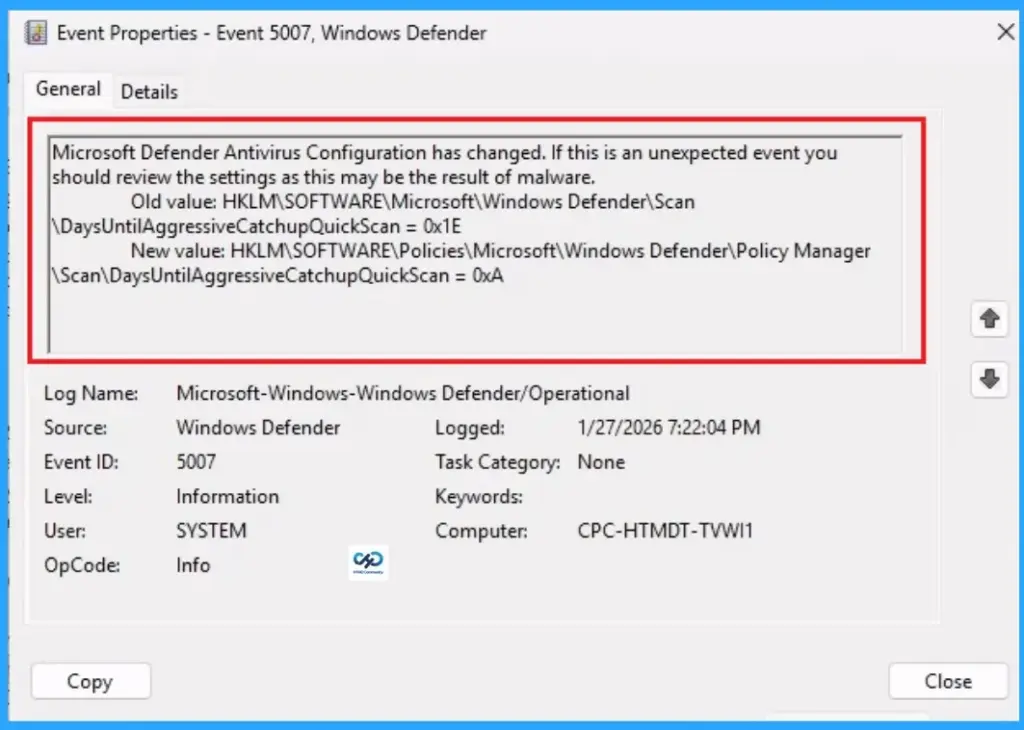
Event Viewer Details
Event Viewer helps you check the client side and verify the policy status. Open the Client device and open the Event Viewer. Go to Start > Event Viewer. Navigate to Logs: In the left pane, go to Application and Services Logs > Microsoft > Windows > DeviceManagement-Enterprise-Diagnostics-Provider > Admin.
| Event Viewer Details |
|---|
| Microsoft Defender Antivirus Configuration has changed. If this is an unexpected event you should review the settings as this may be the result of malware. Old value: HKLM\SOFTWARE\Microsoft\Windows Defender\Scan \DaysUntilAggressiveCatchupQuickScan = 0x1E New value: HKLM\SOFTWARE\Policies\Microsoft\Windows Defender\Policy Manager \Scan\DaysUntilAggressiveCatchupQuickScan = 0xA |
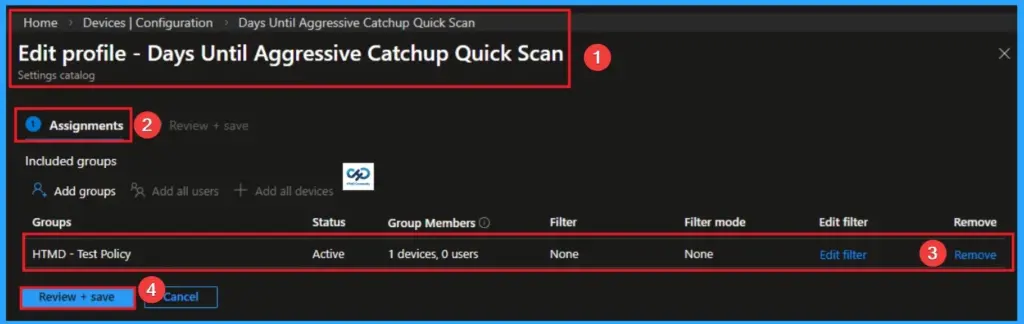
Removing the Assigned Group from Settings
If you want to remove the Assigned group from the policy, it is possible from the Intune Portal. To do this, open the Policy on Intune Portal and edit the Assignments tab and the Remove Policy.
To get more detailed information, you can refer to our previous post – Learn How to Delete or Remove App Assignment from Intune using by Step-by-Step Guide.
How to Delete Queue Specific Files
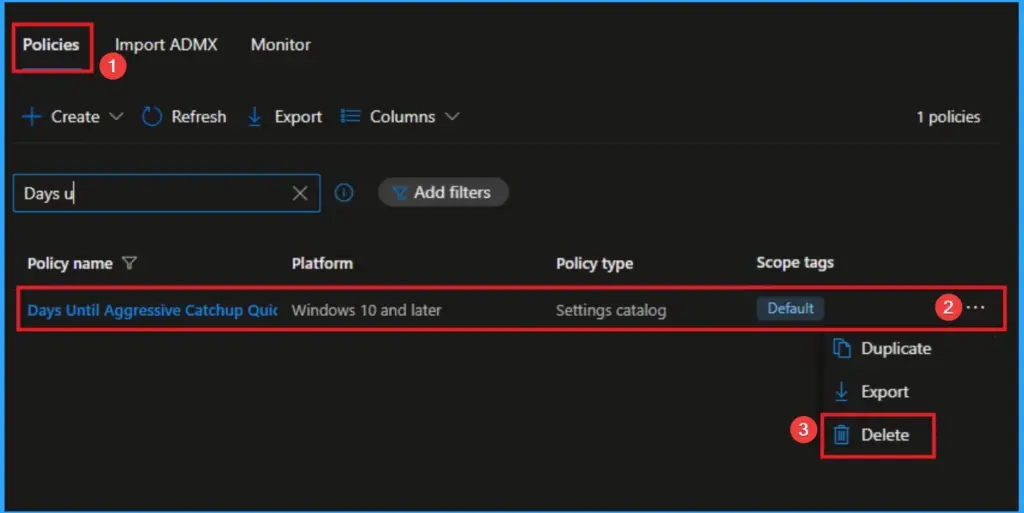
You can easily delete the Policy from the Intune Portal. From the Configuration section, you can delete the policy. It will completely remove it from the client devices.
For detailed information, you can refer to our previous post – How to Delete Allow Clipboard History Policy in Intune Step by Step Guide.
Need Further Assistance or Have Technical Questions?
Join the LinkedIn Page and Telegram group to get the latest step-by-step guides and news updates. Join our Meetup Page to participate in User group meetings. Also, join the WhatsApp Community and the WhatsApp channel to get the latest news on Microsoft Technologies. We are there on Reddit as well.
Author
Anoop C Nair is a Workplace Technology solution architect with 25+ years of experience. Microsoft Certified Trainer. Microsoft MVP from 2015 onwards for consecutive 11+ years! He is a blogger, Speaker, and Founder of HTMD Community and HTMD Conference. His main focus is on Device Management technologies like Intune, Windows, and Cloud PC. He writes about technologies like Intune, SCCM, Windows, Cloud PC, Entra, and Microsoft Security.


Discussion