






Maintaining Enterprise Control Over Defender MAPS Reporting using Intune Policy
Today we are discussing Ensuring Centralized Management of Defender MAPS Reporting using Intune Policy. This policy is about controlling how Windows devices report information about malware to Microsoft’s cloud-based protection service, previously known as MAPS and now part of Microsoft Defender Antivirus Cloud Protection. In simple terms, it decides whether individual users or local device settings can change how malware reporting works on their computer.
In an organization, security settings are usually managed centrally by IT teams to make sure all devices follow the same rules. If every computer behaves differently, it becomes difficult to maintain security and monitor threats properly. This policy helps avoid that situation by keeping control at the organization level instead of the local device level.
By setting this policy to Disabled, local users or local system settings are not allowed to override the organization’s decision about malware reporting. This ensures that the choice to participate in Microsoft’s cloud protection service is made only by administrators using central management tools like Group Policy or Intune.
This setting is especially important in managed enterprise environments where consistency is critical. When all systems report threats in the same way, security teams get reliable and predictable information. This helps them understand what is happening across the network without gaps or confusion caused by individual overrides.

Table of Contents
Maintaining Enterprise Control Over Defender MAPS Reporting Using Intune Policy
One important benefit of this policy is improved visibility into malware activity across the organization. Since reporting behavior is centrally controlled, security teams receive consistent data from all endpoints. This makes it easier to detect patterns, respond to threats quickly, and take informed decisions.
Another benefit is reduced risk of misconfiguration. Local setting overrides can lead to mistakes, especially on systems handled by non-technical users. Disabling the override removes this risk and ensures devices stay compliant with security standards defined by the organization.
- How to Continue Syncing on Metered Networks on OneDrive using Intune Policy
- Prevent users from Moving their Windows Known Folders to OneDrive
- Allow Manual Start of Microsoft Account Sign In Assistant Using Intune Settings Catalog
Create a Profile
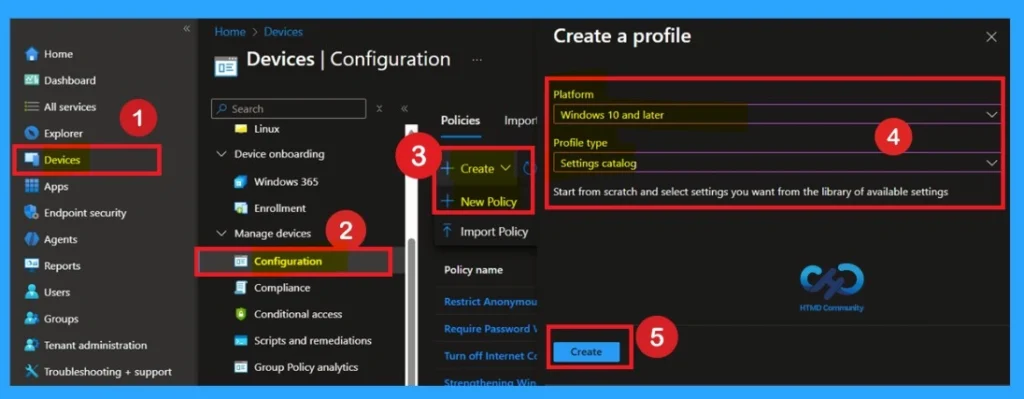
First, you need to configure this policy. Start by signing in to the Microsoft Intune Admin Center. Then, click on Devices. Under the Devices section, go to the Configuration tab, where you will find a + Create option. Click on it, and you will see 2 options, such as the new policy and the Import policy.
- After that, click Create.
- Select New policy, and this will open a new window titled Create a profile.
- Here, you need to enter the Platform and Profile type details.
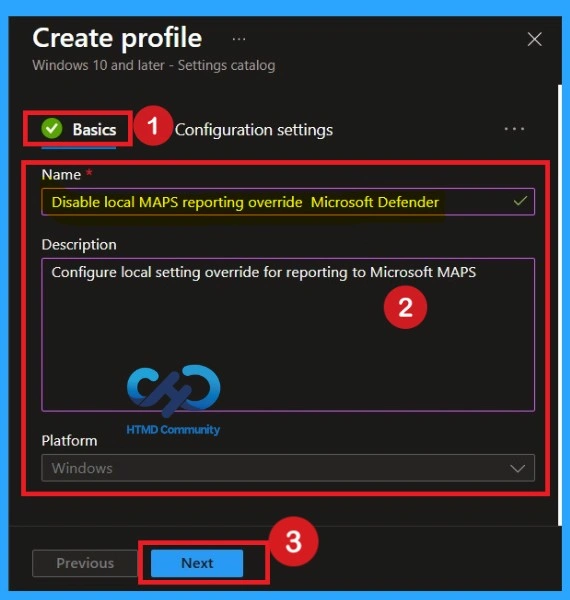
What is a Basic Tab
The Basics tab is the quickest step. Here, you need to enter the basic details such as the Name, Description, and Platform information. Since the platform is already set to Windows, you only need to provide a specific name and description for the policy, then click Next.
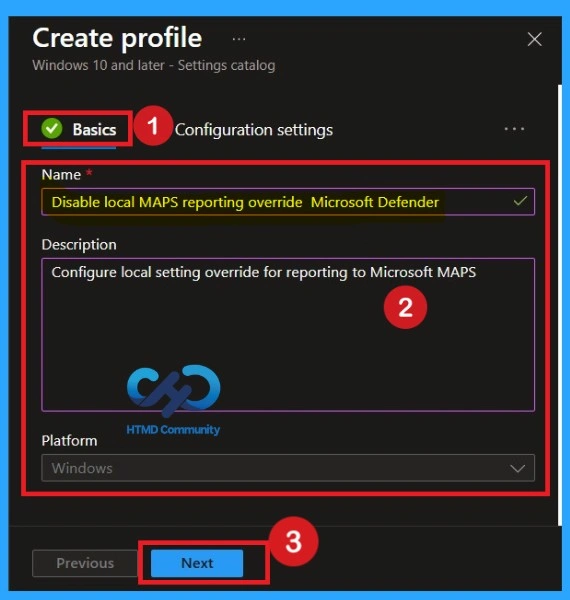
Basics Section
Now we fill the Basics page. We enter a clear name, so everyone knows what the policy does. We also write a short description explaining why this policy is needed. The description helps avoid confusion in the future. This is important when many people are managing policies. Proper naming and description give clarity and save time.
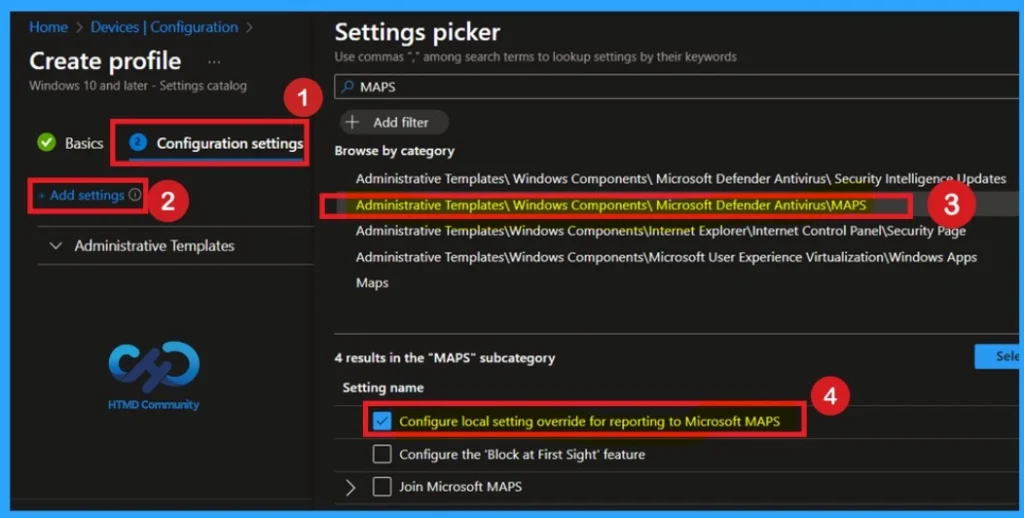
Configuration Settings
The next step is Configuration settings. Click on Add settings, and the Settings picker window will open. In the search box, type MAPS. You will find the setting under Administrative Templates. Select Configure local setting override for reporting to Microsoft MAPS and proceed with the policy configuration.
Disabled By Default
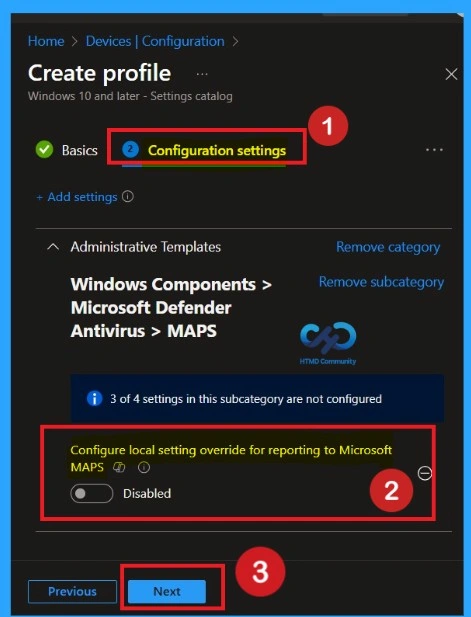
After selecting the settings, close the settings picker window. Now you are on the Configuration Settings main page. You will see that the policy has appeared on your screen. By default, this policy is disabled. If you want to continue with this default setting, you can click Next.
Enabled Mode
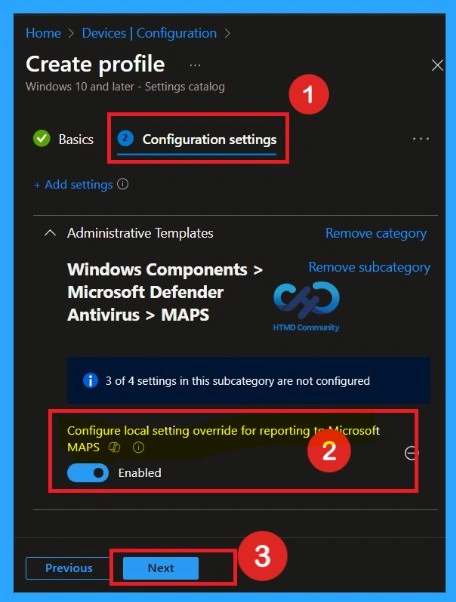
You can also enable a policy that is disabled by default. To do this, toggle the switch from left to right. Once enabled, the switch will turn blue and display the label Enabled. If you want to proceed without making any changes, simply click Next to continue
What is Scope Tags
Now you are on the Scope tags section. Scope tags are used to assign policies to specific admin groups for better management and filtering. If needed, you can add a scope tag here. However, for this policy, I chose to skip this section

Assignment Tab for Selecting Group
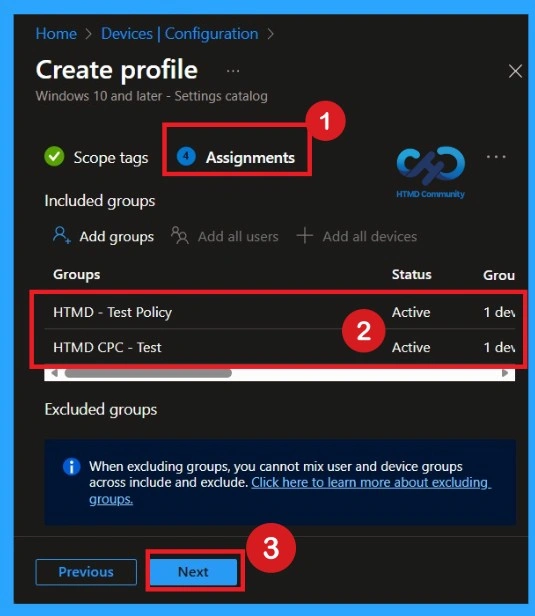
To assign the policy to specific groups, you can use the Assignment Tab. Here I click, +Add groups option under Included groups. I choose a group from the list of groups and click on the Select button. Again, I click on the Select button to continue.
Review + Create Tab
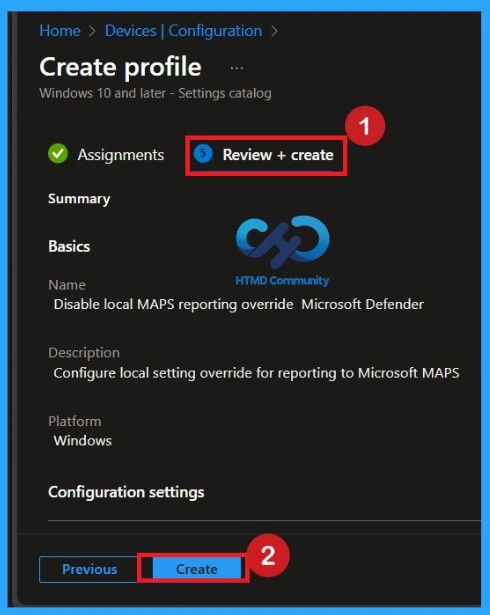
Before completing the policy creation, you can review each tab to avoid misconfiguration or policy failure. After verifying all the details, click on the Create Button. After creating the policy, you will get a success message.
Monitoring Details
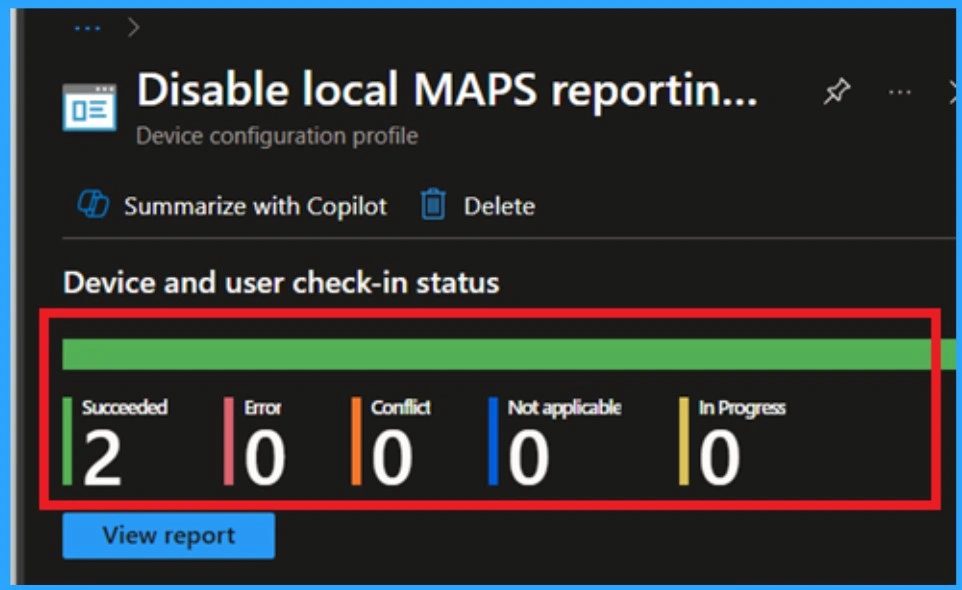
Using this method ensures the policy is applied more quickly and you can confirm the outcome without waiting the full sync time. To check the Monitoring status, follow the steps Click on the policy to view its deployment status and details. Navigate to Devices > Configuration Policies.
- In the Configuration Policies list, look for the policy you created.
Remove the Assigned Policy Group
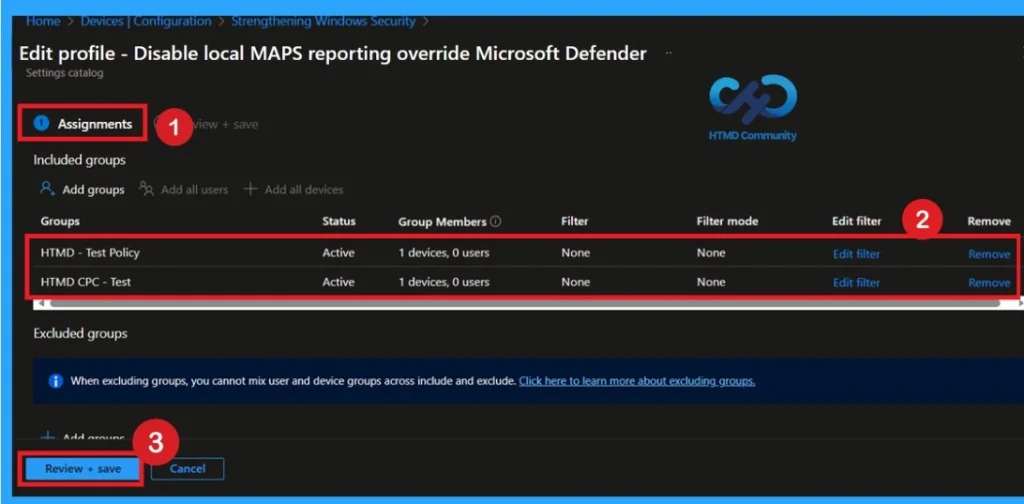
Removing a group from a policy is very simple. First, go to the Monitoring status page and scroll down until you see the Assignments Edit option. Click on it, and you will be taken directly to the Assignments section that you had previously configured. Here, you will find the Remove option.
How to Delete the Policy that you created
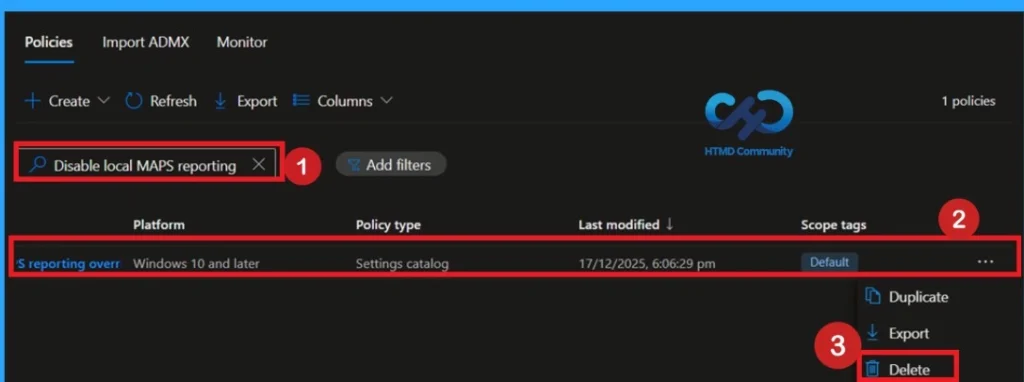
To delete a policy in MS Intune, first sign in to the Microsoft Intune Admin Center. Navigate to Devices and then select Configuration. Locate and select the specific policy you want to remove. Once you’re on the policy details page, click the 3 -dot menu in the top right corner and choose Delete from the available options.
Need Further Assistance or Have Technical Questions?
Join the LinkedIn Page and Telegram group to get the latest step-by-step guides and news updates. Join our Meetup Page to participate in User group meetings. Also, Join the WhatsApp Community to get the latest news on Microsoft Technologies. We are there on Reddit as well.
Author
Anoop C Nair has been Microsoft MVP from 2015 onwards for 10 consecutive years! He is a Workplace Solution Architect with more than 22+ years of experience in Workplace technologies. He is also a Blogger, Speaker, and Local User Group Community leader. His primary focus is on Device Management technologies like SCCM and Intune. He writes about technologies like Intune, SCCM, Windows, Cloud PC, Windows, Entra, Microsoft Security, Career, etc.


Discussion