






Prevent All Accessing Dangerous Websites Policy using Intune
This post helps in exploring how to set Prevent All Accessing Dangerous Websites Policy Using Intune. We will explore how to apply this policy using Intune’s Configuration Profiles. The main goal is to acquire understanding and hands-on experience in configuring and setting Prevent Users and Applications Accessing Dangerous Websites Policy Using Intune.
Prevent All Accessing Dangerous Websites Policy Using Intune policy provides the option to enable or disable network protection, which safeguards employees using any app from accessing phishing scams, exploit-hosting sites, and malicious internet content. It includes preventing third-party browsers from connecting to hazardous sites. The value type for this policy is an integer. Microsoft Defender for Endpoint (aka MDE) Network Protection is a feature of Microsoft Defender Antivirus that helps you to protect devices from accessing malicious domains and IP addresses.
If you choose to enable this setting, network protection will be turned on, and employees won’t have the ability to turn it off. The policy’s behavior can be managed through two options: Block and Audit. Enabling the policy with the “Block” option will result in users and apps being blocked from connecting to dangerous domains. Any such activity will be visible in the Windows Defender Security Center.
Alternatively, enabling the policy with the “Audit” option will allow users and apps to connect to risky domains. However, their activity will still be logged in the Windows Defender Security Center. If you decide to disable this policy, users, and apps will have unrestricted access to dangerous domains, and no network activity related to this policy will be recorded in the Windows Defender Security Center.

By default, if you don’t configure this policy, network blocking will be disabled. If the policy is left unconfigured, network blocking will be disabled by default. This means that users and applications will have unrestricted access to all domains, including those that may be harmful.
- Join Microsoft MAPS Policy using Intune
- Force Sync of Browser Data without Consent Policy using Intune
Prevent All Accessing Dangerous Websites Policy using Intune
To set Prevent All Accessing Dangerous Websites Policy Using Intune, follow the steps stated below:
- Sign in to the Intune Admin Center portal https://intune.microsoft.com/.
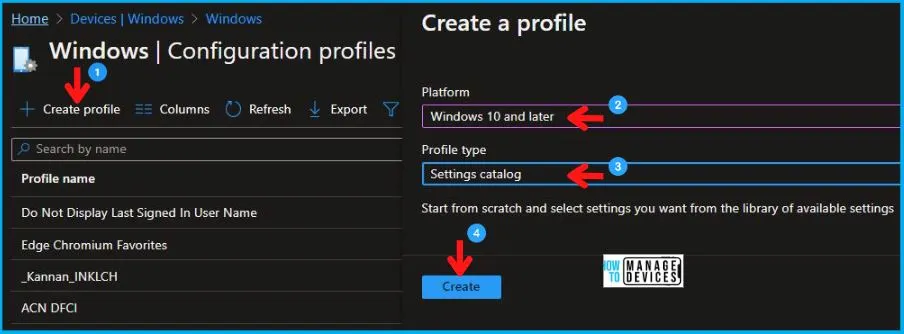
- Select Devices > Windows > Configuration profiles > Create a profile.
In Create Profile, Select Windows 10 and later in Platform, and Select Profile Type as Settings catalog. Click on Create button.
| Platform | Profile Type |
|---|---|
| Windows 10 and later | Settings Catalog |
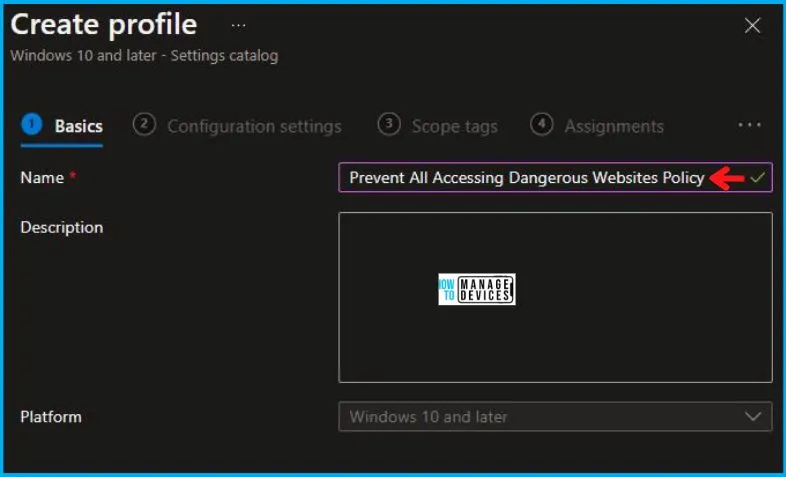
On the Basics tab pane, provide a name for the policy as “Prevent All Accessing Dangerous Websites Policy.” Optionally, you can enter a description for the policy and then proceed by selecting “Next.
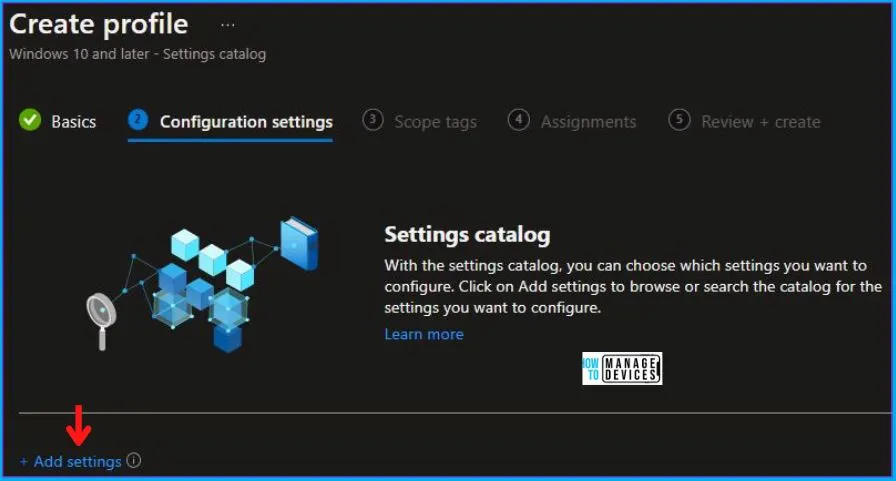
Now in Configuration Settings, click Add Settings to browse or search the catalog for the settings you want to configure.
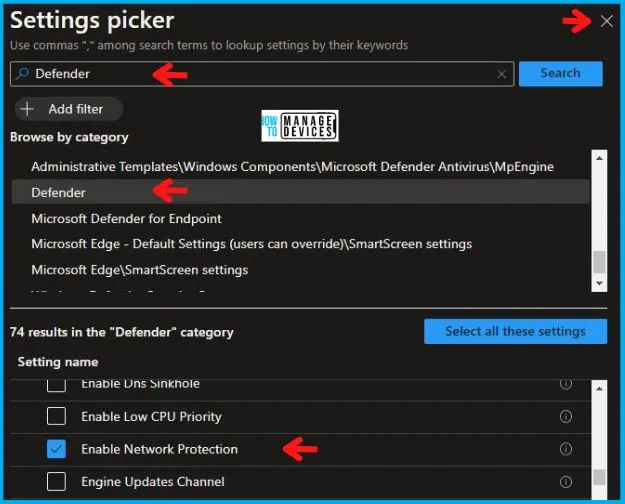
In the Settings Picker windows, search by the keyword Defender, among many, you’ll get the category Defender, and select this.
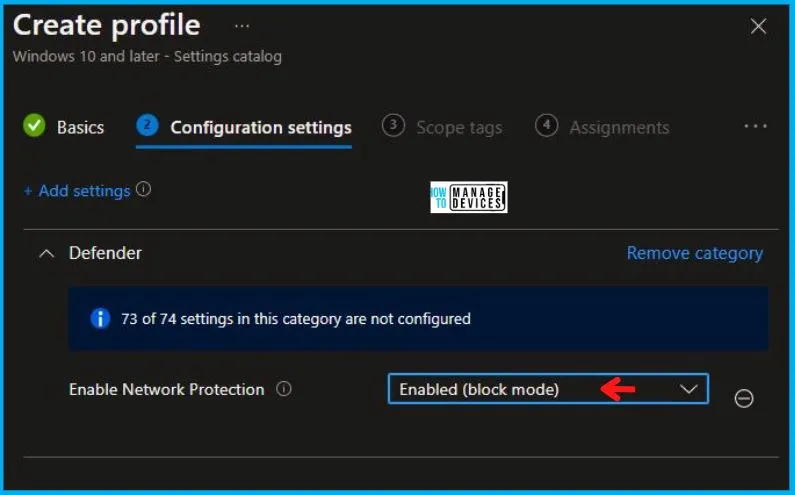
When you select the option as stated above, you will see one option, which is Enable Network Protection. After selecting your setting, click the cross mark at the right-hand corner, as shown below.
Now, in the Administrative Templates, set Enable Network Protection to Enabled (block mode), as shown below in the image.
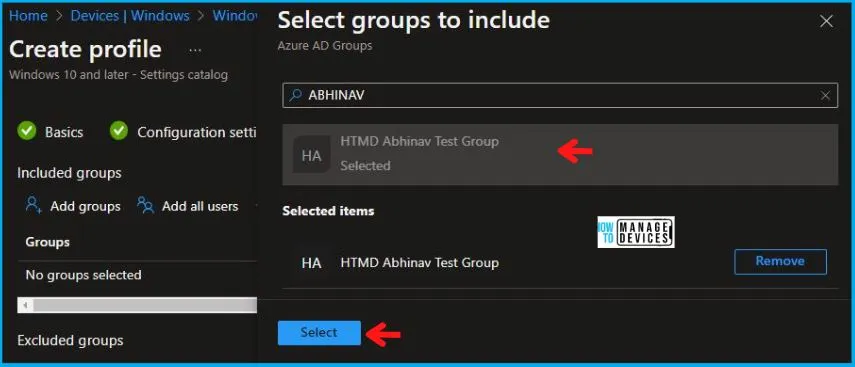
Using Scope tags, you can assign a tag to filter the profile to specific IT groups. One can add scope tags (if required) and click Next to continue. Now in Assignments, in Included Groups, you need to click on Add Groups, choose Select Groups to include one or more groups, and click Next to continue.
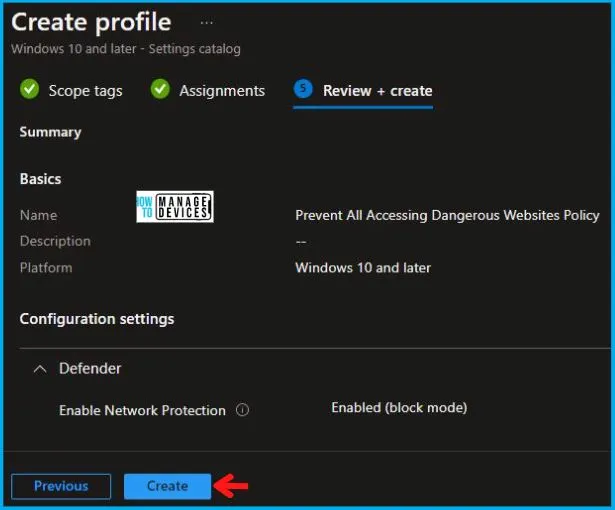
In the Review + Create tab, you need to review your settings. After clicking on Create, your changes are saved, and the profile is assigned.
Upon successfully creating the “Prevent All Accessing Dangerous Websites Policy,” notification will appear in the top right-hand corner, confirming the action. You can also verify the policy’s existence by navigating to the Configuration Profiles list, where it will be prominently displayed.
Your groups will receive your profile settings when the devices check in with the Intune service. The Policy applies to the device.
Intune Report for Prevent All Accessing Dangerous Websites Policy
From Intune Portal, you can view the Intune settings catalog profile report, which provides an overview of device configuration policies and deployment status.
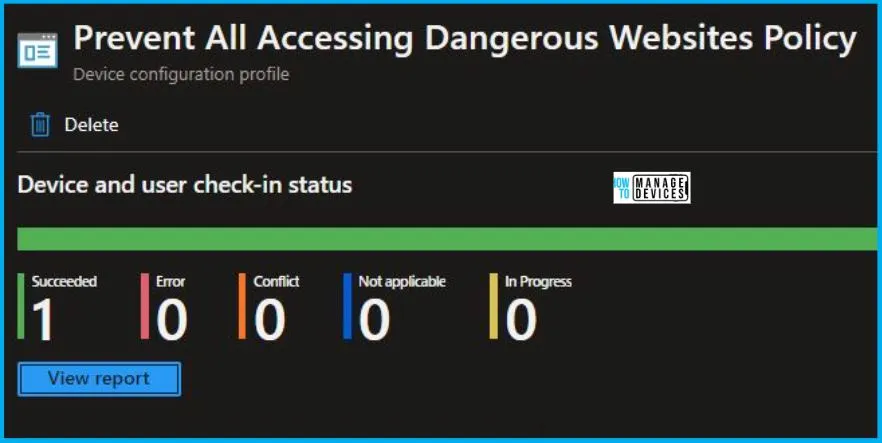
To track the assignment of the policy, you need to select the relevant policy from the Configuration Profiles list. By reviewing the device and user check-in status, you can determine if the policy has been successfully applied. If you require more detailed information, you can click on “View Report” to access additional insights.
Registry-Key Verification for Enable Network Protection
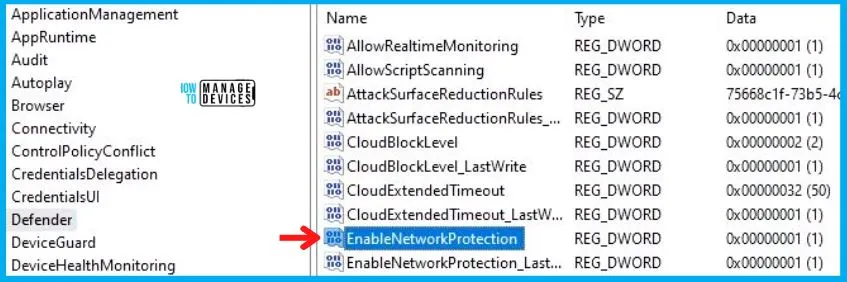
To access the registry settings that hold the group policy configurations on a specific computer, you can execute “REGEDIT.exe” on the target computer and navigate to the precise registry path mentioned below where these settings are stored.
- Computer\HKEY_LOCAL_MACHINE\SOFTWARE\Microsoft\PolicyManager\providers\1A661A16-302C-46D4-81F0-AA73244850D8\default\Device\Defender
When you navigate to the above path in the Registry Editor, you will find the registry key with the name EnableNetworkProtection. Refer to the table and image below.
| Registry Name | Data |
|---|---|
| EnableNetworkProtection | Enabled |
Author
Abhinav Rana is working as an SCCM Admin. He loves to help the community by sharing his knowledge. He is a B.Tech graduate in Information Technology.


Discussion