






Assign Azure AD Roles Using Privileged Identity Management PIM
Here’s how you can assign Azure AD Roles using Privileged Identity Management PIM. The Azure AD PIM service also allows Privileged role administrators to make permanent admin role assignments.
A privileged role administrator can customize Privileged Identity Management (PIM) in their Azure Active Directory (Azure AD) organization, including changing the experience for a user who is activating an eligible role assignment.
Privileged Identity Management lets you know when important events occur in your Azure AD organization, such as when a role is assigned or activated. Privileged Identity Management keeps you informed by sending you and other participants email notifications.
You can manage just-in-time assignments to all Azure AD roles and all Azure roles using Privileged Identity Management (PIM) in Azure Active Directory (Azure AD), part of Microsoft Entra.

- Assign: Assign users or current admins as eligible admins for specific Azure AD roles, so that they only have access when necessary.
- Activate: Activate your eligible admin roles so that you can get limited standing access to the privileged identity.
- Approve: View and approve all activation requests for specific Azure AD roles that you are configured to approve.
- Audit: View and export a history of all privileged identity assignments and activations so you can identify attacks and stay compliant.
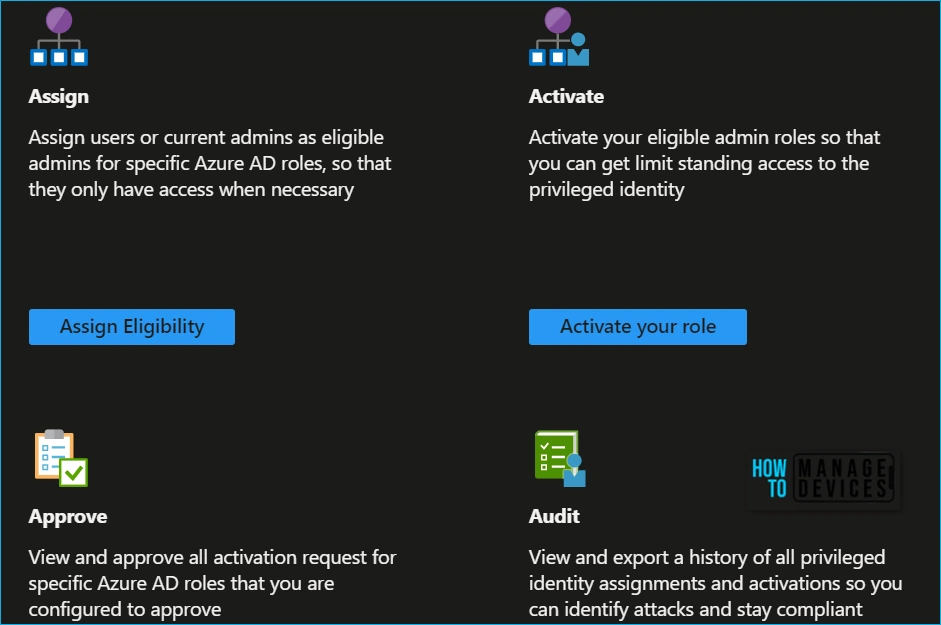
Assign Azure AD Roles Using Privileged Identity Management PIM
Let’s follow the steps to assign Azure AD roles using PIM. With Azure Active Directory, a Global administrator can make permanent Azure AD admin role assignments.
- Sign in to the Azure portal with a user in the Privileged Role Administrator role.
- Open Azure AD Privileged Identity Management > Azure AD roles > Role settings.
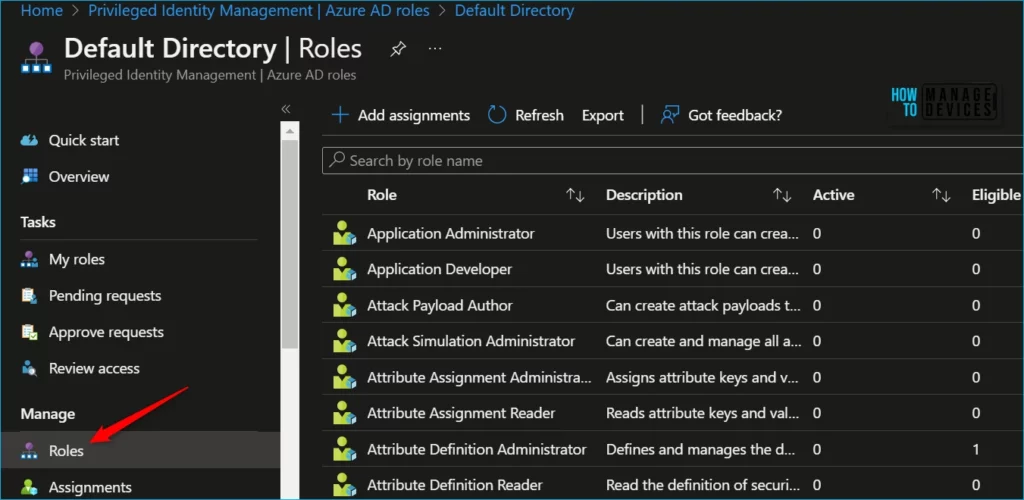
Select Add assignments to open the Add assignments page, and Select Select a role to open the Select a role page.
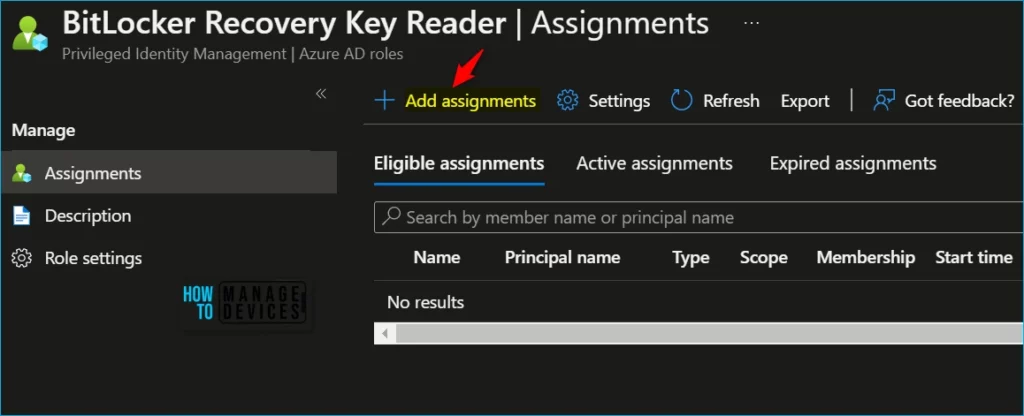
Select Roles to see the list of roles for Azure AD permissions. For Example, I selected BitLocker Recovery Key Reader custom role for assignments.
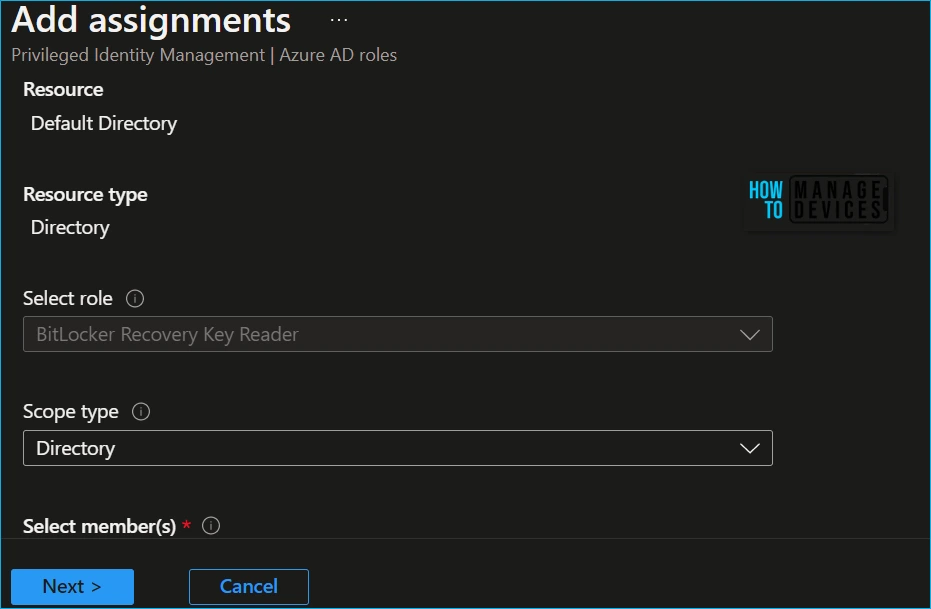
Once you selected a role you want to assign, select a member to whom you want to assign the role, Select No member selected the link to open the Select a member or group pane, and then select Next.
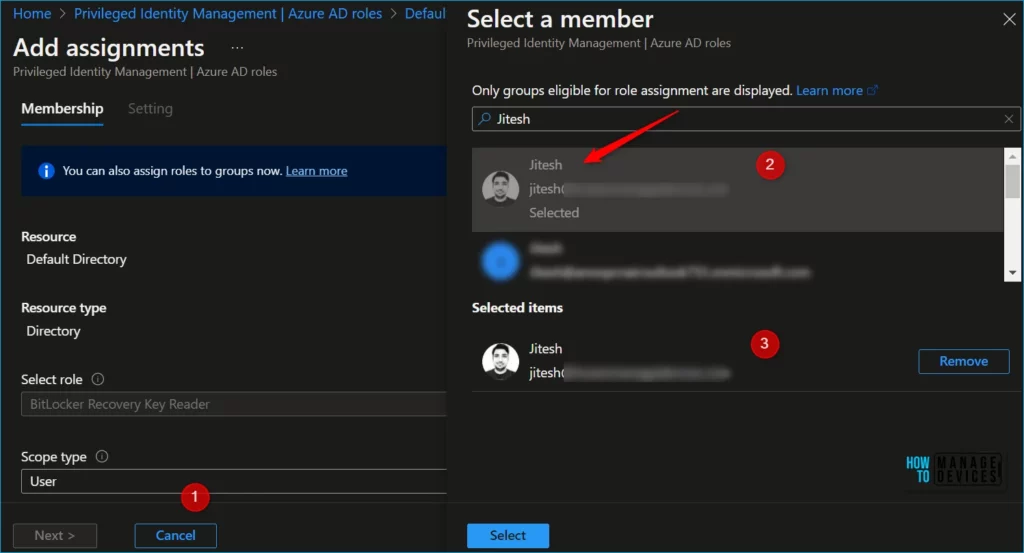
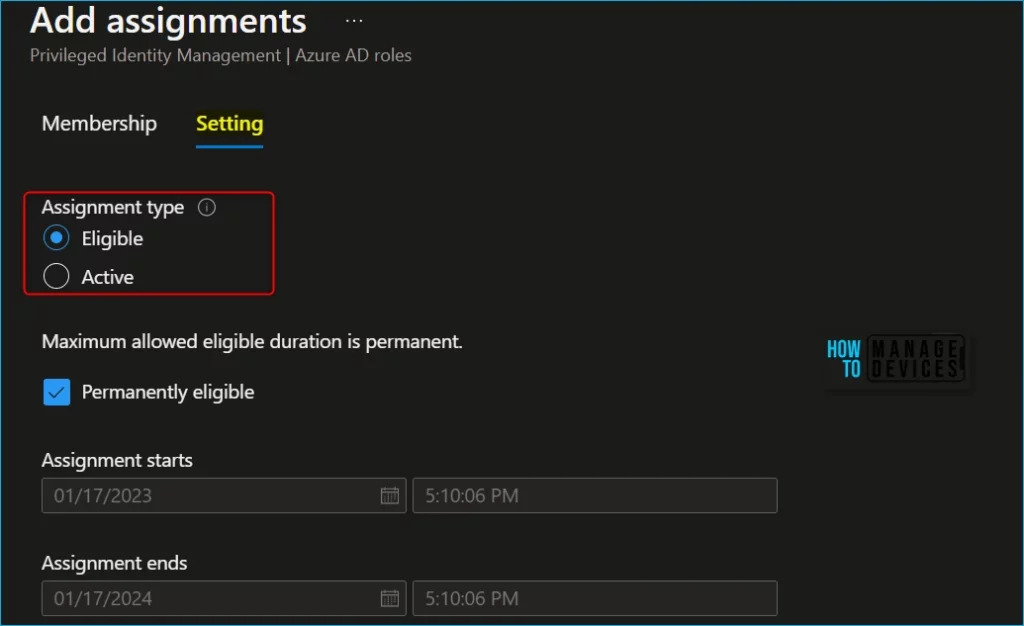
In the Assignment type list on the Membership settings pane, select Eligible or Active.
- Eligible assignments require the member of the role to perform an action to use the role. Actions might include performing a multi-factor authentication (MFA) check, providing a business justification, or requesting approval from designated approvers.
- Active assignments don’t require the member to perform any action to use the role. Members assigned as active have the privileges assigned to the role at all times.
Add start and end date and time boxes to specify a specific assignment duration. When finished, select Assign to create the new role assignment.
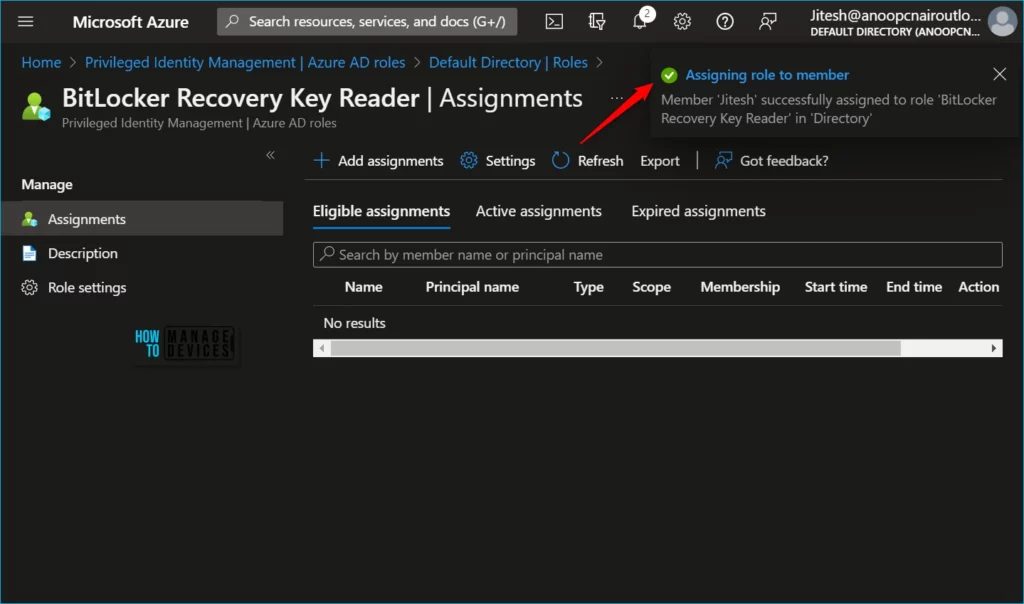
After the role is assigned, an assignment status notification is displayed. Member ‘Jitesh’ successfully assigned to role ‘BitLocker Recovery Key Reader’ in ‘Directory’.
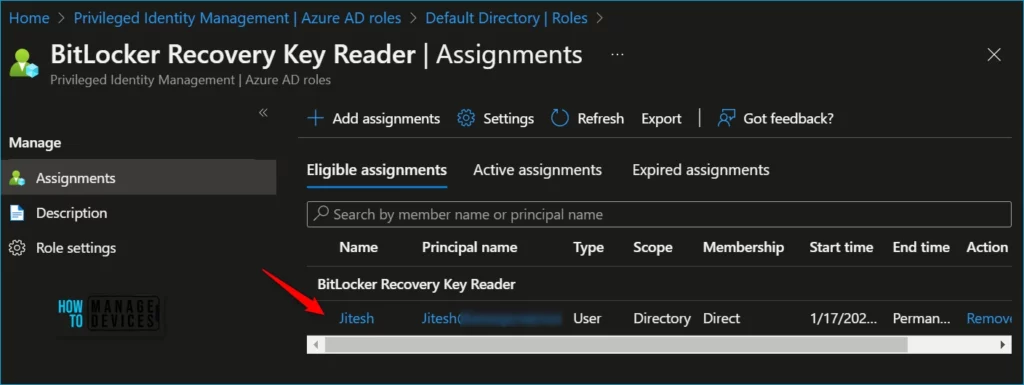
Here you can see Azure AD roles have been added to your eligible Azure AD roles.
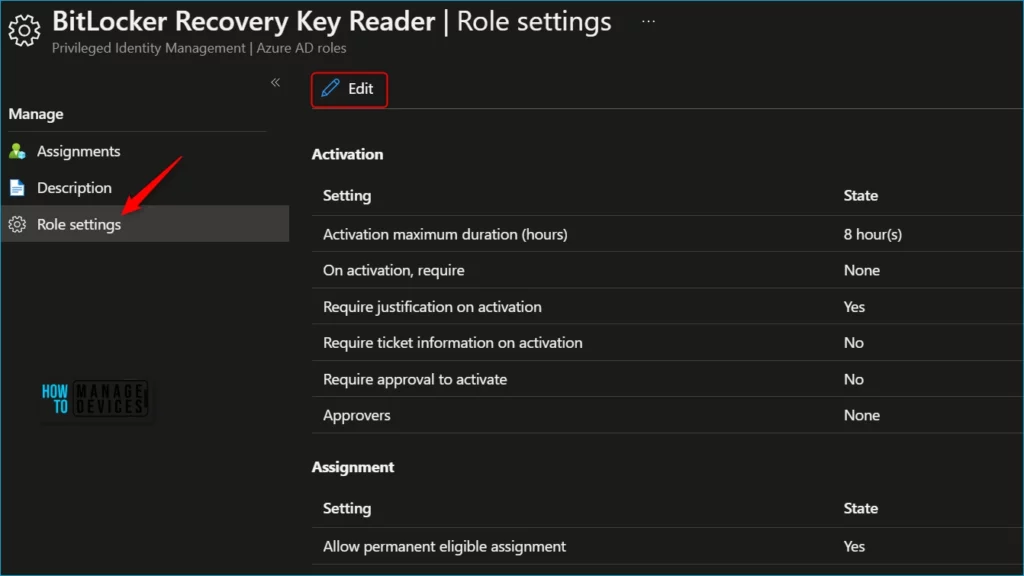
When you configure Azure resource role settings, you define the default settings applied to Azure role assignments in Privileged Identity Management (PIM) in Azure AD. Select Edit to open the Edit role setting pane.
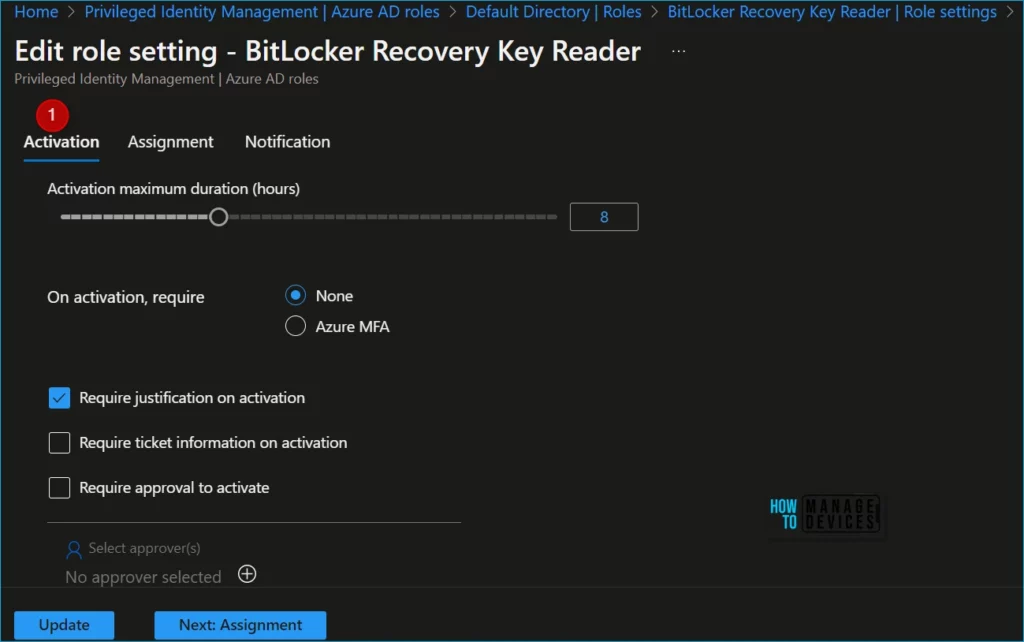
Select the role whose settings you want to configure. The first tab allows you to update the configuration for role activation in Privileged Identity Management.
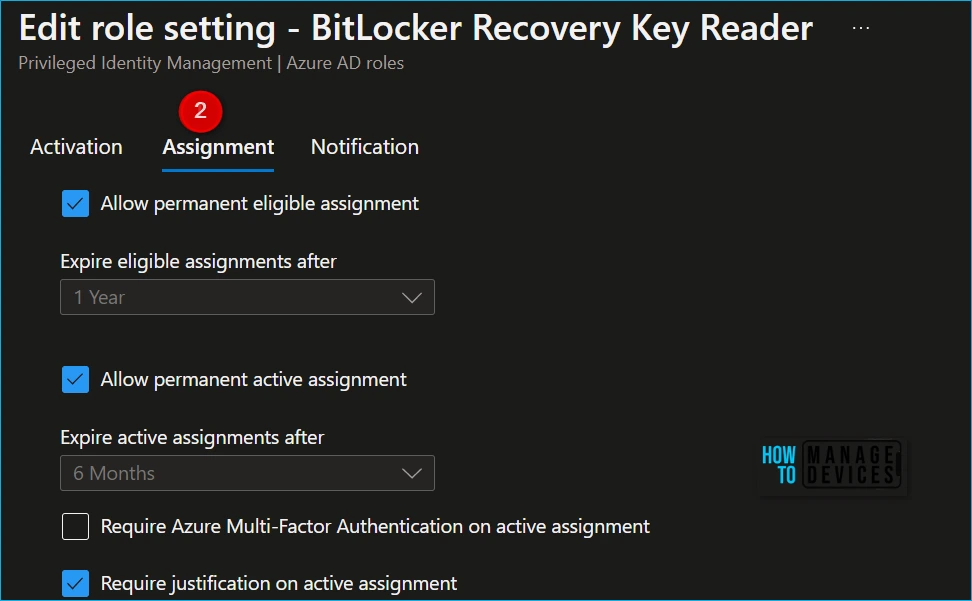
Select the Assignment tab or the Next: Assignment button at the bottom of the page to open the assignment setting tab. These settings control role assignments made inside the Privileged Identity Management interface.
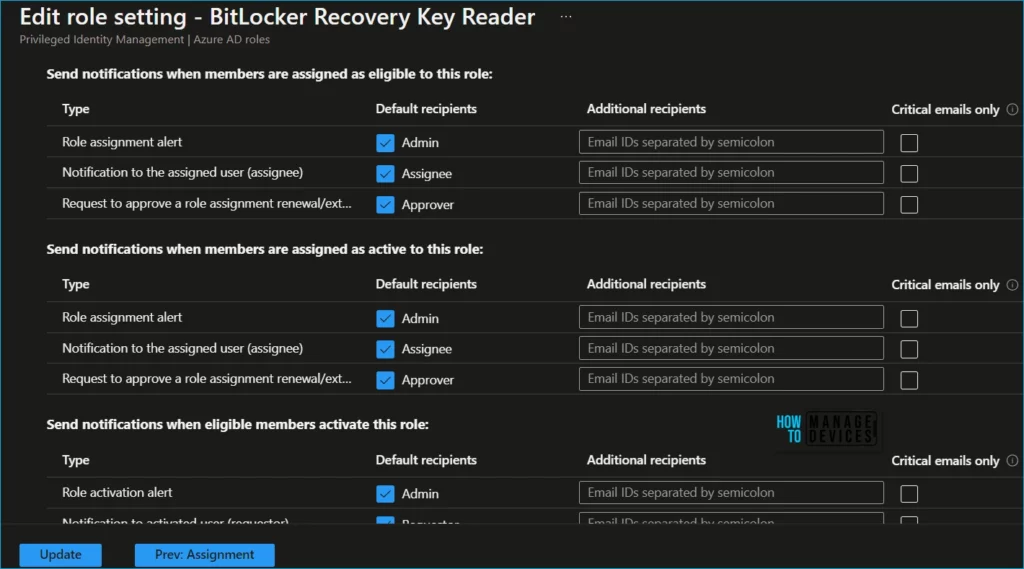
Use the Notification tab or the Next: Activation button at the bottom of the page to get to the notification setting tab for this role. These settings control all the email notifications related to this role. Select Update to update the role settings.
Activate Azure AD Role
You must activate the role assignment when performing privileged actions if you have been made eligible for an administrative role.
When you need to assume an Azure AD role, you can request activation by opening My roles in Privileged Identity Management.
- Sign in to the Azure portal. Open Azure AD Privileged Identity Management. You can also directly jump into it by accessing My roles – Microsoft Azure.
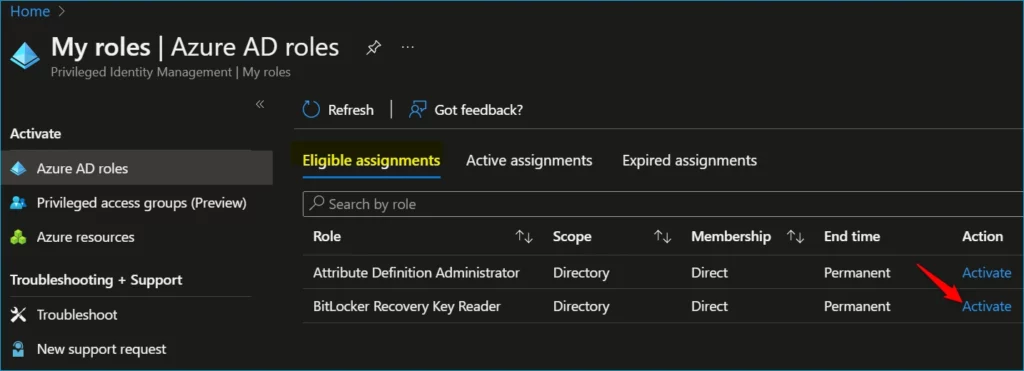
- Select My roles, and then select Azure AD roles to see a list of your eligible Azure AD roles.
- Here find the role you want to activate and click on Activate.
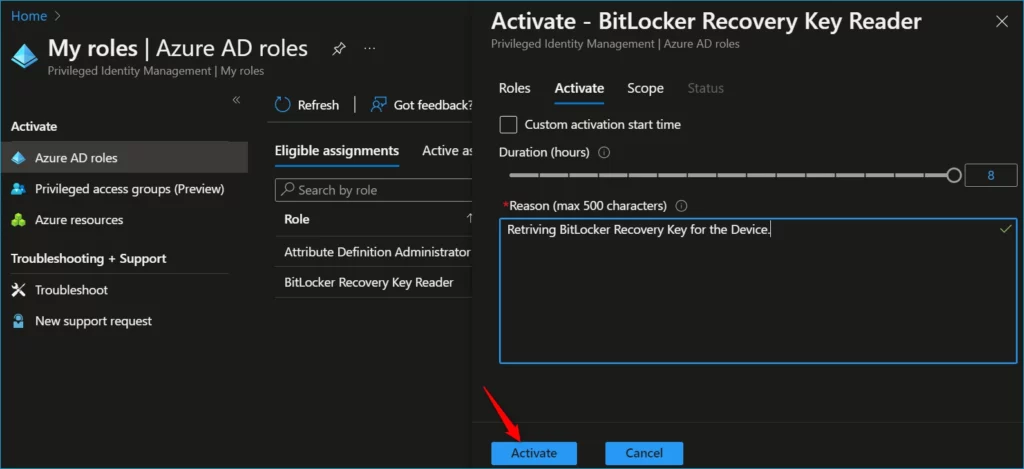
If necessary, specify a custom activation start time. The Azure AD role would be activated after the selected time. In the Reason box, enter the reason for the activation request and click on Activate.
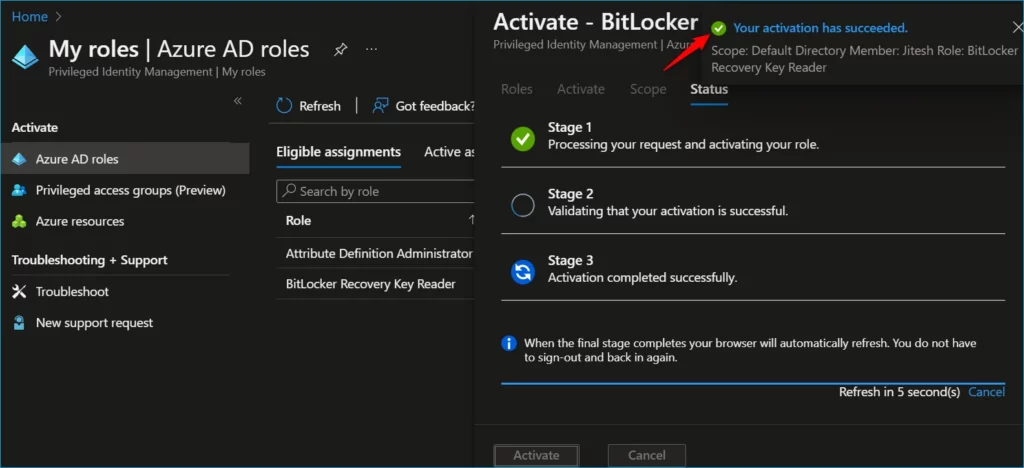
If the role requires approval to activate, a notification will appear in the upper right corner of your browser, informing you the request is pending approval. Here you can see the message Your activation has succeeded.
Email Notifications for Azure AD Roles
Privileged Identity Management sends emails when the following events occur for Azure AD roles:
- When a privileged role activation is pending approval.
- When a privileged role activation request is completed.
- When Azure AD Privileged Identity Management is enabled.
Who receives these emails for Azure AD roles depends on your role, event, and notification setting.
| User | Role activation is pending approval | Role activation request is completed | PIM is enabled |
|---|---|---|---|
| Privileged Role Administrator (Activated/Eligible) | Yes (only if no explicit approvers are specified) | Yes* | Yes |
| Security Administrator (Activated/Eligible) | No | Yes* | Yes |
| Global Administrator (Activated/Eligible) | No | Yes* | Yes |
* If the Notifications setting is set to Enable.
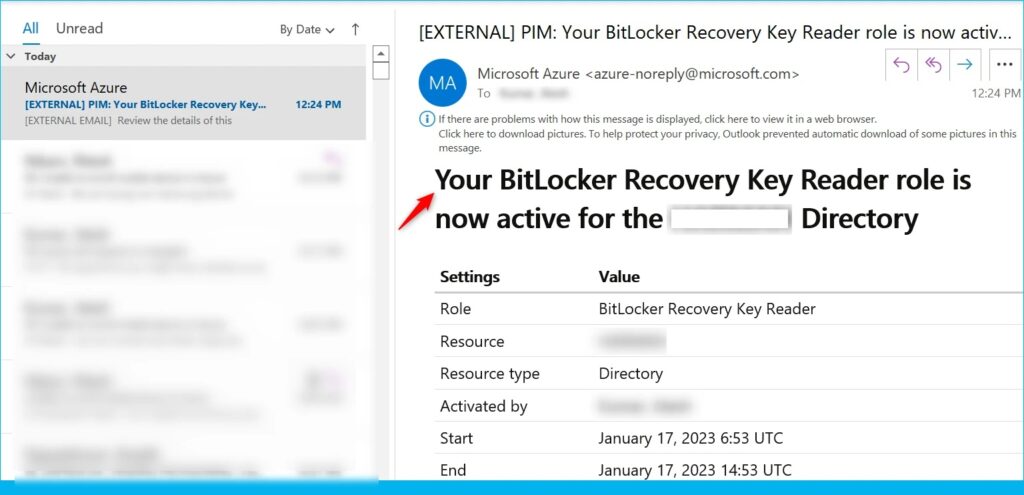
The following shows an example email sent when a user activates an Azure AD role for the organization. Emails sent from Privileged Identity Management for both Azure AD and Azure resource roles have the following sender email address:
- Email address: azure-noreply@microsoft.com
- Display name: Microsoft Azure
These emails include a PIM prefix in the subject line. Here’s an example: PIM: Your BitLocker Recovery Key Reader role is now active in Azure Active Directory.
Author
About Author – Jitesh, Microsoft MVP, has over six years of working experience in the IT Industry. He writes and shares his experiences related to Microsoft device management technologies and IT Infrastructure management. His primary focus is Windows 10/11 Deployment solution with Configuration Manager, Microsoft Deployment Toolkit (MDT), and Microsoft Intune.


Discussion