






3 Best Ways to Enable Disable User Accounts in Windows 11
Learn the 3 Best Ways to Enable Disable User Accounts in Windows 11. Now, you can temporarily disable an account instead of deleting it. You may have different accounts on a shared PC that is used by multiple people using the same device to provide their personal sign-in info to access their files etc.
If you have an account on your PC and you want to make it unavailable without deleting it, you can disable the account and enable against when required. The benefit of it is you no longer need to delete the account; instead, disable it; when the account is disabled, it will no longer be signed in until you enable it again.
The account name never appears on the sign-in screen or in the user menu on the start menu till it is enabled again. It is called the temporary prevention of the user from signing into the computer. Disabling the account does not affect the user’s personal settings, apps, and files.
In Windows 11, there are several ways to enable or disable a user account, where Command Prompt, PowerShell, and Computer Management can be used. In this post, the details of the matter are discussed in detail.


- User Accounts Settings in Windows 11
- 3 Key ways to Deliver Windows to End Users
- Prevent Users From Syncing Personal OneDrive Accounts using Intune Policy
How to Enable Disable User Accounts in Windows 11
Windows 11 has various ways to enable or disable user accounts. Here, the possible ways to enable or disable user accounts in Windows 11 are discussed in detail, and the processes are listed below for reference.
- Enable Disable User Account Using System Setting
- Enable Disable User Account Using Command Prompt
- Enable Disable User Account Using PowerShell
Enable Disable User Account Using System Setting
This is the graphical mode (GUI), where you can enable or disable any user account available on your PC. Here are two methods that are used to change the user account validation: the Local Users & Groups (Local) using the lusrmgr.msc run command. Another way is computer management using the compmgmt.msc run command.
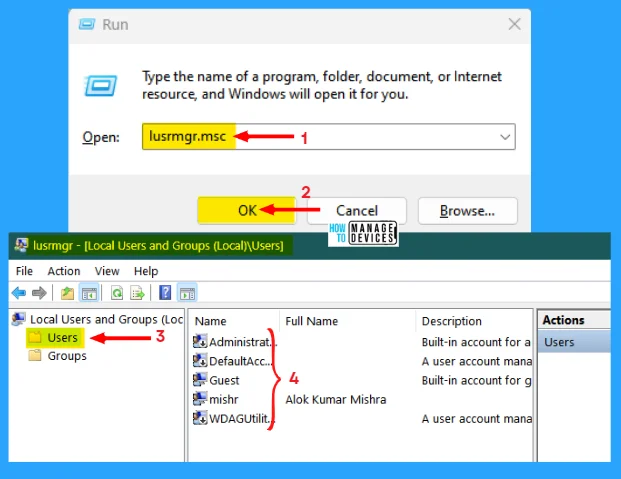
Method One – press Win Key + R to open the run command box, type lusrmgr.msc, and press OK or hit Enter. The lusrmgr [Local Users & Groups (Local)] window opens. Click on Users in the left panel to view the number of user accounts available on the PC.
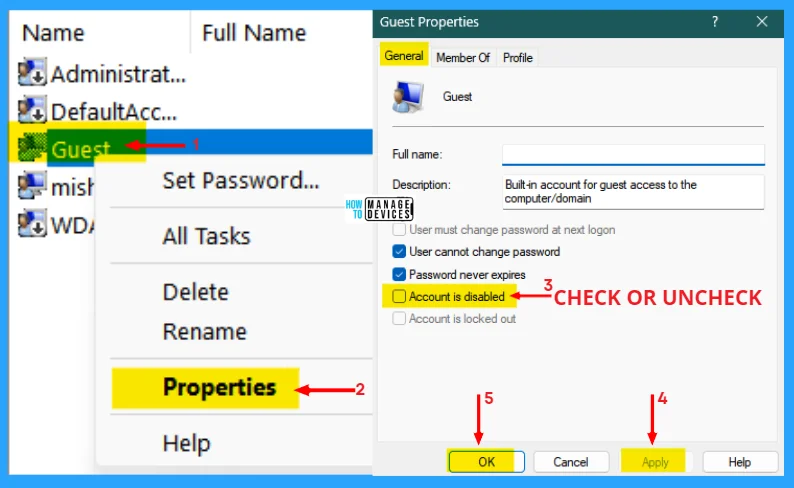
Then right-click on any user and click on Properties. When the properties window opens under the General tab, there is an option as Account is disabled; check the box to disable the user account or uncheck the box to enable the user account, then press Apply and OK to continue.
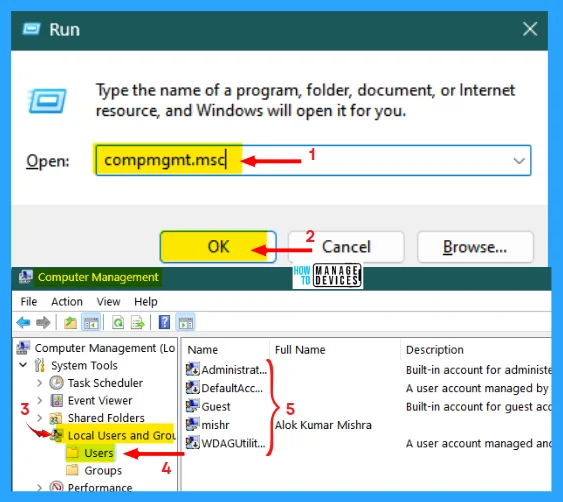
Method Two- press Win Key + R to open the run command box, type compmgmt.msc and press OK or hit Enter. The Computer Management window opens, expand the option Local User & Groups in the left panel, then click on Users to view number of user accounts available in the PC.
Then right-click on any user and click on Properties. When the properties window opens under the General tab, there is an option as Account is disabled; check the box to disable the user account or uncheck the box to enable the user account, then press Apply and OK to continue as same process shown in the above in Fig.3.
NOTE! You must have the Administrative Privilege in all the possible ways to enable and disable a user account in Windows 11.
Enable Disable User Account Using Command Prompt
To execute this command, open the command prompt with administrative privilege. The process of opening command prompt in Administrative mode is shown here, click on the link to know more – Elevated Command Prompt. Then type the command net user and press Enter.
The process to enable and disable the user account using the command prompt is described in detail. There is a command to enable or disable existing user accounts. The command, shown below, is to know the number of user accounts available in the system.
net user
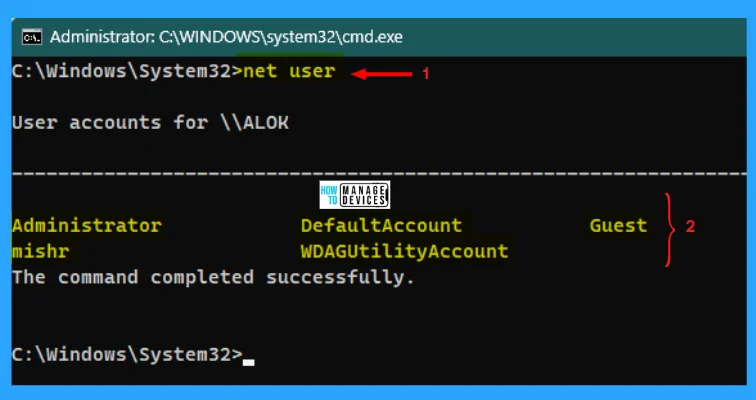
The above command shows the names of user accounts available in the system. To know detailed information about the user accounts, there is another command available that is shown below. Open the Command prompt in Elevated (Administrative) Mode, then type the command below and press enter for the result. The user indicated False shows the disabled user accounts, and the users indicated True is enabled.
PowerShell Get-LocalUser
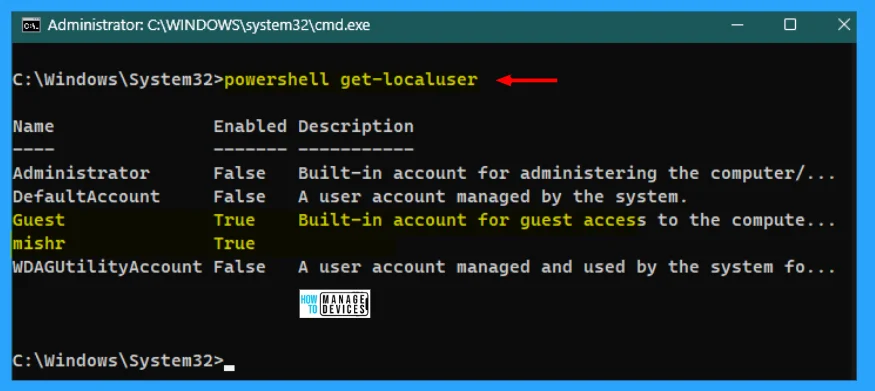
After checking the details of the user accounts, now run the following command to make the user enable or disable your device. You can enable or disable local users as well as domain users by entering the command shown in the table below & the execution shown in the image below.
NOTE! Here, replace the <username> with the user account name you want to enable or disable.
| Effects | Command |
|---|---|
| To disable local user | Net user “<username>” /active:no |
| To disable domain user | Net user “<username>” /active:no /domain |
| To enable local user | Net user “<username>” /active:yes |
| To enable domain user | Net user “<username>” /active:yes /domain |
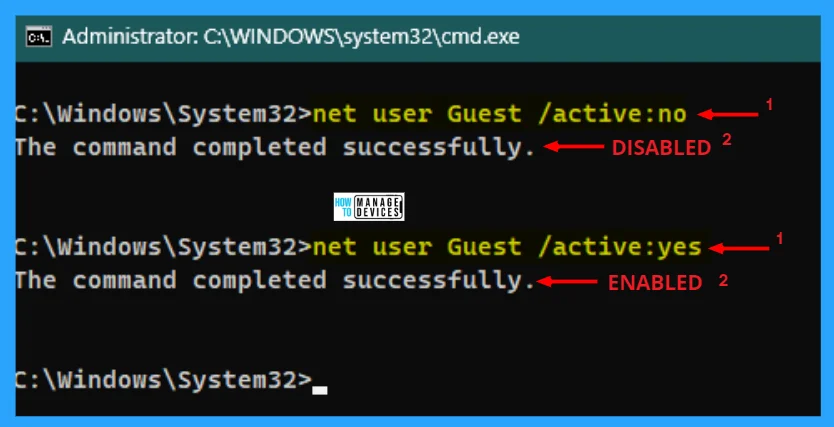
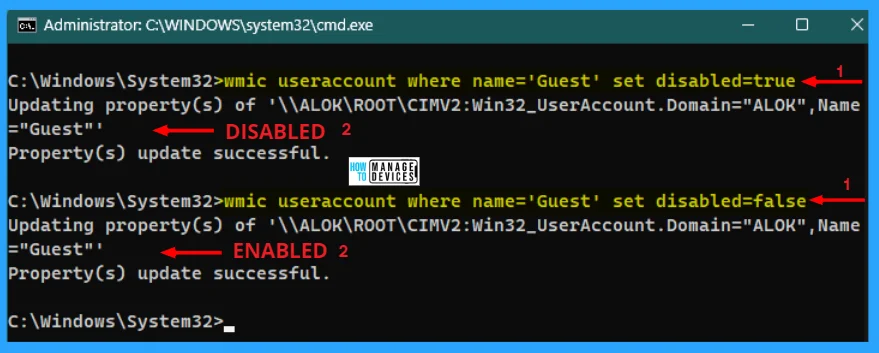
Except for the above process, another command is there to enable or disable user accounts in Windows 11. And it uses the wmic command illustrated below:
To disable user account: wmic useraccount where name=’Guest’ set disabled=true and To enable user account: wmic useraccount where name=’Guest’ set disabled=false
Enable Disable User Account Using PowerShell
You can also able to enable disable user accounts using PowerShell. To do so, open the PowerShell window in Administrative mode. Type PowerShell in the Windows search box presented on the Taskbar and select the appropriate option. Then the User Account Control window appears, click Yes to open the powershell in Admin Mode.
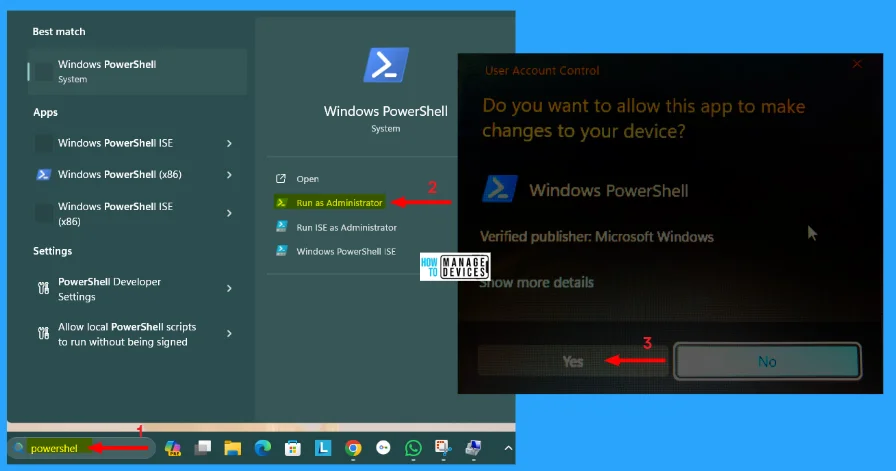
When the PowerShell window opens, type get-localuser and press Enter to execute the command, which results in providing the user account details that are available with the PC.
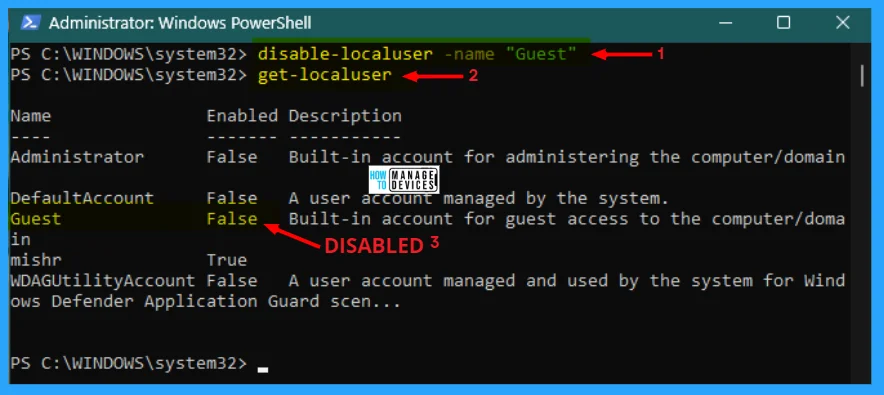
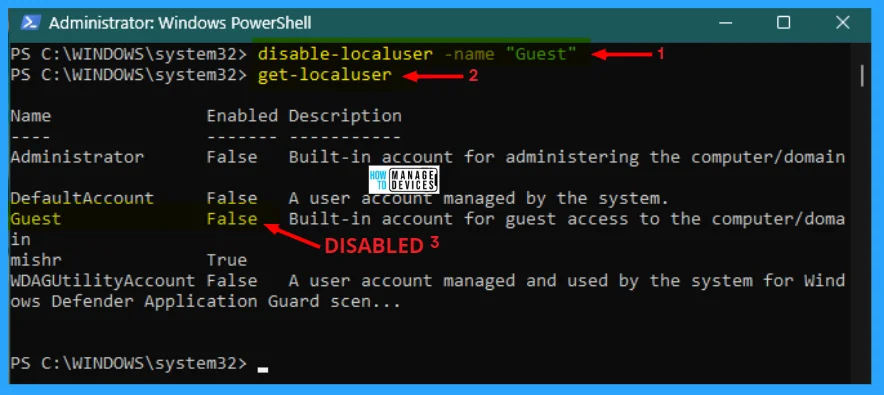
After that, you can see the list of user accounts available on the current PC you are working on. Then, to disable the user account, type Disable-localuser -name “<username>” and hit the Enter button. Again type get-localuser and hit Enter to know the current status of the user account.
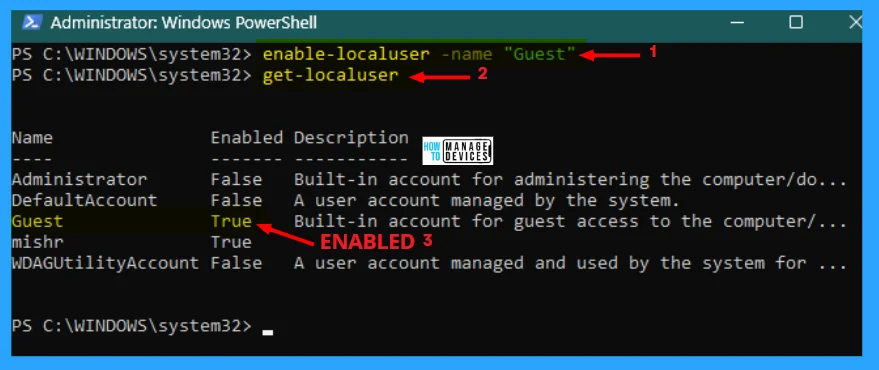
Then, to enable the user account, type Enable-localuser -name “<username>” and hit the Enter button, and to check, type get-localuser and hit Enter to know the current status of the user account.
I hope the information on the 3 Best Ways to Enable Disable User Accounts in Windows 11 is helpful. Please follow us on the HTMD Community and visit our website HTMD Forum, if you like our content. Suggest improvements, if any, and we love to know which topic you want us to explore next.
We are on WhatsApp. To get the latest step-by-step guides and news updates, Join our Channel. Click here –HTMD WhatsApp.
Author
Alok is a Master of Computer Applications (MCA) graduate. He loves writing on Windows 11 and related technologies. He likes to share his knowledge, quick tips, and tricks with Windows 11 or Windows 10 with the community.




Discussion