






Guide to Disabling the Erase All Content Option on Supervised Devices using Intune
Hey, let’s discuss about Guide to Disabling the Erase All Content Option on Supervised Devices using Intune. This policy controls whether the “Erase All Content and Settings” option is available on an Apple device. When the setting is false, the option is disabled, which means users cannot reset or wipe the device from the device settings.
The policy works only on supervised devices, meaning the device must be enrolled and fully managed by the organisation. Supervision provides deeper management capabilities, and this policy uses that control to protect the device from being reset by end users. Without supervision, the setting cannot be enforced.
This feature is available on iOS 8 and later and macOS 12 and later, so it works on both iPhones/iPads and Macs running supported versions. Organisations can use this policy through their device management platform to ensure that all supervised devices follow the same reset restriction.
For example, if an employee tries to reset their work iPhone, they won’t see the Erase All Content and Settings option because this policy blocks it. This stops them from removing company control. Only the IT team can erase the device, which keeps the device safe and protects company data.

Guide to Disabling the Erase All Content Option on Supervised Devices using Intune
By enabling the erase option, users can access the Erase All Content and Settings feature and reset the device on their own. By disabling the erase option using this policy, the reset feature is blocked, so users cannot wipe the device. This keeps the device under management control and prevents any unwanted or accidental resets.
- How Activation Lock Protects Lost or Stolen iOS and iPadOS Devices using Intune Policy
- Block Malicious Code Creation in Word Excel and PowerPoint using Intune ASR Rule
- How to Prevent Malware Spread and Remote Attacks by Blocking PsExec and WMI with Intune ASR Rule
How this policy helps supervised devices
This policy helps supervised devices by stopping users from resetting the device on their own. When the erase option is blocked, the device stays under company control and cannot be removed from management. This keeps the device safe, protects company data, and makes sure only the IT team can reset the device when needed.
Create a Profile
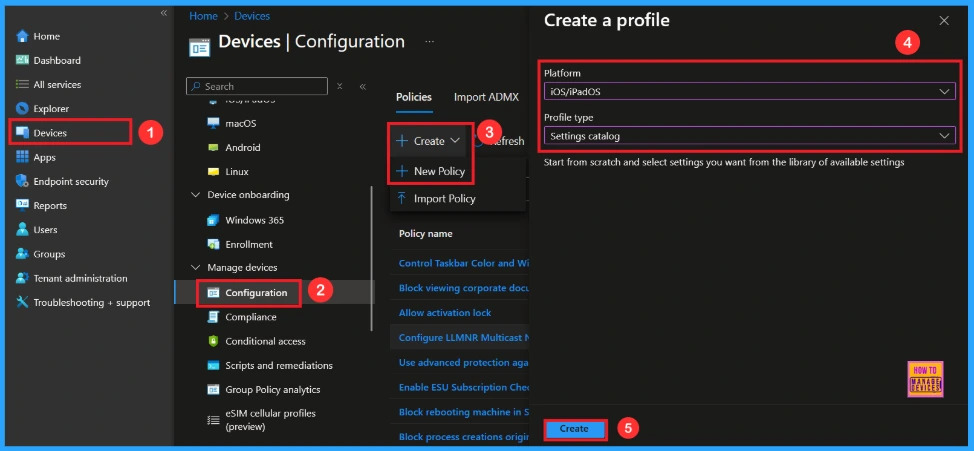
First, log in to the Microsoft Intune admin center. Then, navigate to Devices. Under Devices, go to Configuration. In the Configuration section, you’ll see an option to create a New Policy. Click on that. A new window will appear titled Create Profile. In this section, you need to set the platform to iOS/iPadOS, and choose the Profile Type as Settings Catalog. Then, click Create to proceed.
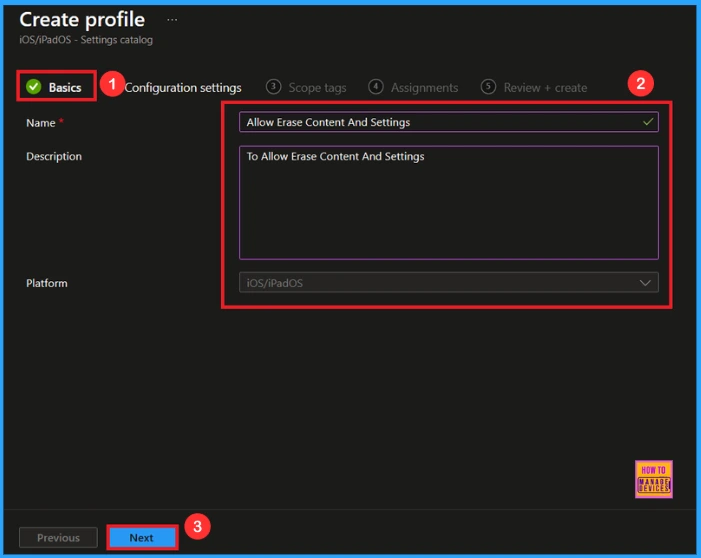
Basic Step
After creating profile, your next step is to fill in the basic details. These usually include the name, description, platform information. we can add the name (e.g Allow Erase Content and Setttings) of the policy and give a brief description (e.g To Allow Erase Content and Setttings). Click Next to continue.
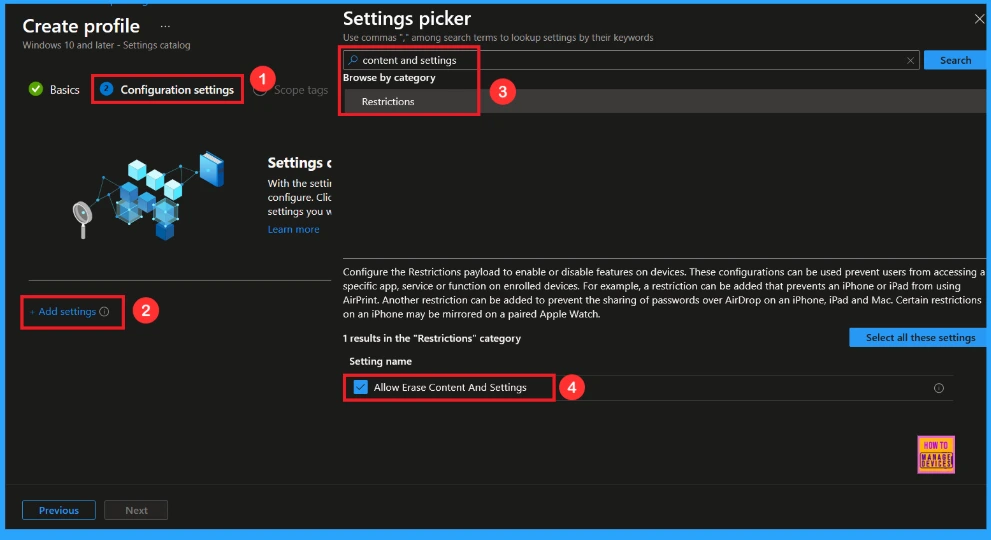
Configuration Settings
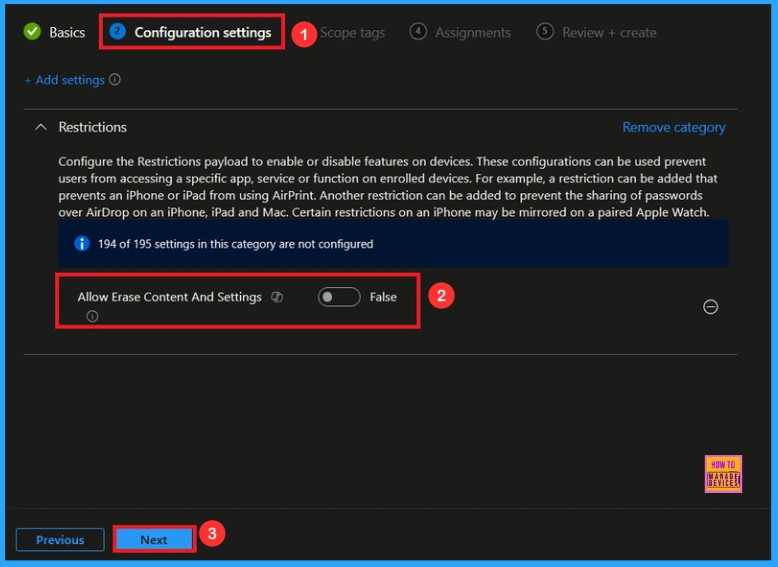
In this tab, you will see an option to Add Settings. Click on it. Once you click, a new window called Settings Picker will appear. In the Settings Picker window, you need to type Content and Settings or select the Restriction category. Under this category, select Allow Erase Content and Setttings.
You can close the Settings Picker window. Once you close it, you’ll return to the Configuration Settings page. Here, you’ll notice that the policy is set to Allowed or Blocked by default. If you want to continue with this setting, click Next to proceed.
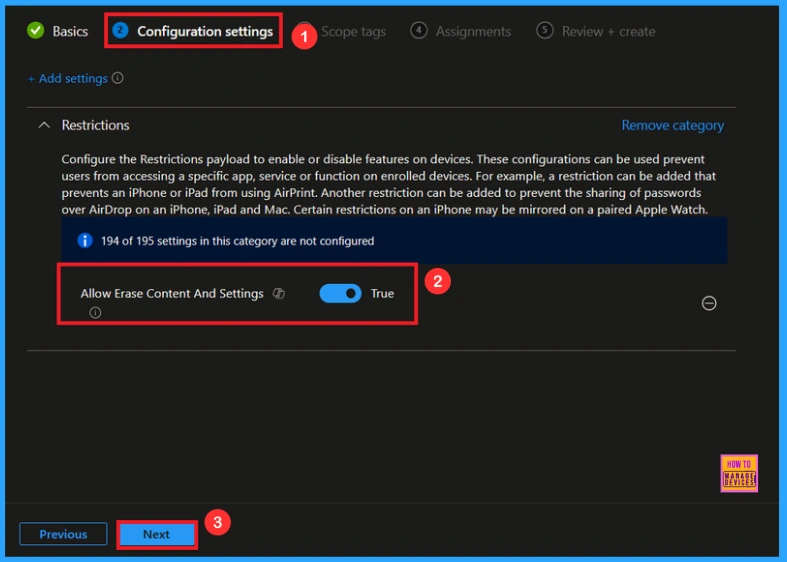
Block Erase Content and Setttings
If you want to false this policy, look for the toggle switch next to the Allow Erase Content and Setttings setting. By default, this toggle is set to True. To block the policy, you have to move the toggle from right to left. Then click Next to proceed.
Scope Tags
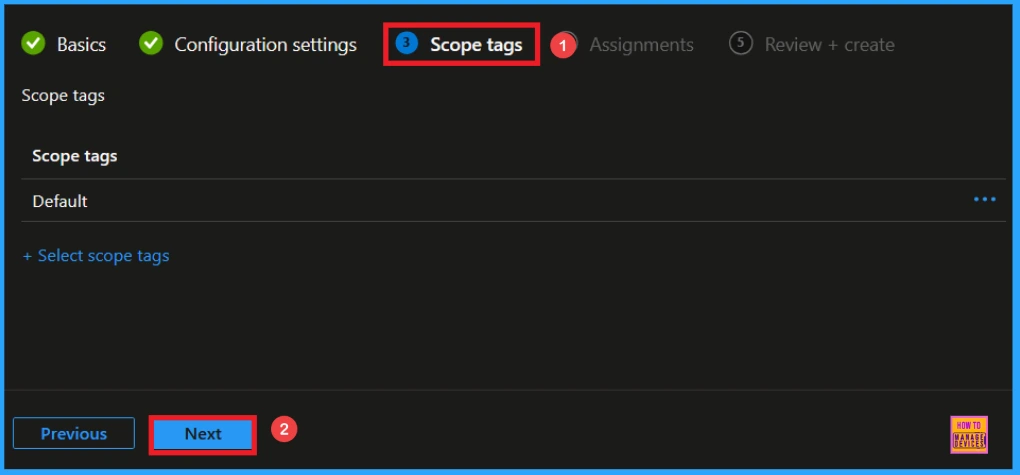
A scope tag is used to assign policies to specific groups within an organisation. The scope tag is not mandatory, so you can skip this section. Click Next if they’re not required for your setup.
Assignments
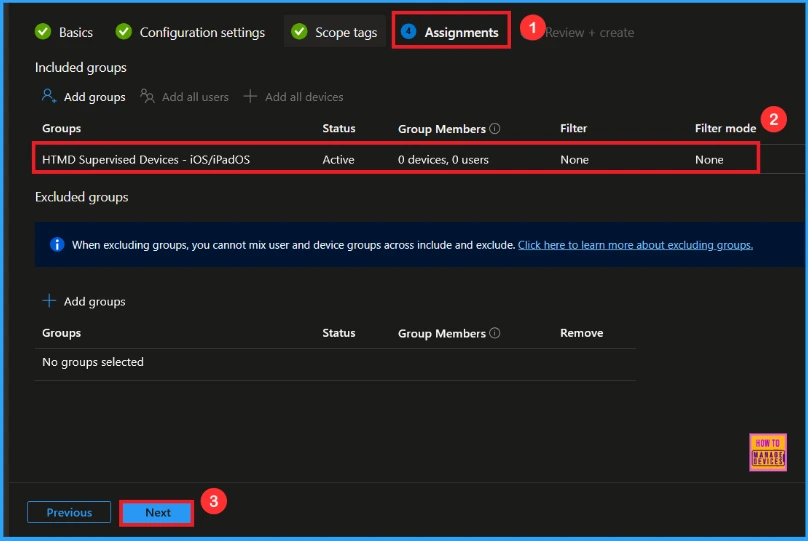
Here, you will see an option called Add Groups under the Include Groups section. Click on it. When you click, a list of available groups will appear. You can search for the group you want (e.g HTMD Supervised Devices – iOS/iPadOs). Then click the Next button.
Final Step
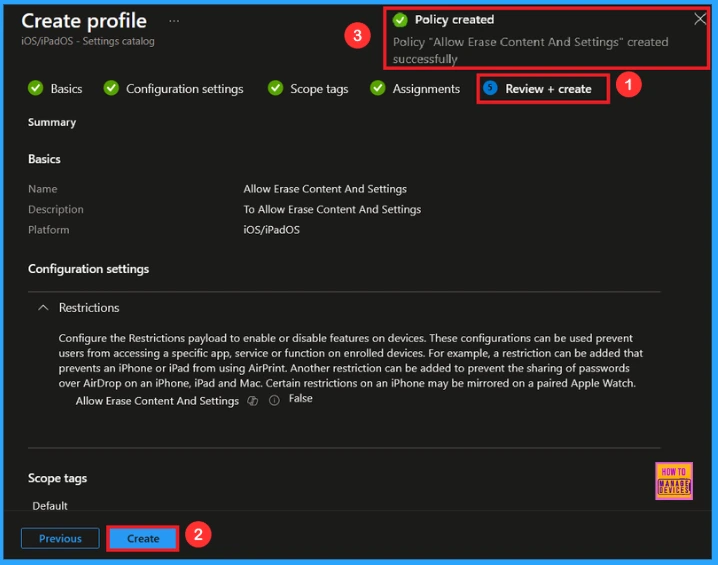
In this section, you can see a summary of everything you entered in the previous steps, such as basic details, configuration settings, assignment details, and more. If you want to change or edit anything, you can easily go back to the previous section. Click Create to finish, and a message will confirm that the “Allow Erase Content and Settings created successfully”.
Device and User Check-in Status
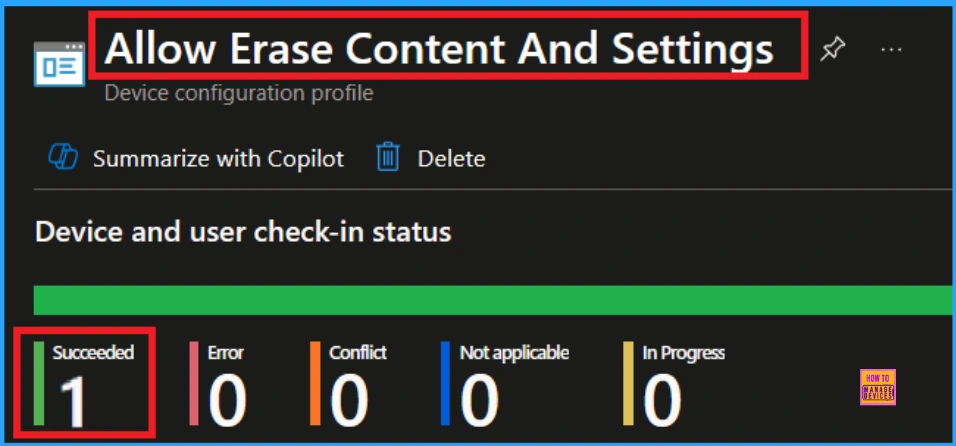
To view a policy’s status, go to Devices > Configuration in the Intune portal, select the policy (like Allow Erase Content and Settings ), and check that the status shows Succeeded (1). Use manual sync in the Company Portal to speed up the process.
How to Check on End User Device
To check this policy on an end user’s device, the user can open Settings, go to General, and then tap Transfer or Reset iPhone. If the policy is applied, the “Erase All Content and Settings” option will not appear on the screen. When this option is missing, it means the device is controlled by the organisation and the policy is working. If the option is still visible, then the policy has not been applied to the device.
Need Further Assistance or Have Technical Questions?
Join the LinkedIn Page and Telegram group to get the latest step-by-step guides and news updates. Join our Meetup Page to participate in User group meetings. Also, Join the WhatsApp Community to get the latest news on Microsoft Technologies. We are there on Reddit as well.
Author
Anoop C Nair has been Microsoft MVP from 2015 onwards for 10 consecutive years! He is a Workplace Solution Architect with more than 22+ years of experience in Workplace technologies. He is also a Blogger, Speaker, and Local User Group Community leader. His primary focus is on Device Management technologies like SCCM and Intune. He writes about technologies like Intune, SCCM, Windows, Cloud PC, Windows, Entra, Microsoft Security, Career, etc.


Discussion